Craft Architectural Diagrams in Minutes with Modelo

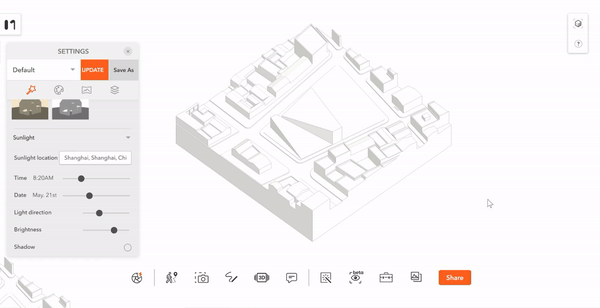
Architectural diagrams help to clarify a building, relationships between elements of a building, or a process connected to a building. Architects do this with visual symbols which can be considered all at once, unlike language which must be processed in a linear fashion. The problem is that it takes lots of time to produce a simple architectural diagram if you use common software such as V-ray, Escape, Lumion, and so on. However, the Modelo new Make Diagram function helps you craft architectural diagrams in minutes.

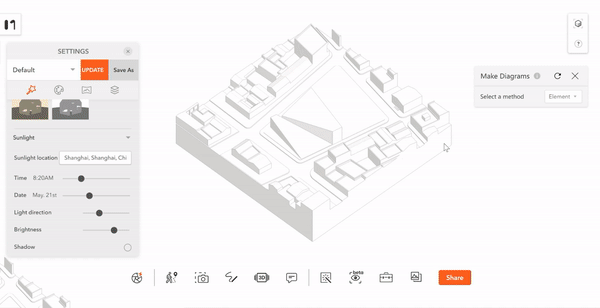
In the new Make Diagrams function. There are three select modes: by the element, material, and layer.

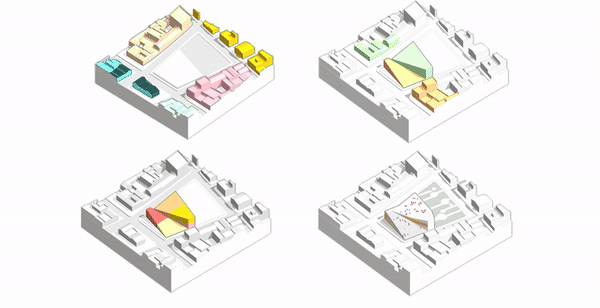
You could tint volume with reference colors to show the different properties of the architecture. In this model, we use blue and pink to show the trend of architecture and related buildings around the site.

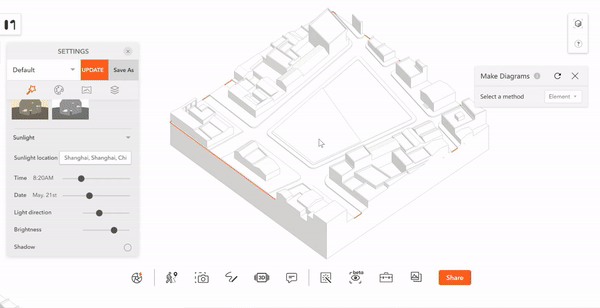
After finishing the selection and coloration, don’t forget to screenshot and capture the diagram. It only takes you 3 minutes to create a simple architectural diagram.

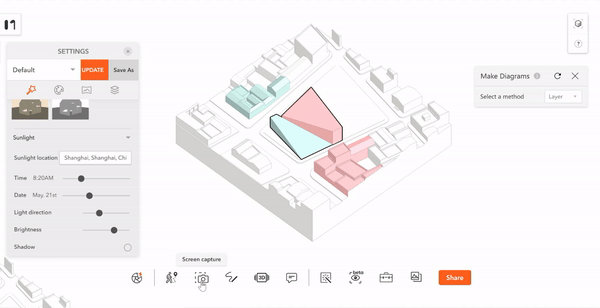
If you want to select multiple parts of the model, press CTRL and select them at the same time. Then you can tint or stroke them all together with one click.

Isn’t that easy? Come to Modelo and create your architectural diagrams now.

Ten City 3D Models Up For Grabs

Good News. In order to thank you for the continued support, we provide a thanksgiving gift – free city models for all Modelo users. The first batch of city models will include ten American cities and we will continually add new models regularly.

These free design materials are located in Modelo recent releasing notes and under the link:  A thanksgiving gift from Modelo: Click to get city models. 


If you miss the releasing note on the main page, don’t worry. You can also find the link in our “What’s new” tab. 


New Modelo users which signed up after 11/12/2020 can also access these models.  Introduce Modelo to your family, friends, and colleague now. They will also have a chance to travel to these beautiful cities at home. Please see the New York city model on Modelo!

Bring me to Modelo!

http://www.modelo.io

Simplify your 360 tour with a mini floor plan

Easy to display, high efficiency and deep interaction. These characteristics determine that 360 tours are more and more popular. This immersive approach can make customers, contractors and other stakeholders more involved in the project.

Some customers complained that because of the size of their projects, locating specific rooms in 360 tours is a difficult task. Now our Modelo team has simplified your 360 tour with mini floor plans.

Step 1: Uploading your Mini Floor Plan

First, prepare your mini floor plan. Please make sure that each panoramic image can be located in your floor plan. In the upload tab, in addition to the previous 360 tour option, we also added another floor plan option. After successfully uploading the floor plan image, you will see a thumbnail below the panoramic photo.

Step 2: Add Hotspots on your Floor Plan

Once your floor plan is ready, you can start creating hotspots. These hotspots will become the anchor points for each part in your 360 tour. Just click “Add Hotspot” in the upper right corner and place the hotspot on the floor plan. You will also notice that all panoramic photos will appear in the bottom bar, which will help you assign hotspots to specific locations. Then, you need to select the correct picture and select the input view.

Step 3: Edit or Delete Hotspots.

If you are not satisfied with the hotspots, you can try to edit or delete them. Click the hotspot on your floor plan. “Edit Location” helps you relocate hotspots. If the hotspot is no longer useful, just click it and select the “Delete” option.

To view the whole tutorial video, click here. Modelo makes it easy for you to explore your 360 tour during design reviews and presentations. Get started on yours today!