More June 2017 Product Updates
Modelo has announced today that several exciting updates have been released and are available for users to begin employing in their collaborative and presentation efforts immediately.
Streamlined management of multiple companies and projects
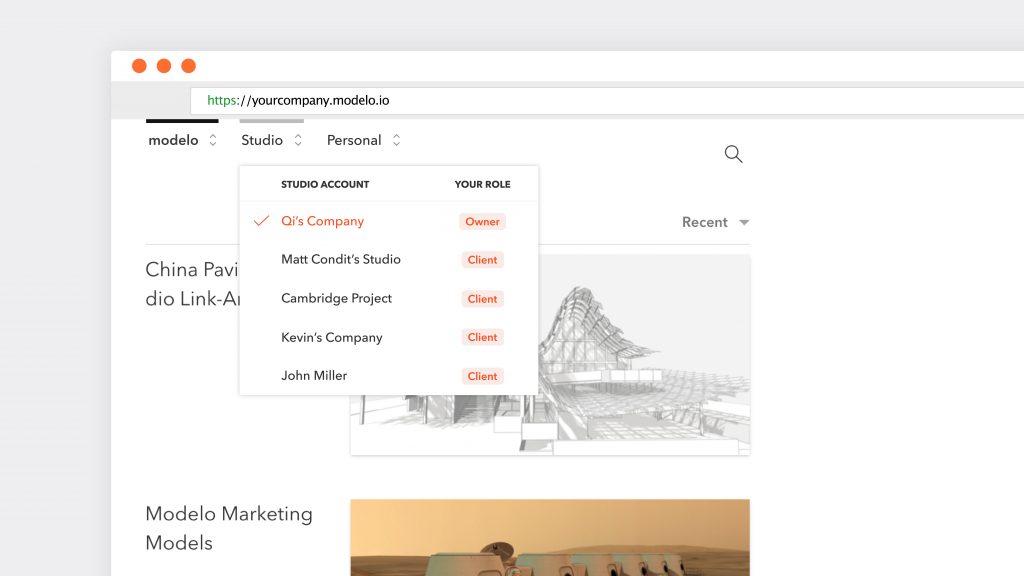
There are a number of reasons why you might be a member of multiple companies and projects in Modelo. For instance, you might be the owner of one project (or more), but provide collaborative input into several other projects.
To make it easier to manage all of your projects, you can now see what projects you are a part of and your role within them. When you select the dropdown company menu in the top left corner, you will now see a breakdown of this information.
Upload Panoramas
Uploading a panorama can make a powerful impact and a bold statement when you are presenting a design. Modelo has now made it even easier to upload panoramic images to present them to clients and employ them in design reviews.
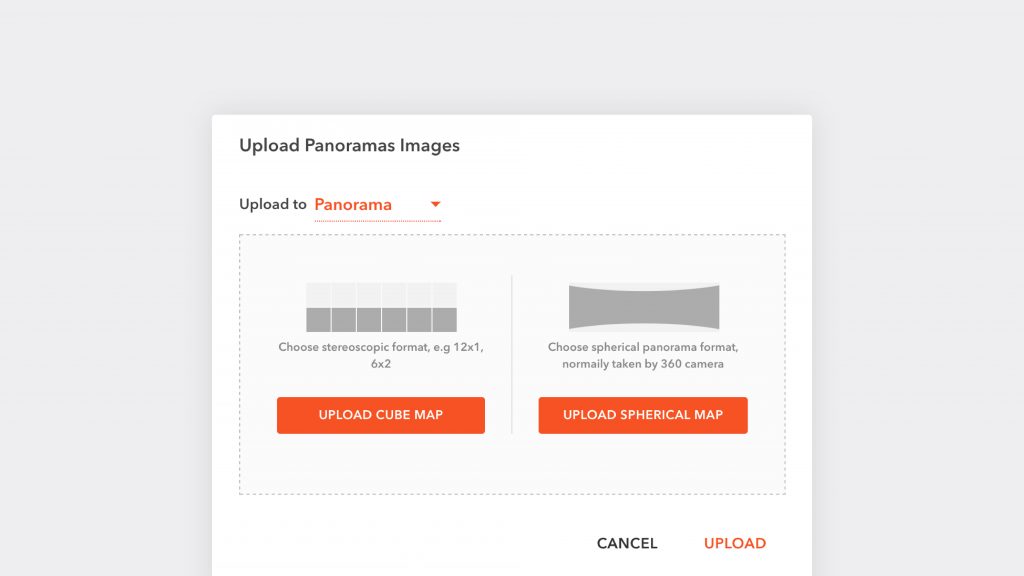
You can choose to upload stereoscopic panorama images or you can upload spherical panorama images to Modelo. Stereoscopic images, sometimes called a cube map image, have a ratio to them such as 12:1 or 6:2. On the other hand, spherical images, or spherical maps, are often produced using a 360° camera.
Both types of images will be uploaded and stored in your assets library and can be referenced in your presentation quickly and easily. For added convenience, you can attach them to a 3D comment card and reference them directly from your 3D design.
How to upload a panorama image:
- Select your desired Modelo project and navigate to the assets tab
- Click the button that reads ‘Upload Panorama’
- Click the ‘Upload Cube Map’ or ‘Upload Spherical Map’ button, depending on whether you would like to upload a stereoscopic or spherical image
- Select the panorama image from your computer’s file location and click ‘Upload’
What’s more, you can now create walkthroughs using panorama images to create realistic visualizations in seconds. Watch the tutorial below to learn more.
Rotate Section Box
You can now create a section cut in your 3D design and rotate it. This is especially useful when models are uploaded to Modelo that are not aligned along a north-south axis. When you make a section cut, you can now view it from any angle or direction, further strengthening Modelo’s capabilities to supporting your design reviews.
How to rotate a section cut:
- Select ‘Tools’ (the briefcase icon in your menubar) then ‘Section’
- Click ‘Rotate Section Box’ in the control box that appears in top right quadrant of your Modelo canvas
- Select your desired plane and move your mouse while you are hovering over your design to the left or right to achieve the desired cut depth
- Click and drag your mouse outside of the model frame to rotate your design

Product Updates for Free Account Users
Several notable product updates have been introduced for users of Modelo’s Free Account product.
Walkthroughs
Free Account users have the ability to drop waypoints and create engaging and immersive walkthroughs of their designs. However, users of this product are limited to creating one walkthrough only; Studio and Business users can create unlimited walkthroughs.
Comment Cards
3D comments cards are, in many ways, the lifeblood of Modelo given they are used in so many areas of the tool. Free Account users are limited to creating three comment cards. There are no limitations for Modelo’s Studio and Business users.
Views
All Modelo users can upload and see as many views of their projects as they would like to their projects. However, users of Modelo’s Free Account are limited to working, commenting, and presenting 3 of them. This restriction does not apply to Studio and Business users.
200MB Upload Size
As the size of models increases and projects become larger and more complex, Free Account users are now able to upload models up to 200MB. This represents a 100% increase from what was previously available. Studio users are able to upload models up to 750MB and Business users have no restriction placed on the size of models that can upload.
Modelo was founded to provide a means for professionals in the AEC industry to better communicate, collaborate, and present their designs in the best possible manner. Accordingly, the team behind Modelo is committed to providing Modelo as a platform to achieve these goals and are excited to see these updates, as well as future ones, utilized by Modelo’s rapidly expanding community of users.