360º tours are the most immersive way to present your unbuilt designs in the correct context. By involving clients, contractors, or other stakeholders in the design review process earlier, all parties can be more involved, making it easier for you as a refined designer to make tweaks sooner rather than later.
We’ve outlined the ultimate guide for creating 360º tours that will take you through step-by-step on how to use Modelo’s new 360º tour feature for both presentation and design review purposes.
Step 1: Creating your Project and Upload your Panorama images
To begin, create a new project in Modelo. For the purpose of creating a 360º tour, we will be focusing on the “Create 360 Tour” tab highlighted below.
For imagery requirements, panorama images can be taken using a dedicated 360º camera, like the Ricoh Theta, or by using rendering support such as Lumion or V-Ray. Then uploading them to Modelo and getting started is a breeze.
When uploading the images, you first want to create a new folder (or multiple folders) to store all your images. You can sort however you see fit- by project, by phase, or by date. Modelo is compatible with the following file formats: PNG or JPG, and we also support cube map and spherical images.
Step 2: Creating your First Hotspot
Once your images are all ready to go, you can begin creating hotspots. These hotspots will act as the tour guides throughout the 360º tour. Simply click on the “view” button and you will be taken into that panorama. You will also notice all of your other images in that folder on the bottom bar, which will help you create a consecutive path by linking to each image. Note: the current view is highlighted on the bottom bar, this is also your starting view.
To create your first hotspot, click “Add Hotspot” in the top right-hand corner. An orange dot will emerge, allowing you to place it on any point of the panorama. You can rotate the image in order to call out certain areas of the scenery, like an entrance to a building. After you place your first hotspot, you must choose the second panorama image from the bottom bar that you would like to link to.
This second image’s direction should be consistent with the first, and bring you to the next consecutive point on the tour. It’s all about the end destination and creating a guided tour that demonstrates the consistency. Keep in mind that if you’d like to go back and forth between points during your 360º tour, it’s necessary to link back to the previous image. Then repeat these steps for the next hotspots and you’re on your way to completing your first 360º tour with Modelo!
Pro tip: Make sure to save and test throughout your tour creation process.
Step 3: Playing and Sharing your 360º Tour On Any Device
Congratulations! You’ve successfully created your first 360º tour with Modelo. Now it’s time to play and share with other colleagues or clients. To play your 360º tour, simply choose your starting view by selecting the image you’d like to begin your tour with, and then click on the “Play” button.
Everything in Modelo has the ability to be shared, that’s what makes collaboration so effortless. To share your 360º tour, simply click on the “Share” button and a unique URL will be generated for you.
We get it, sometimes you need to tweak things as your designs go through different iterations. That’s why you can always edit your 360º tours and preview the shareable link before you send along to other stakeholders, so you can see what they’ll see.
Once you’re ready to go, copy and paste the URL and send it to anyone on your project via email, text, or through the medium of your choice. They can then open it up on the device of their choice- phone, tablet, or computer- and view with confidence and ease. Plus, you can embed 360º tours on your website to impress visitors and potential clients with your designs.
Step 4: Virtual Reality and Hosting your 360º Tours on Websites
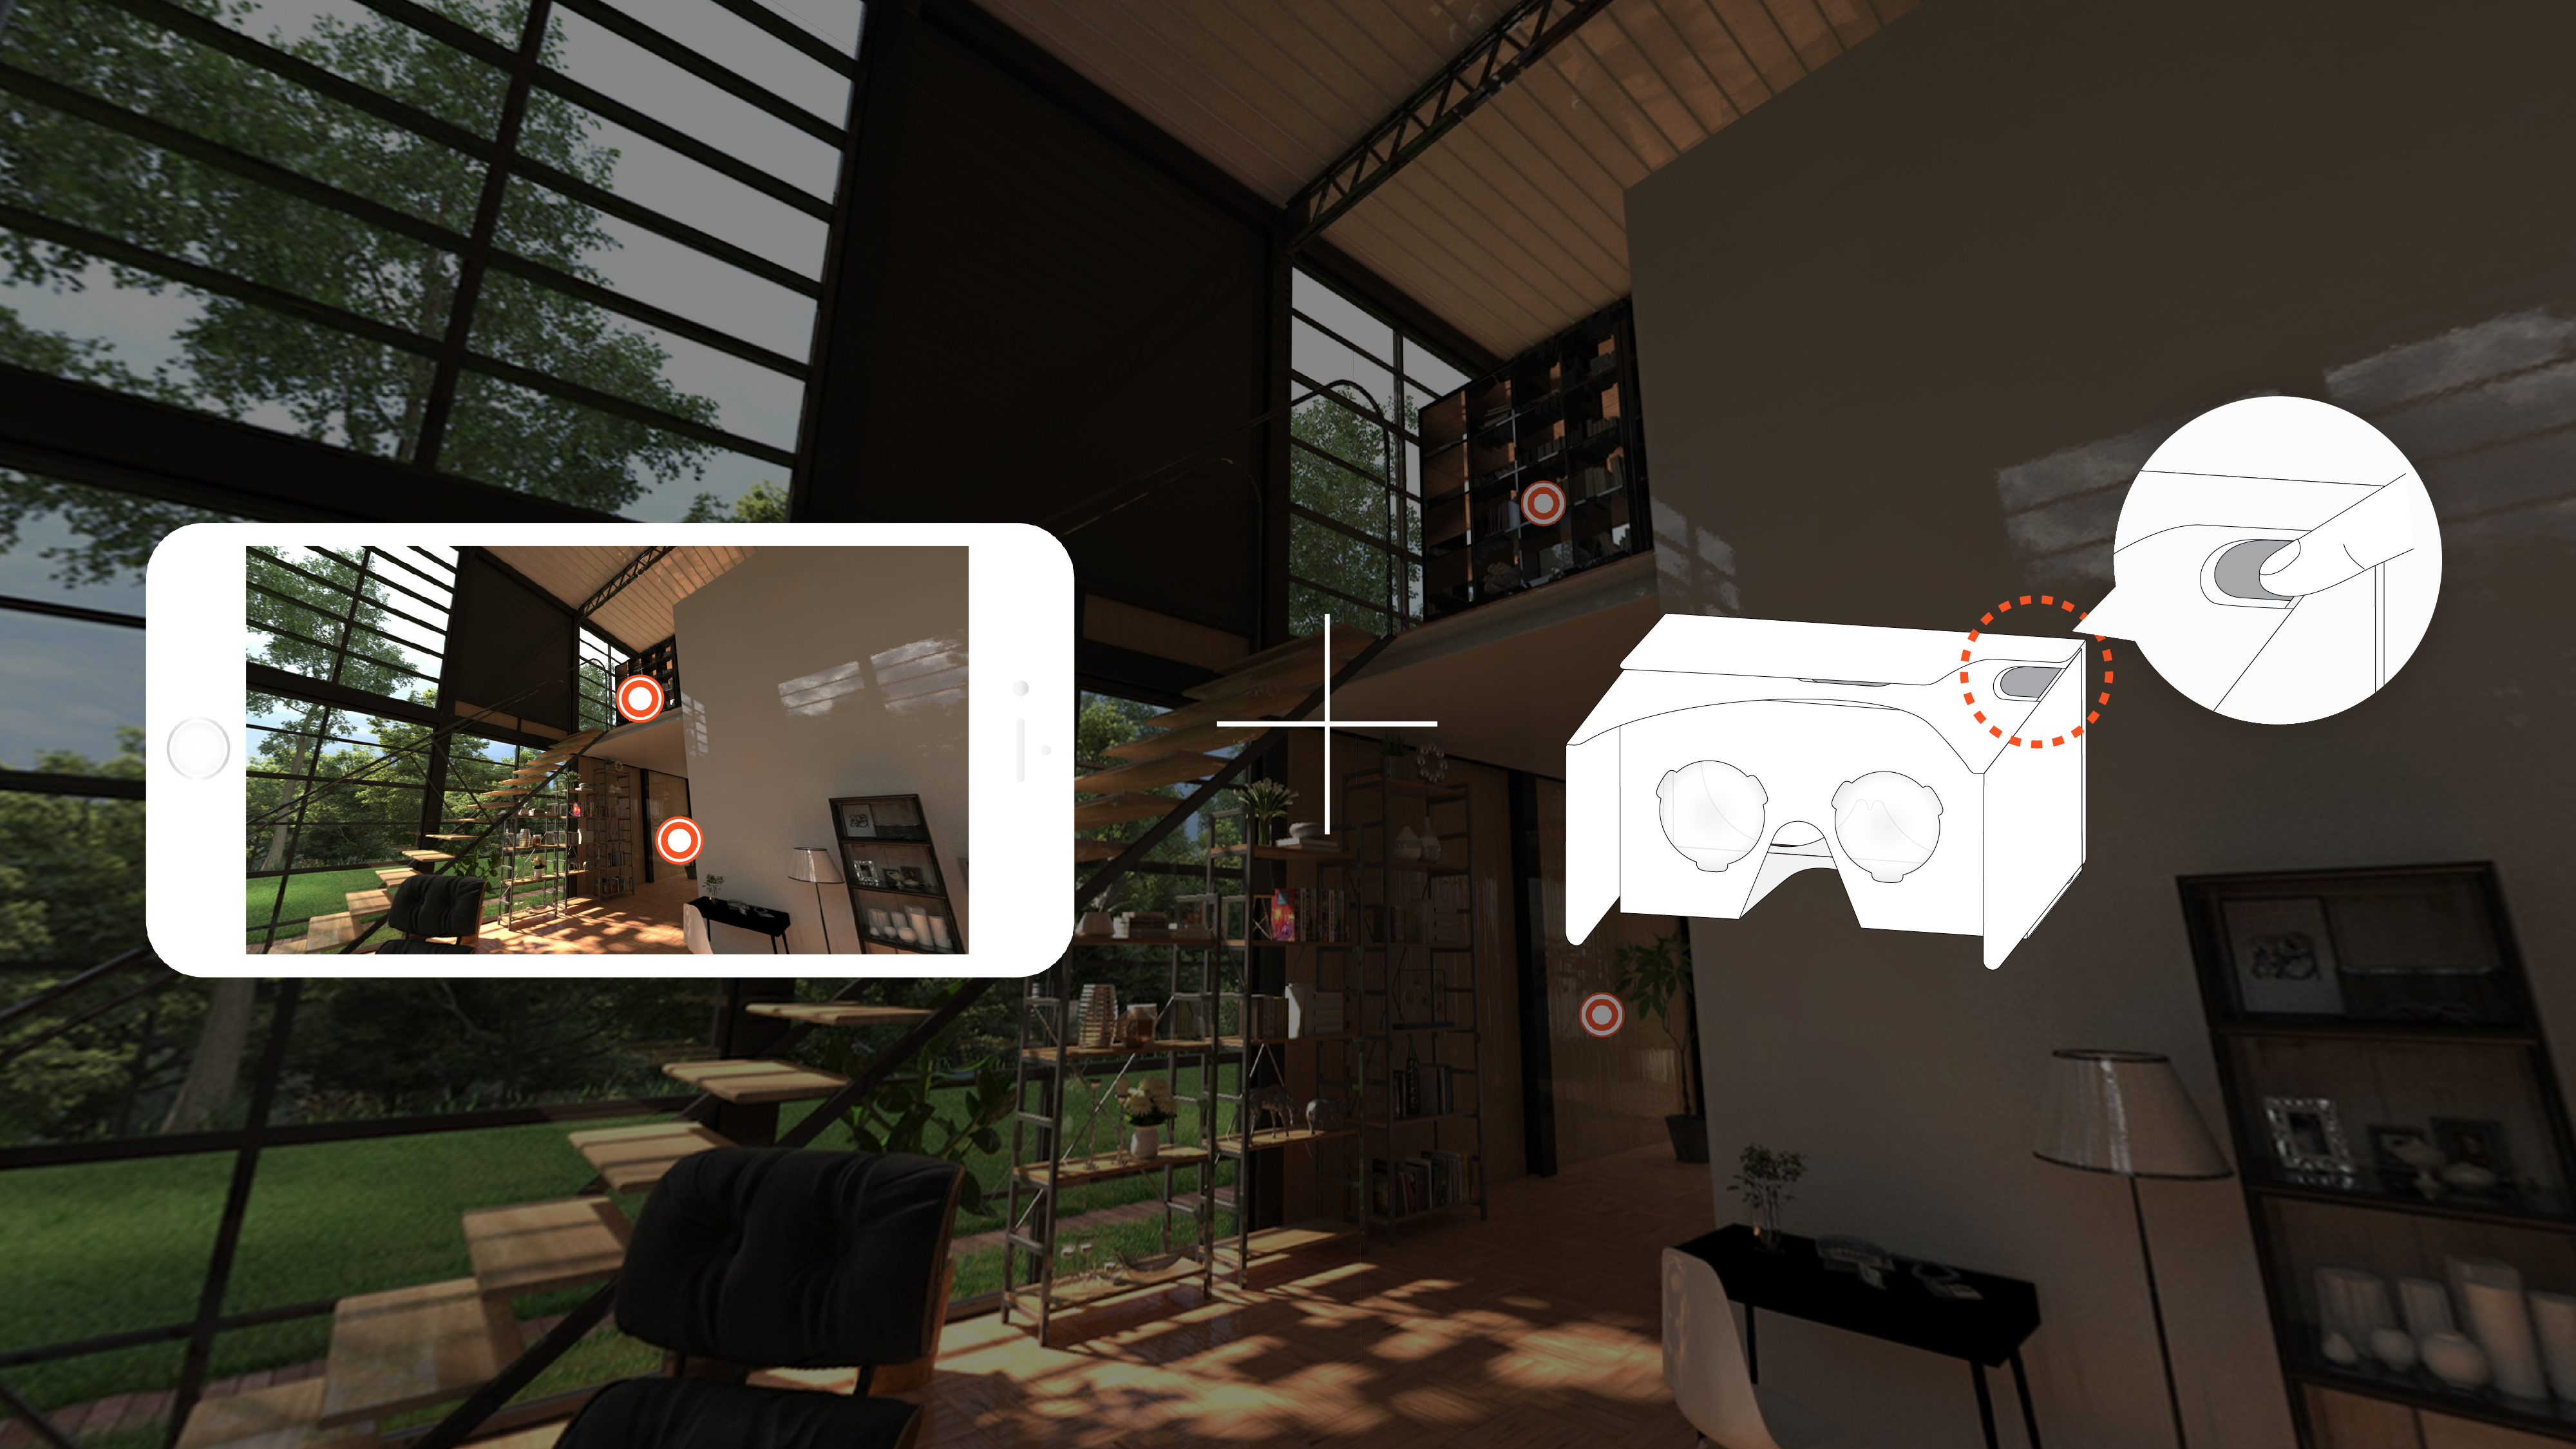
The best part about sharing designs with clients using a unique URL link is that they can slide their phone into a Google Cardboard and view the 360º tour in Virtual Reality with the click of a button. Google Cardboards are a great option for architects to implement into their design review workflows because they are inexpensive and less clunky than other VR options.
Modelo and Google Cardboard are bridging the gap and making VR accessible to non-CAD users, as well as experienced CAD users. Clients need to see 360º tours in VR because it brings a space to life, allows them to visualize and tour their building before it’s built in the right context, and makes design reviews more productive.
To view the whole tutorial video, click here. Modelo makes it easy for you to immerse your clients, contractors, or other stakeholders in an interactive 360º Tour during design reviews and presentations. Get started on yours today!