Embedding 3D models into your website with Modelo. Learn how to embed today!
Eames house By Modelo Modelo »
So you want to show off your 3D modeling skills… Well, we want to help you! Embedding your 3D Revit, Rhino, SketchUp, 3DS Max or Vectorworks model into your blog or portfolio website using a small piece of code we provide through Modelo. This small snippet of code creates what is called an “iframe” (an inline frame of html, embedded within a website). If the blogging tool you use supports iframes, then you should be in luck. Now onto the embedding!
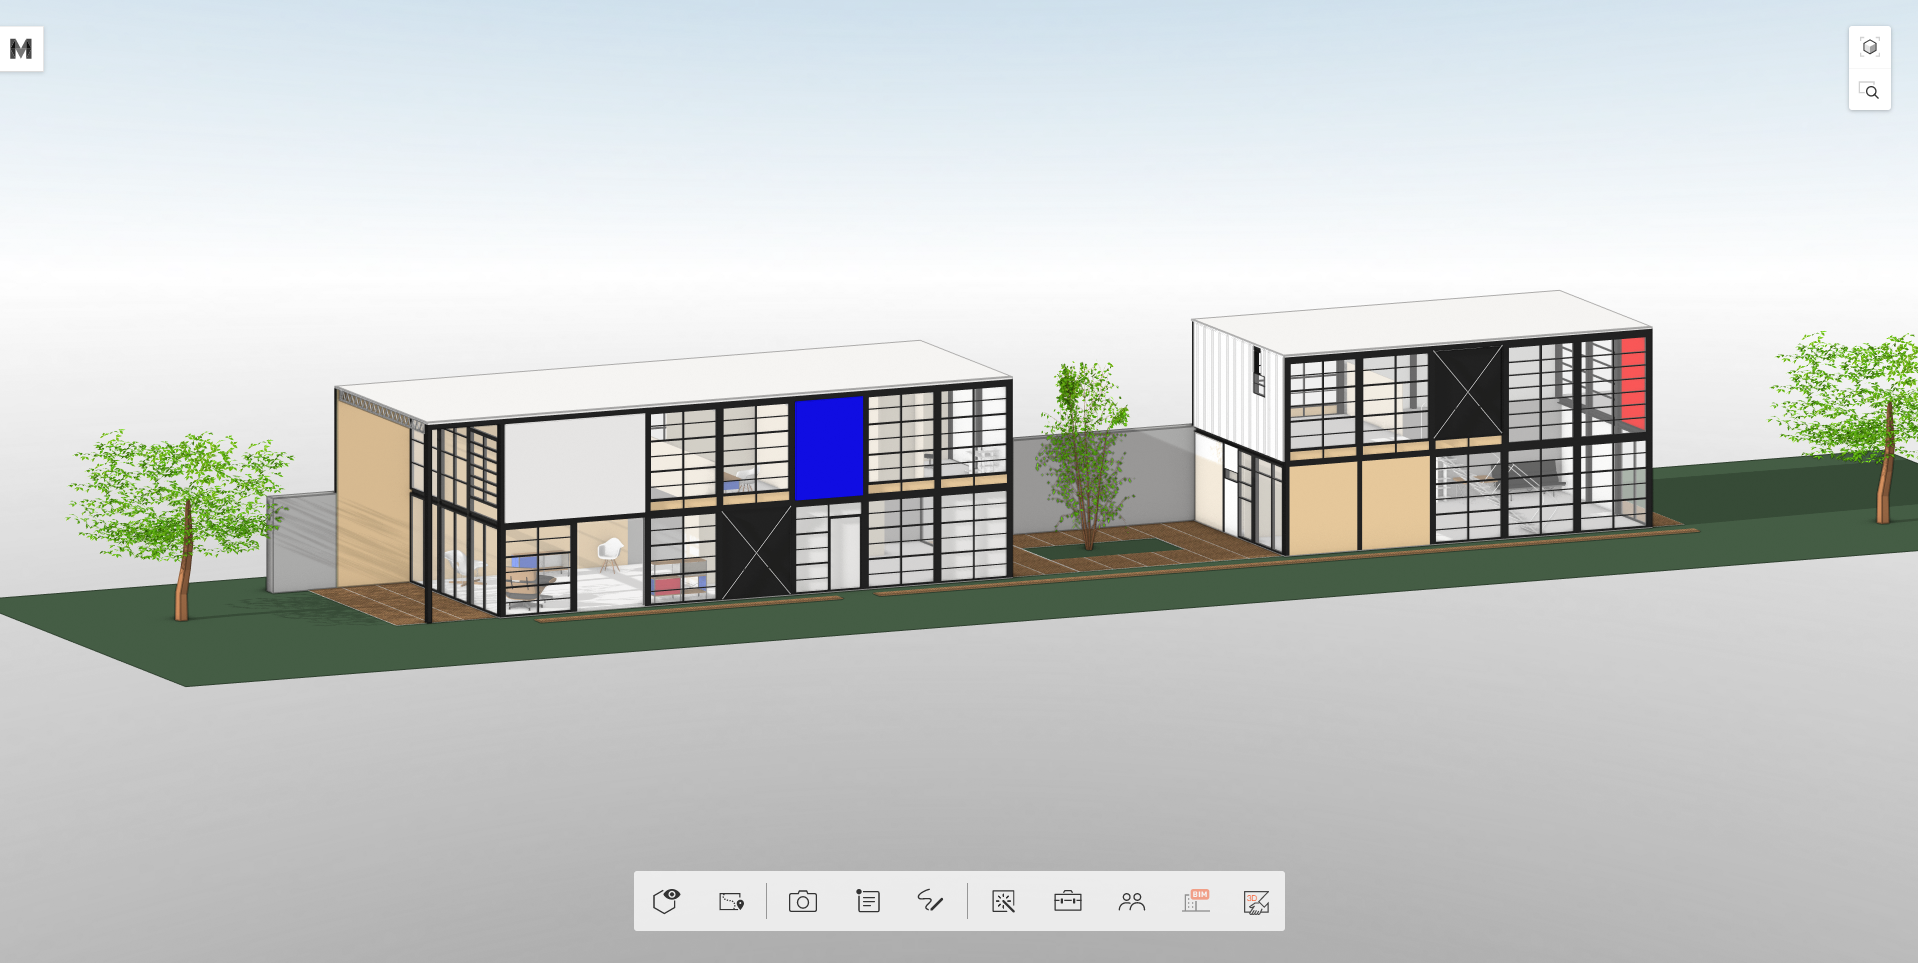
1. View your Model in the 3D viewer
Once you upload your model, navigate to the 3D view page, which looks like the screenshot above.
2. Click the Share icon and select “Embed”
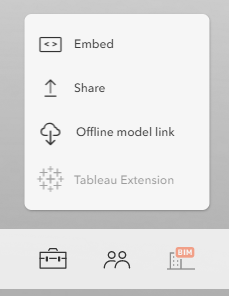
From here it’s easy. Click the share icon at the far right of the toolbar and select the “Embed” option. This will open an Embed Options popup, which provides you with your html code for the iframe.
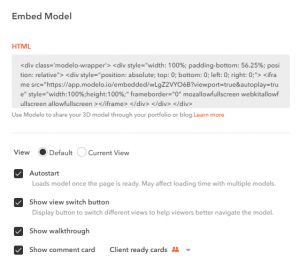
3. Choose your Embed options
-
- Embed code: This is the text you will copy and paste into your blog or website’s HTML. Click the text once to select it, copy it, then paste it into your site. (We’ve included some helpful links to iframe how-to for some of the most popular blogging sites below)
- Size: This sets the size of the embedded model. The default is 640 x 360 – experiment with this to find the best fit for your purposes and the format of your website’s content. Pro-tip: you can adjust the width to 100% in order to have an adaptive window.
- View: Default / Current View allows you to set the angle or perspective of the model when it loads on your site. Selecting Default will display the model in your embedded viewer as you see it when you first open it in Modelo. If you have a particular angle you want the model to be displayed at when it loads, cancel the Embed, rotate the model to your preferred position, and then select Embed and toggle to “Current View”
- Autostart: Automatically loads the model on your site so that a user can immediately begin it. Keeping Autostart turned off will display a preview of your model with a Play button superimposed on top. If you are planning to embed a number of models on a single page, you should consider keeping Autostart turned off, otherwise, the load times could slow down significantly.
- Autospin: The embedded model rotates slowly around the center when the model starts to display. If you drag to view the model, the autospin will pause a few seconds. Then it will continue when the users stop operating.
- Show view switch button: In the top right corner, a small cube is displayed. Hovering over this cube pops out three different perspective views that allow your visitors to quickly change angles of view between: Top/Bottom, Front/Back, Left/Right and Default.
- Hide Tools: When clicked this option, the toolbox will not show in the embedded models. Pro tips: if you don’t want customers to see the dimensions and the model inside. You prefer to check this box.
- Show comment card: 3D comment card is another powerful feature of Modelo, you could use them to organize and showcase different design options, layer configurations, camera angles, as well as annotating in 3D. Check this tutorial out for more information:
- Show walkthrough: You could easily create a walkthrough in Modelo interface, so when your website’s visitors see the model, they could simply click the play button to experience your 3D space like they are in it. The walkthrough option will only show when the ” Show comment card ” is clicked. Check this tutorial out for more information:
- Show comment card: 3D comment card is another powerful feature of Modelo, you could use them to organize and showcase different design options, layer configurations, camera angles, as well as annotating in 3D. Check this tutorial out for more information:
4. Copy and Paste your Embed iframe html
With your Embed settings selected from Step 3 copy the iframe text (which will change slightly based on your preferred settings). Switch to the page in your blog or website in which you want to embed, select the embed option and paste!
Here’s what it would like in Squarespace (for example):

First add a block and select the “Embed” option outlined here in red, then paste your copied iframe html code into the box.
Keep in mind: You will probably need to play around with the settings a bit and explore the embed support options within your own publishing platform.
Here are some links to helpful support pages for a few different publication platforms:
- Squarespace – Using the Embed Block
- Medium – Embed videos, tweets, music and more into your medium stories
- WordPress – WordPress is a bit more complex, if you are familiar with working in html-mode adding the embeddable iframe should be easy. If not, you may need to do a bit more exploration. WordPress’s Embed Codex page might be a good place to start or the Embed Plugins page.
Next tip: learn how to customize your settings in Modelo before you share with clients or colleagues here.