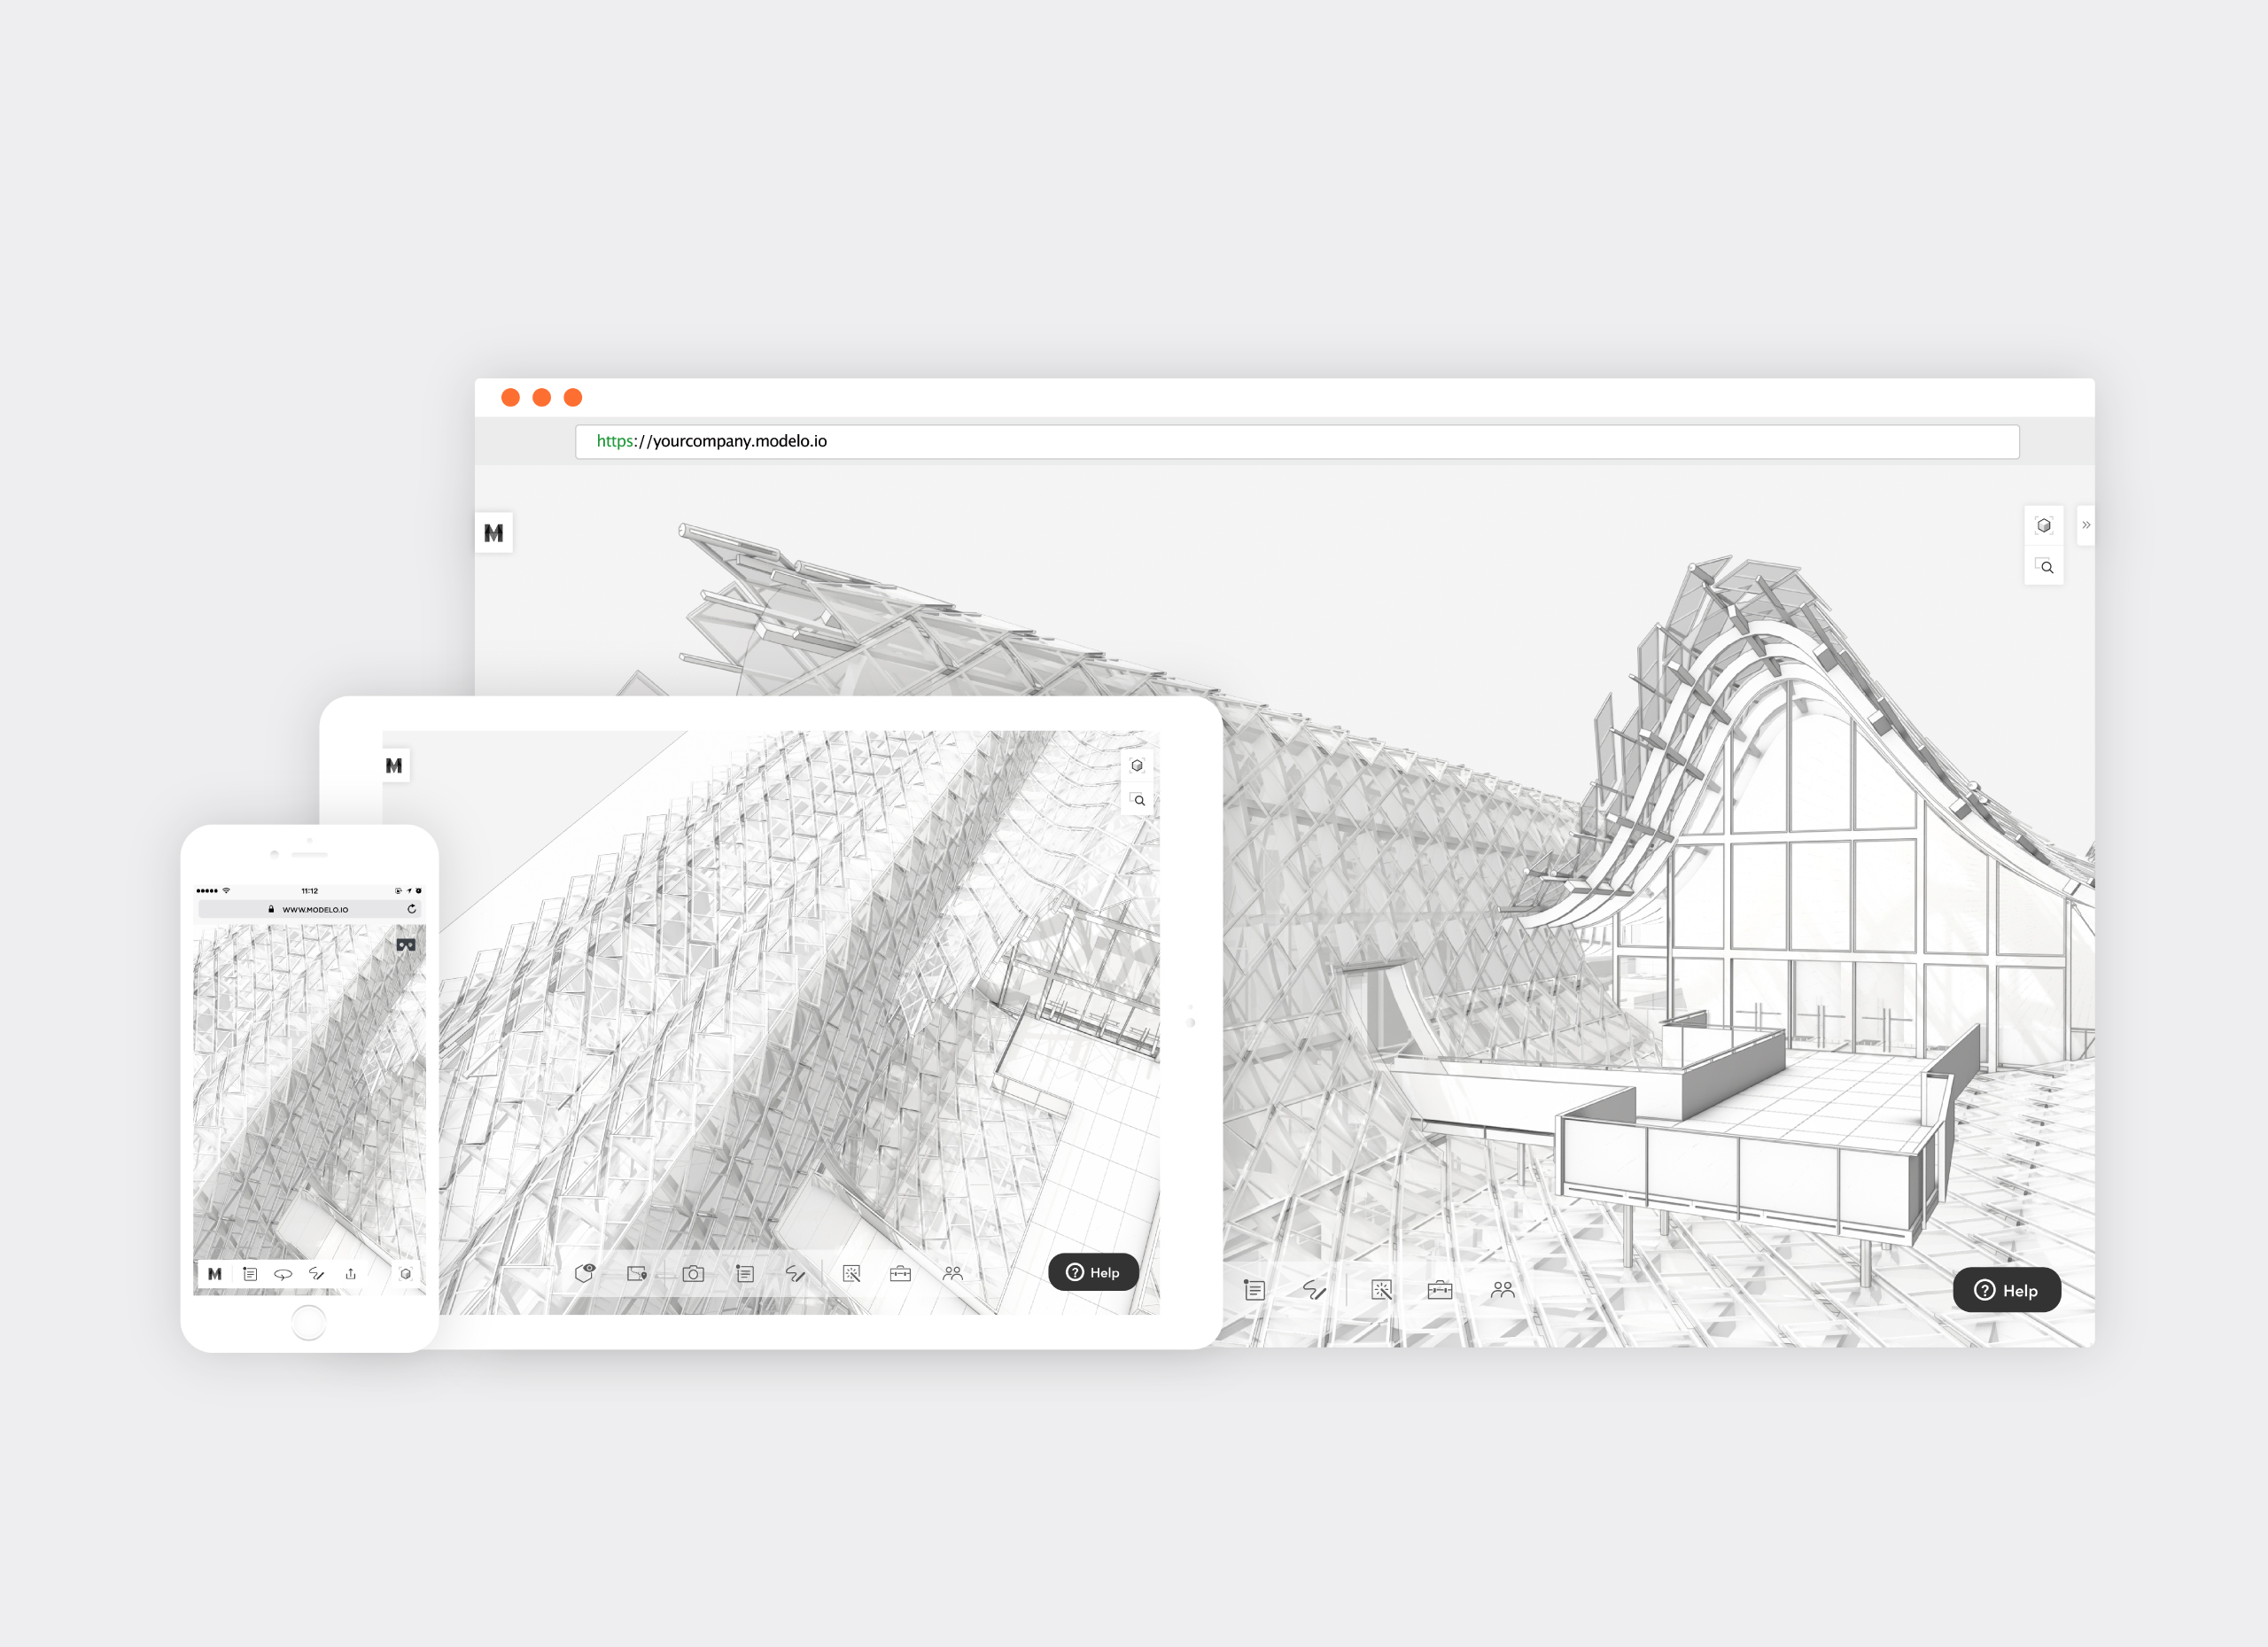
At times, the sheer number of software applications promising improved productivity can be overwhelming. Oftentimes, you may feel as though you spend more time evaluating software applications to improve productivity, rather than actually using them to be more productive. To avoid Modelo from falling into that trap, the team behind Modelo reached out to hundreds of Modelo users and asked them to help compile this guide. The final result is presented below for you to review and includes the top 11 ways that Modelo has been proven to deliver increased productivity.
To download this guide as a PDF eBook, click here.
Learn the Toolbar
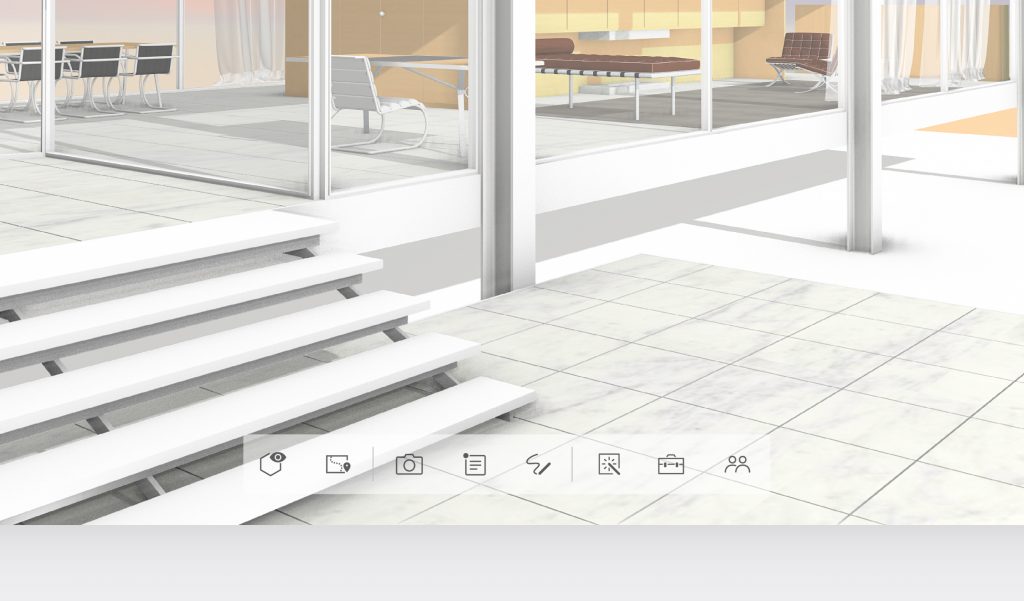
The toolbar in Modelo is the nerve center of your productivity. To make the most of Modelo, you are going to want to become familiar with, and ultimately master, the functionality it offers. As a brief summary, the icons from left to right are:
-
- Orbit View / First Person View: Toggle between viewing your designs in first person or orbital view.
-
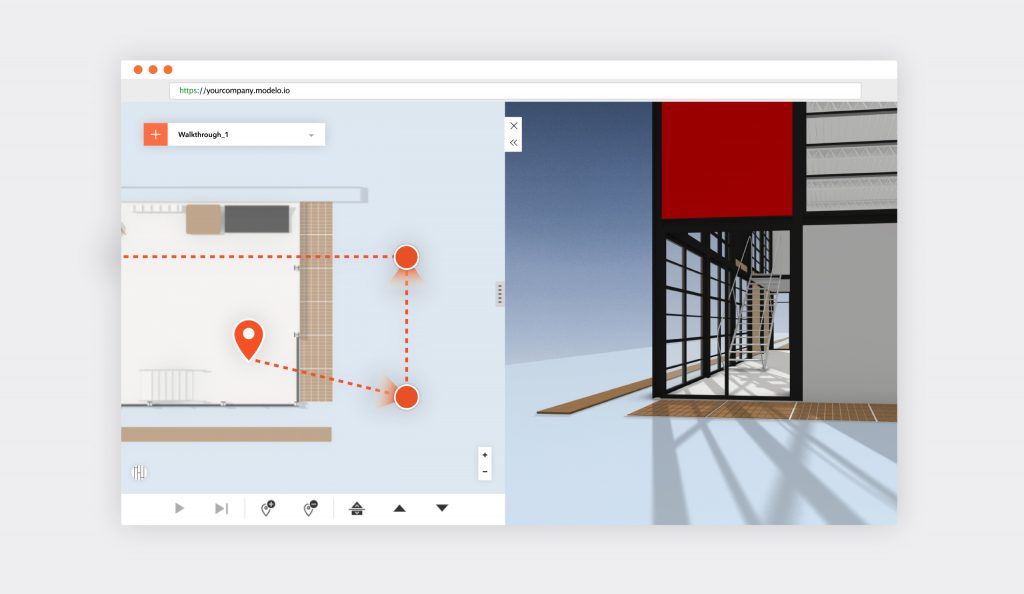
- Walkthrough: Create a walkthrough, or flythrough, of your design by dropping waypoints along your desired path. For a comprehensive explanation on how to create a walkthrough in Modelo, click here.
-
- Screenshot: Capture the current view of your screen in high or low resolution. Send it to a colleague or client or download it for later reference.
-
- Comment: Provide pinpoint feedback on your models by making a comment anywhere on your designs. Attach files to comment cards and use them to guide presentations. For a complete overview of how to best use comment cards in Modelo, read this guide.
-
- Sketch: Markup your designs in a variety of ways using Modelo’s sketch tools. A variety of colors, borders, line markings, pen weights, and other formatting tools are available to you.
-
- Settings: Adjust the settings that apply to your design. Select between a multitude of options under the Layers, Effects, Materials, and Background headings.
-
- Tools: Use Modelo to create section cuts, take measurements, zoom and pan, and see your design in full screen.
- Share: Sharing your design with clients and colleagues is one of Modelo’s most powerful features. You can generate HTML code to embed your design in a website, create a unique URL to share your designs, or save your design to view in an offline environment.
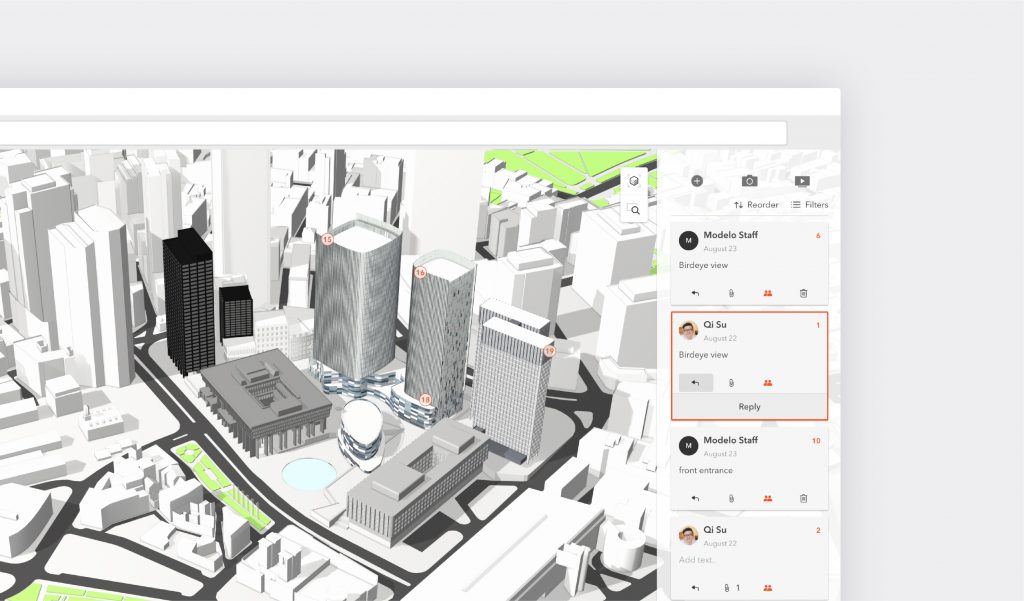
Create scenes
Creating scenes of your designs isn’t a task that is exclusively reserved for your very expensive CAD software. Once your model is uploaded, you can create views and scenes of any view of your design. For instance, you can present different design options to your clients and have them provide feedback directly in Modelo. Of course, if you do create scenes in your CAD software, you can upload these to Modelo as well.
When you present your scenes in Modelo, you can elect to see these in virtual reality (VR), as a looping presentation that cycle automatically through your scenes, or create walkthroughs to really experience your design.
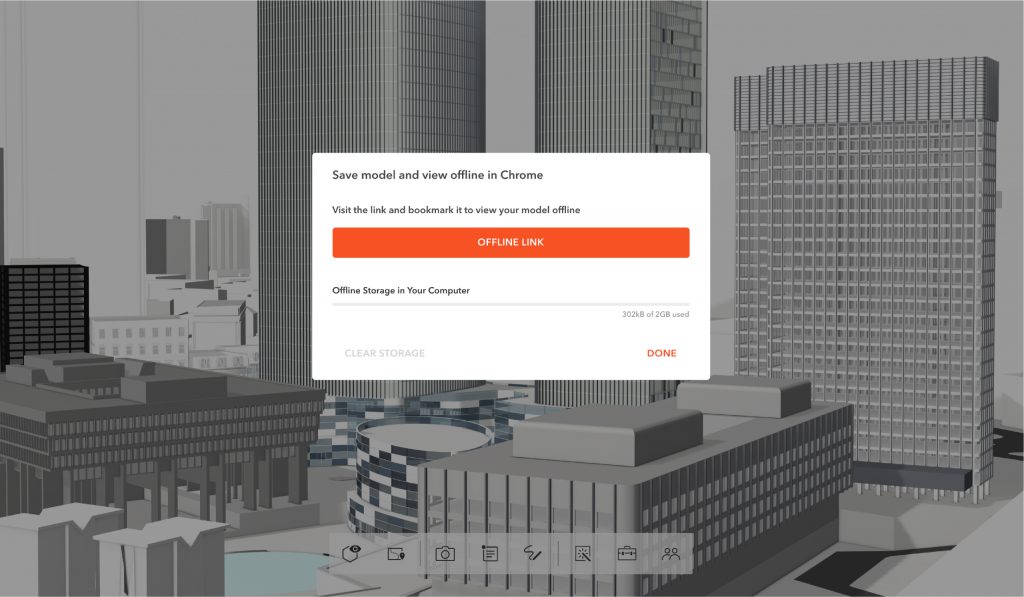
Save offline
If you’re going to an area where the Internet is slow, mobile data is expensive or unreliable, or you can’t get online for any other reason, you can download your designs and present them while you are offline. All of the walkthroughs, comments, and markups you have created on your design will be saved so you don’t lose any presentation capabilities. You will still be able to present powerfully to your clients, explore your designs in detail, and communicate your vision with a highly rendered design even if you don’t have internet access.
Customers who love this feature find it especially helpful when presenting in foreign countries or in an office where the Wi-Fi network cannot be accessed (such as many government institutions).
To save your designs for offline access, you are required to have a Modelo business account. Here is a step-by-step guide to saving your designs for offline access.
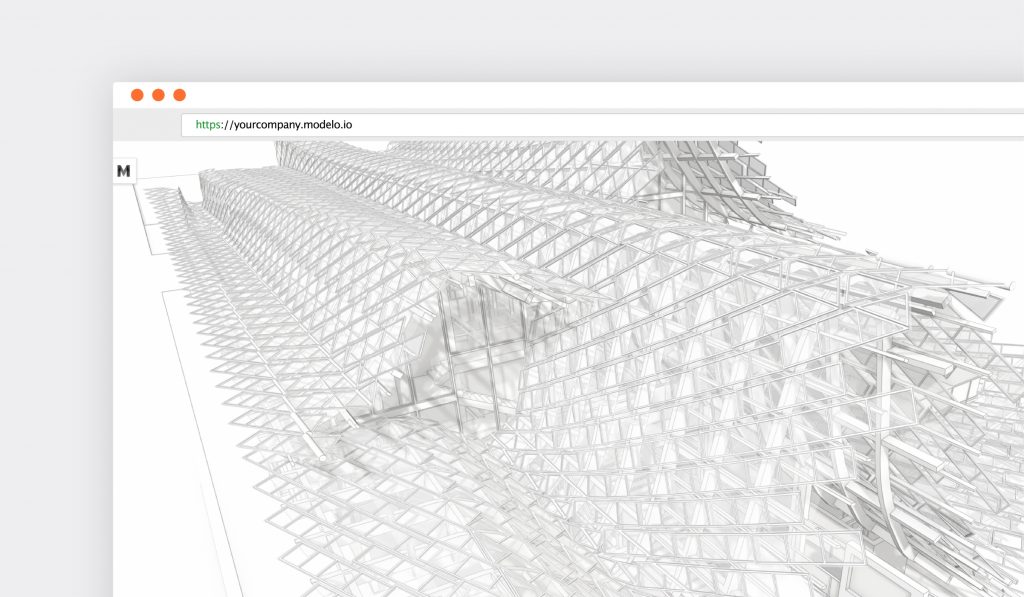
Architect Effect (and other design tools)
Clients love highly rendered, detail-rich designs to review. However, that doesn’t always make it easy to actually review your designs. To help with that, Modelo introduced an Architect Effect. This effect strips away all of the design elements to leave you a simple design of just your model that you and your colleagues can efficiently explore the design when you sit down for a design review.
To best suit your preferences, the Architect Effect can be displayed in a black and white, full color, or hand drawn effect.
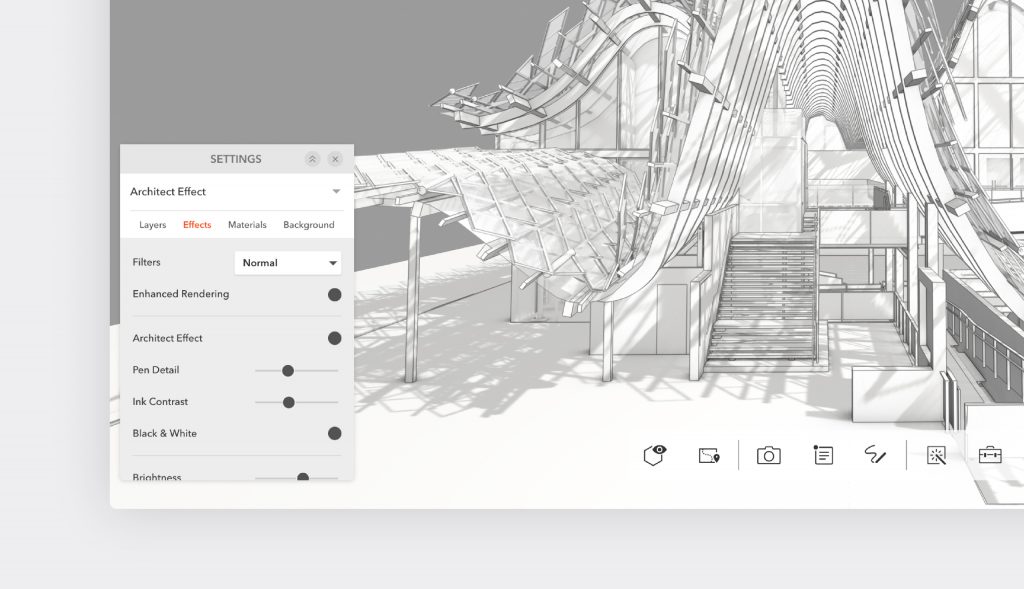
There are a host of other effects that you can apply to help further customize your design, depending on the client that you are working with, including:
-
- Filters: Apply different filters, such as blueprint, vintage paper, and dark sky over your design to create different looks.
-
- Enhanced Rendering: Add that little bit of extra polish to your design to create that ‘finished look’ before your client presentation by turning Enhanced Rendering on
- Brightness, light direction, and shadow: Adjust the brightness, latitude and longitude of your light direction, and your shadows to create a ‘time of day’ look to your presentations.
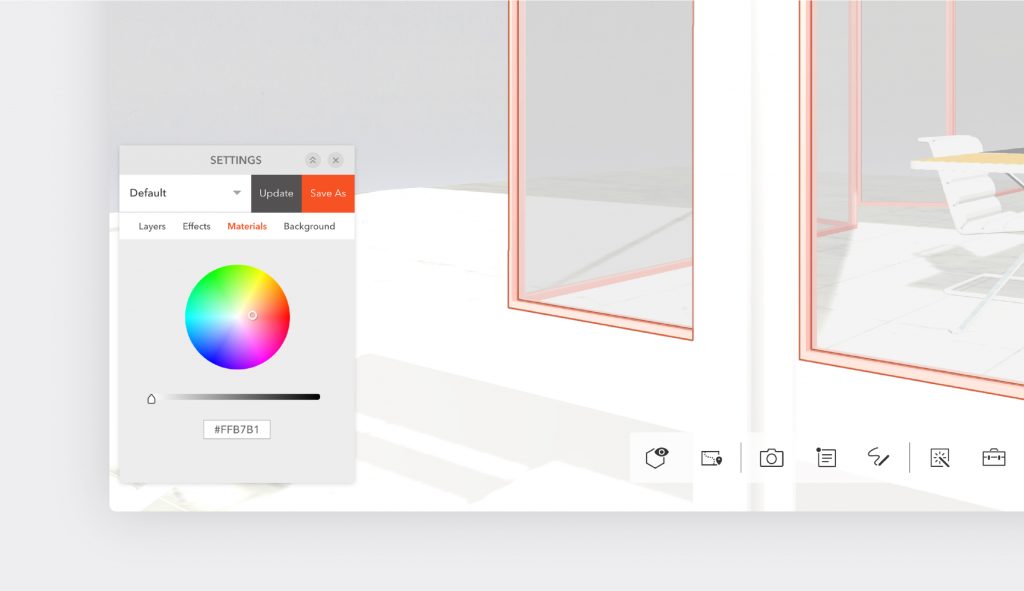
Materials effect
Sometimes when you present to clients or colleagues you want to direct their attention to specific parts of the design. Use the Materials setting to call out a part of your design with a specific color.
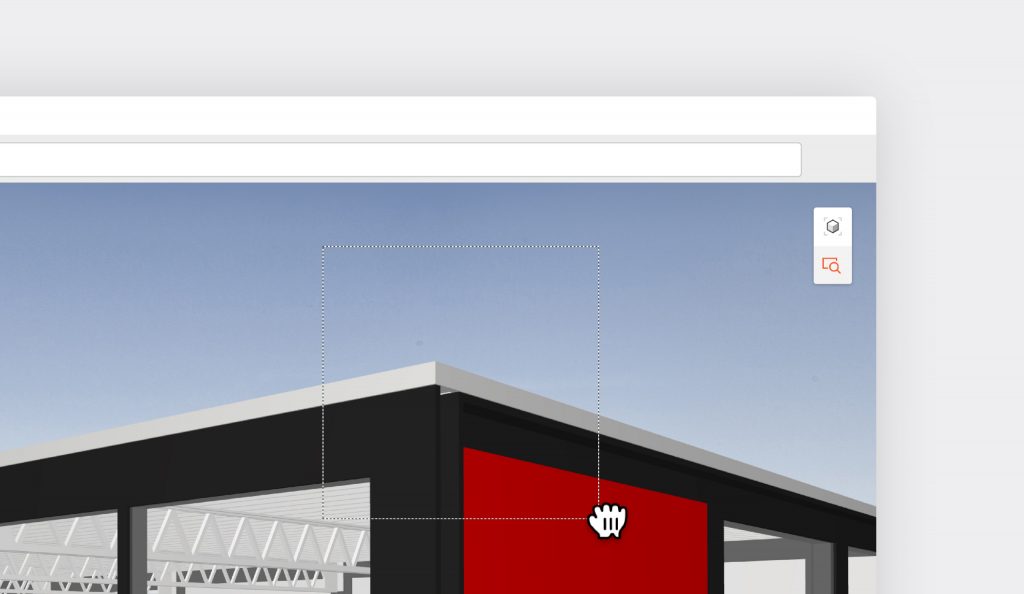
Magnifying glass
To quickly zoom into a part of your model you can click the magnifying glass icon and select the area you want to examine. Conversely, if you want to zoom out of your model completely to see a particular perspective, click the directional cube directly above the magnifying glass icon and select either the top, front, or right perspective.
Markup
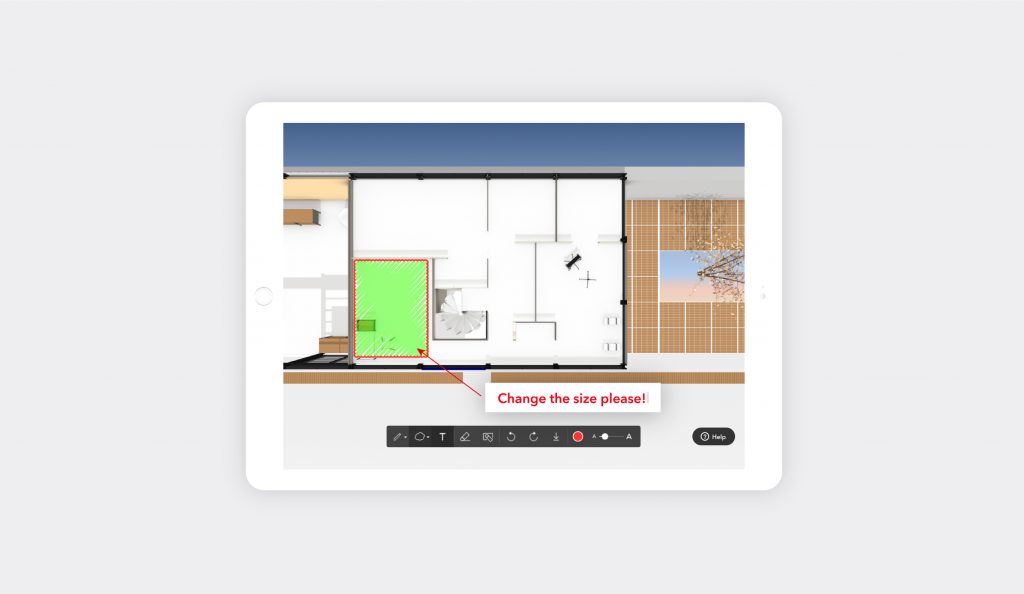
Architects are all familiar with ‘Redlines,’ the ubiquitous way of marking-up corrections on a design. The good news is that Modelo can satisfy all of your markup needs, and you can even choose your favorite hue – you are not limited to just red!
After you navigate to the Sketch icon on your toolbar, you will notice that you have a multitude of markup options. They are all very self-explanatory, but the idea is that you can customize your feedback and make it appropriate for your audience. You can not only markup anywhere on your design, but you can also provide feedback on any files that you have uploaded to Modelo. Once you have completed providing your feedback, you can add any notes and share it with your colleagues.
Backgrounds
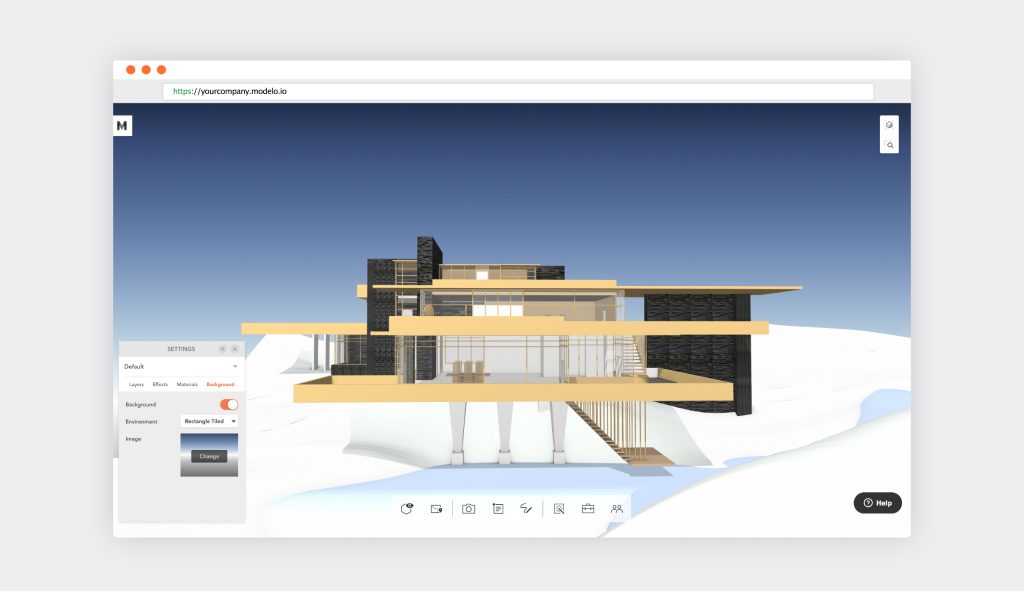
Extend your branding efforts or make your design really stand out with a customized background in Modelo. You can upload any image and then select how you would like it to be displayed (either as a rectangle, sphere, or tiled rectangle).
Toggle layers on and off
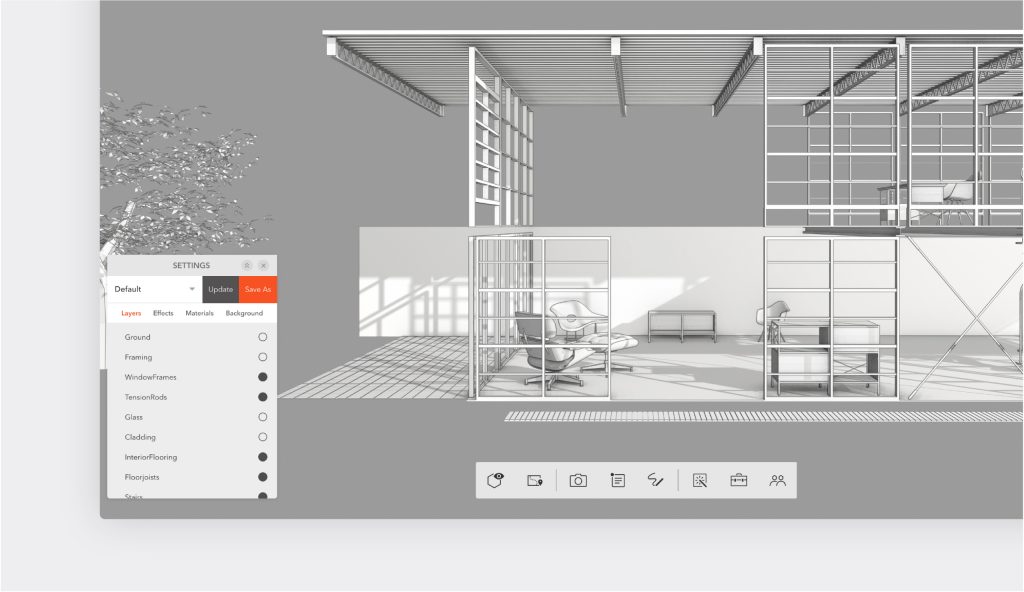
As you build your model in your preferred CAD software, you build it in layers. As you use Modelo to explore your model in design reviews and present it to clients, you can toggle your layers on and off.
Share designs
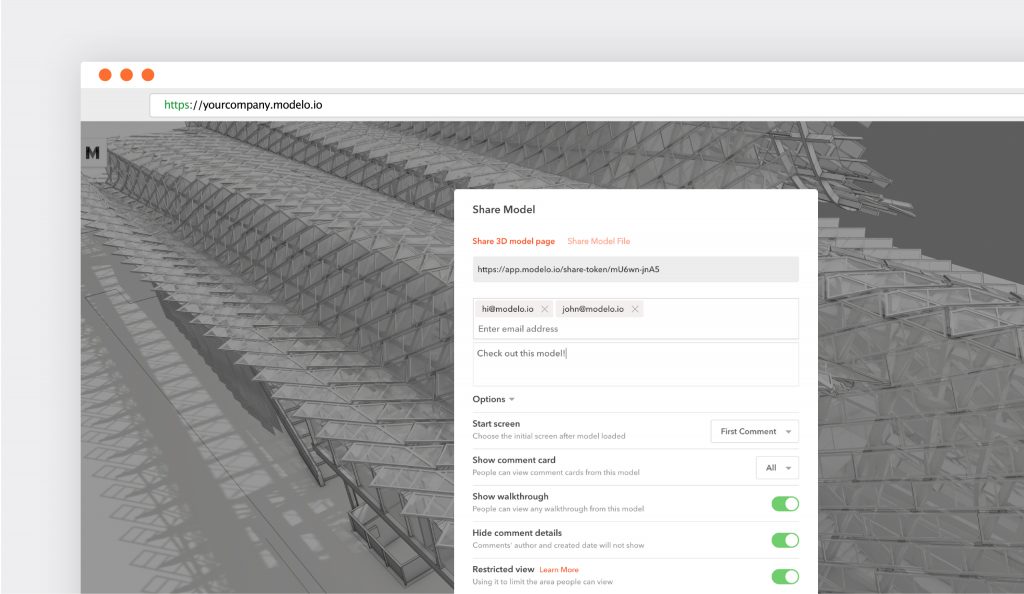
Almost everything you do in Modelo can be shared. Or, if you prefer, not shared. If some parts of your design aren’t ready for the client, don’t share those parts; only share the scenes of your design that you want them to see. Similarly, if you want them provide feedback on your design directly in Modelo, turn that functionality on. Walkthroughs can also be shared.
Your clients do not need a Modelo license to see what you share. All they need is a web-connected device (mobile phone, computer, tablet, etc). From there, all they have to do is click the unique URL that you generate and send to them directly from Modelo. There is no need to send them USBs or ask them to download anything from an FTP server or other file transfer service.
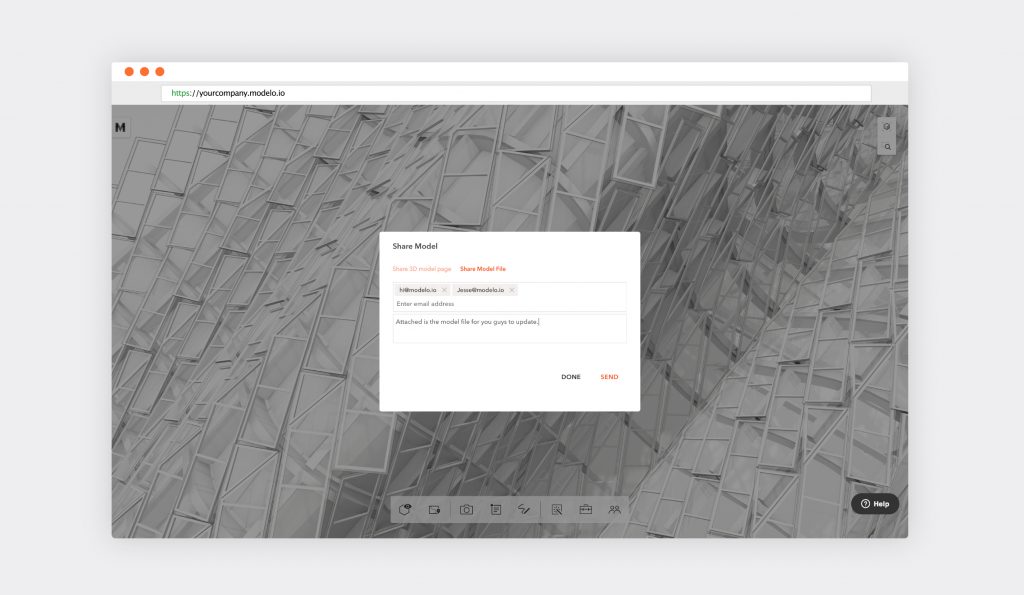
Clients told us that one major productivity gain they achieve by using the share link is by sharing their designs with clients ahead of their meeting and asking them to review it. Then, when they are in the meeting, they are using that time to dive into the client’s feedback to then translate that understanding into improving their design when they are back in the office.
Learn more about sharing designs using Modelo here.
Walkthrough
Creating animated walkthroughs of your designs can take hours. In fact, before architects started using Modelo, almost two-thirds of them spent at least one day creating each walkthrough. Now, they create animated flythroughs within minutes. Once they have uploaded their design, they simply select the walkthrough tool from the Modelo toolbar, drop their waypoints, and select the camera direction. What previously took hours, now only takes minutes. What’s more, you can share your walkthroughs with clients and colleagues alike.
Read a comprehensive summary of creating walkthroughs in Modelo.
Summary
The 11 tips listed above have been proven to increase productivity for architects and industrial designers alike, particularly when they are working with their colleagues and presenting to clients. It is not an exhaustive list and there is certainly a lot more value still to be explored with Modelo, like embedding your design on your website, exploring your design in virtual reality, or uploading panorama images.
If you are not already a Modelo user, set up a FREE forever account today in 90 seconds. Then, upload your own model and see how much more productive Modelo can make you.
About Modelo
Modelo is a cloud-based software application used extensively throughout the architecture and industrial design, retail space planning, construction, and real estate industries. Created by a Harvard-educated architect and Rhode Island School of Design industrial designer, every aspect of Modelo has been designed to help professionals in these industries better communicate their vision. There are obvious applications for Modelo when presenting to clients, but internal communication with colleagues and partners can also be expertly facilitated through Modelo.
