Let’s face it, VR is here and it is here to stay. The main issue around VR currently in the building industry is that everyone wants to have their hands on it, but nobody really knows where it fits best in the workflow. Is it used best in early stages or late stages of design? Is it a tool to communicate your vision more effectively with clients? Or is it a design tool used to understand the space as it is being designed? From what we hear from our users, the verdict is still out on where VR best fits but one thing we do know is that the only way to successfully implement VR into your workflow is to make it easy and fast. In this article, we are going to discuss how to convert Revit files to VR using Modelo and how you can do it in less than 120 seconds.
Revit has become an essential software in every stage of design and construction because of all of its powerful tools. But Revit is usually not complimented on its speed. Today we will talk about how with Modelo you can convert Revit files to VR in less than 120 seconds and have your clients viewing models in VR without any training or fancy hardware needed.
Steps to convert Revit files to VR:
Step 1: Go to www.modelo.io to create a free account and to download the Revit exporter that can be found in the top right corner of your home page when logging into Modelo.
Step 2: Open up your model in Revit, copy and paste your token from Modelo to upload it into the correct project and folder. Make sure to select the view you want to upload with and make sure export textures is turned on and hit upload.
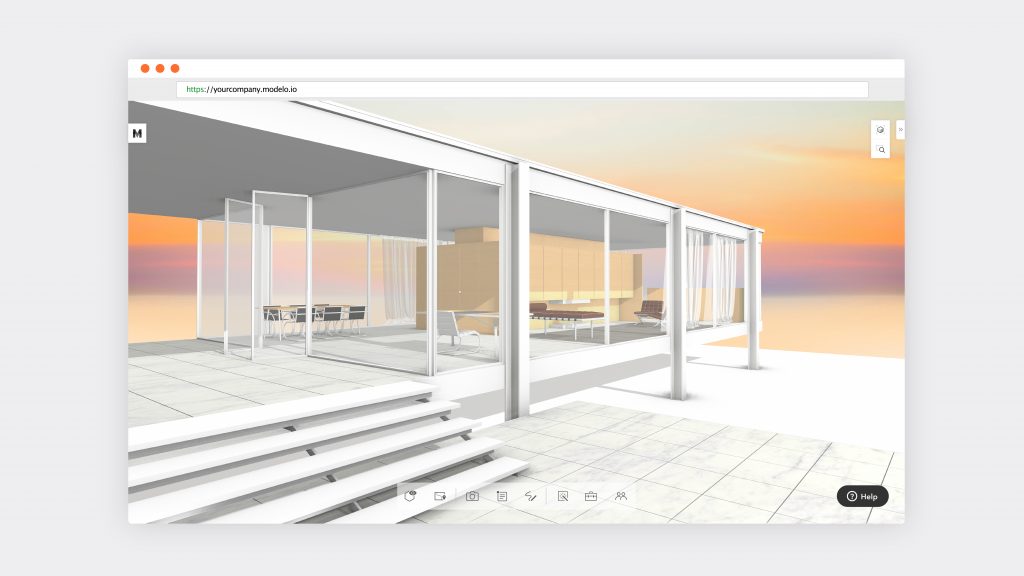
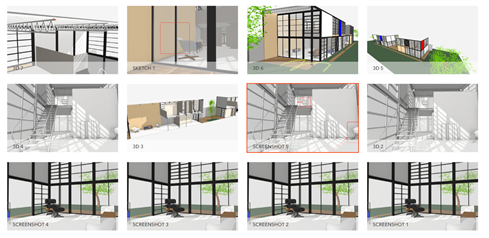
Step 3: Jump into your Modelo account to view your model and use Modelo’s comment cards to quickly create a couple views that will double as the scenes in VR mode.
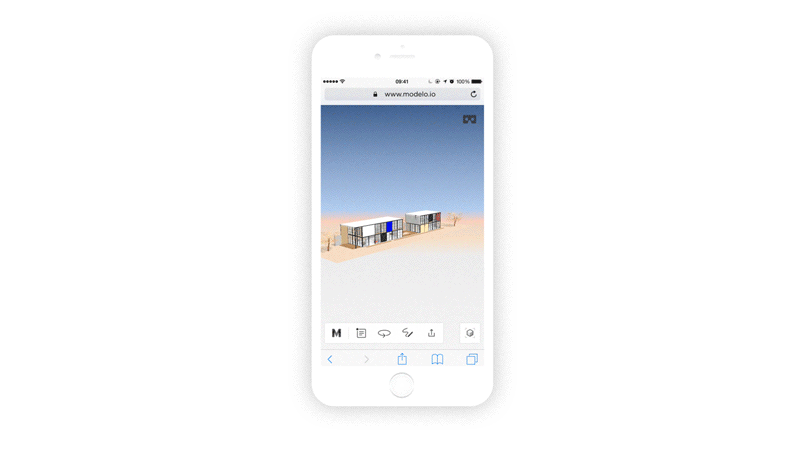
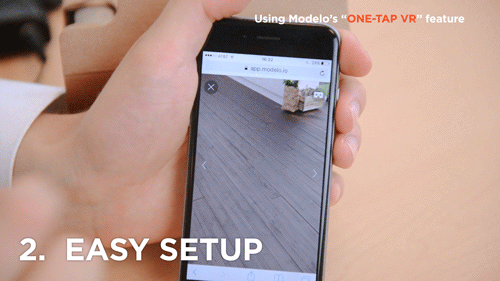
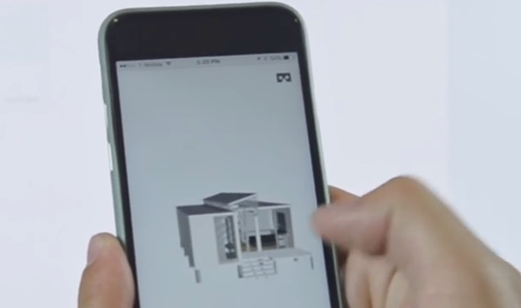
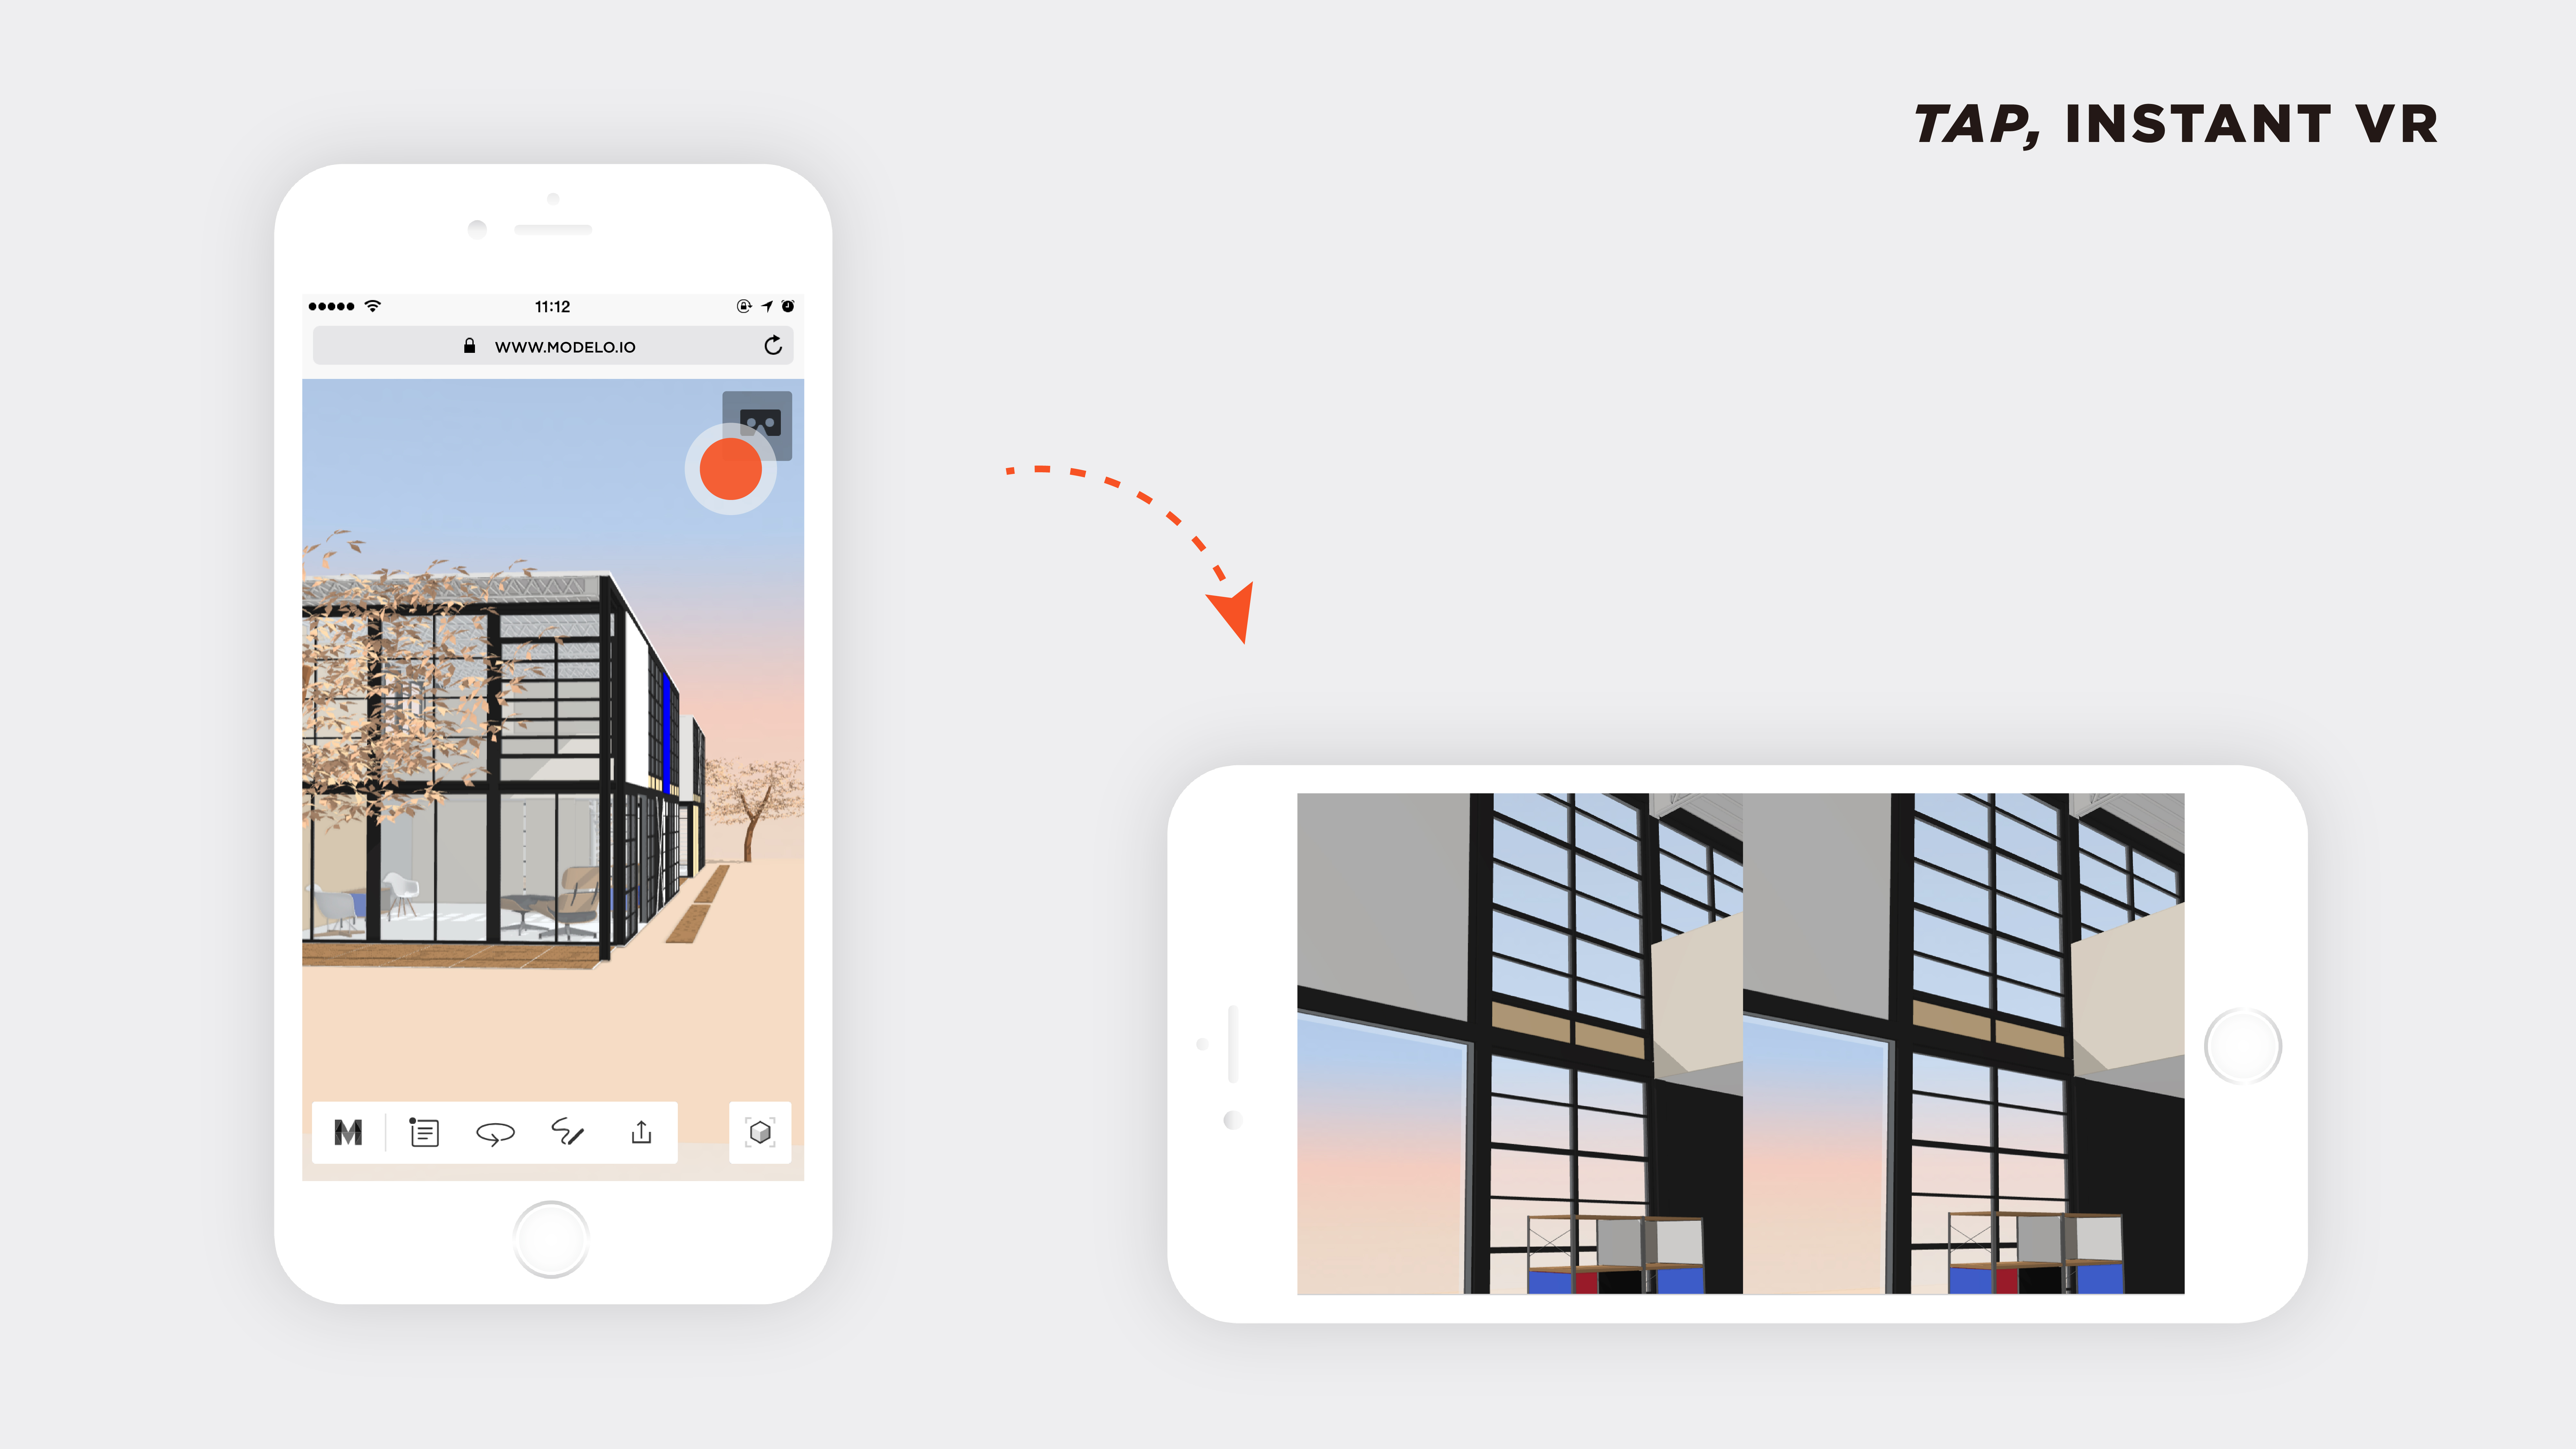
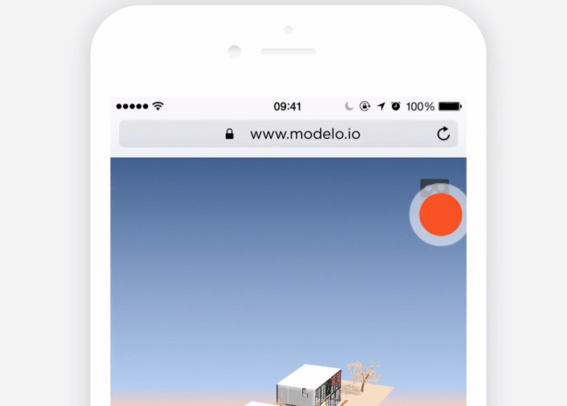
Step 4: Log into Modelo on your mobile browser, click on your project and tap the VR button in the top right corner. From there you will be prompted to turn your phone to landscape mode and place it in a Google Cardboard.
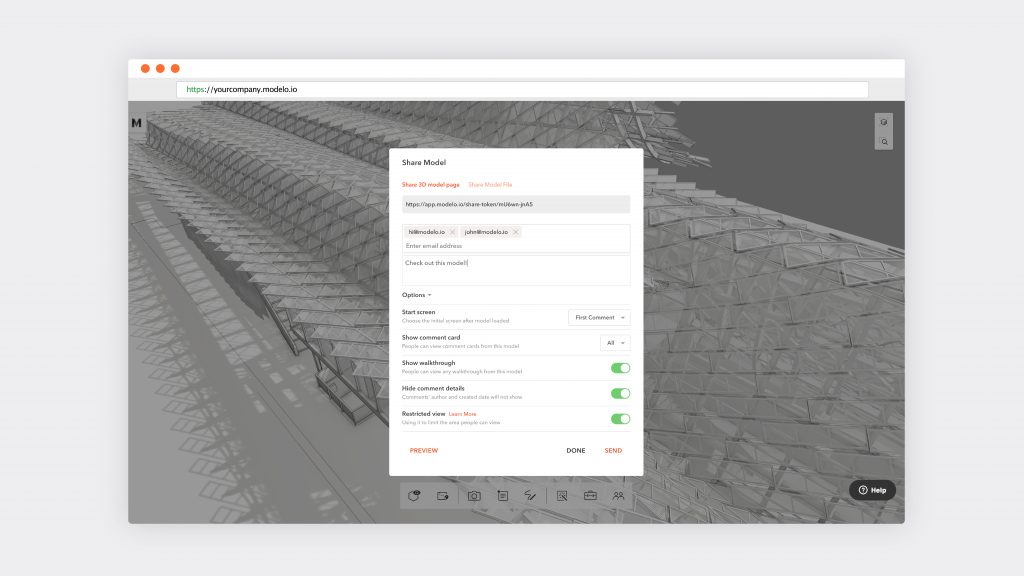
In only a few steps, you are able to convert Revit files to VR using Modelo and all you would need is a Google Cardboard to view. (Learn about the 10 reasons you should use Google Cardboard to view CAD files in VR here.) Now that you have converted your Revit file to VR, it still leaves the questions on what to do next. Will you then use this internally to walk through your design or create a VR walkthrough and share it externally with a client using a unique URL?
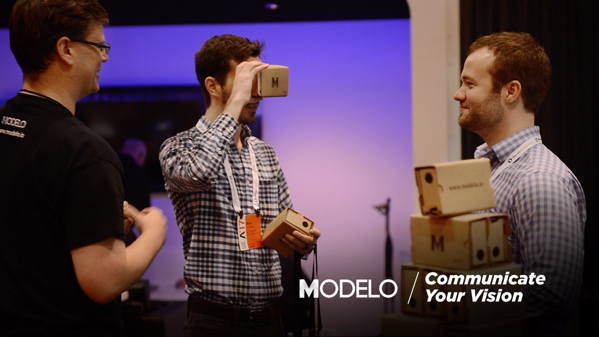
Remember that a client would not have to download or log into anything to view your model with Modelo. They would just need to open the URL on their mobile phone and tap the VR button. This is another benefit that separates Modelo from other software out there because it was built with clients in mind and makes it as easy as possible for you to communicate your vision to them.

The next time someone in the office gets the urge to jump into VR. Head over to Modelo and convert your Revit file to VR. You will be blown away by easy it is to do, how fast it can be done and it will have you thinking about why you spent all that money on the fancy VR hardware that is still in the corner of your office.
![]()