Celebrating 50K Comment cards on Modelo

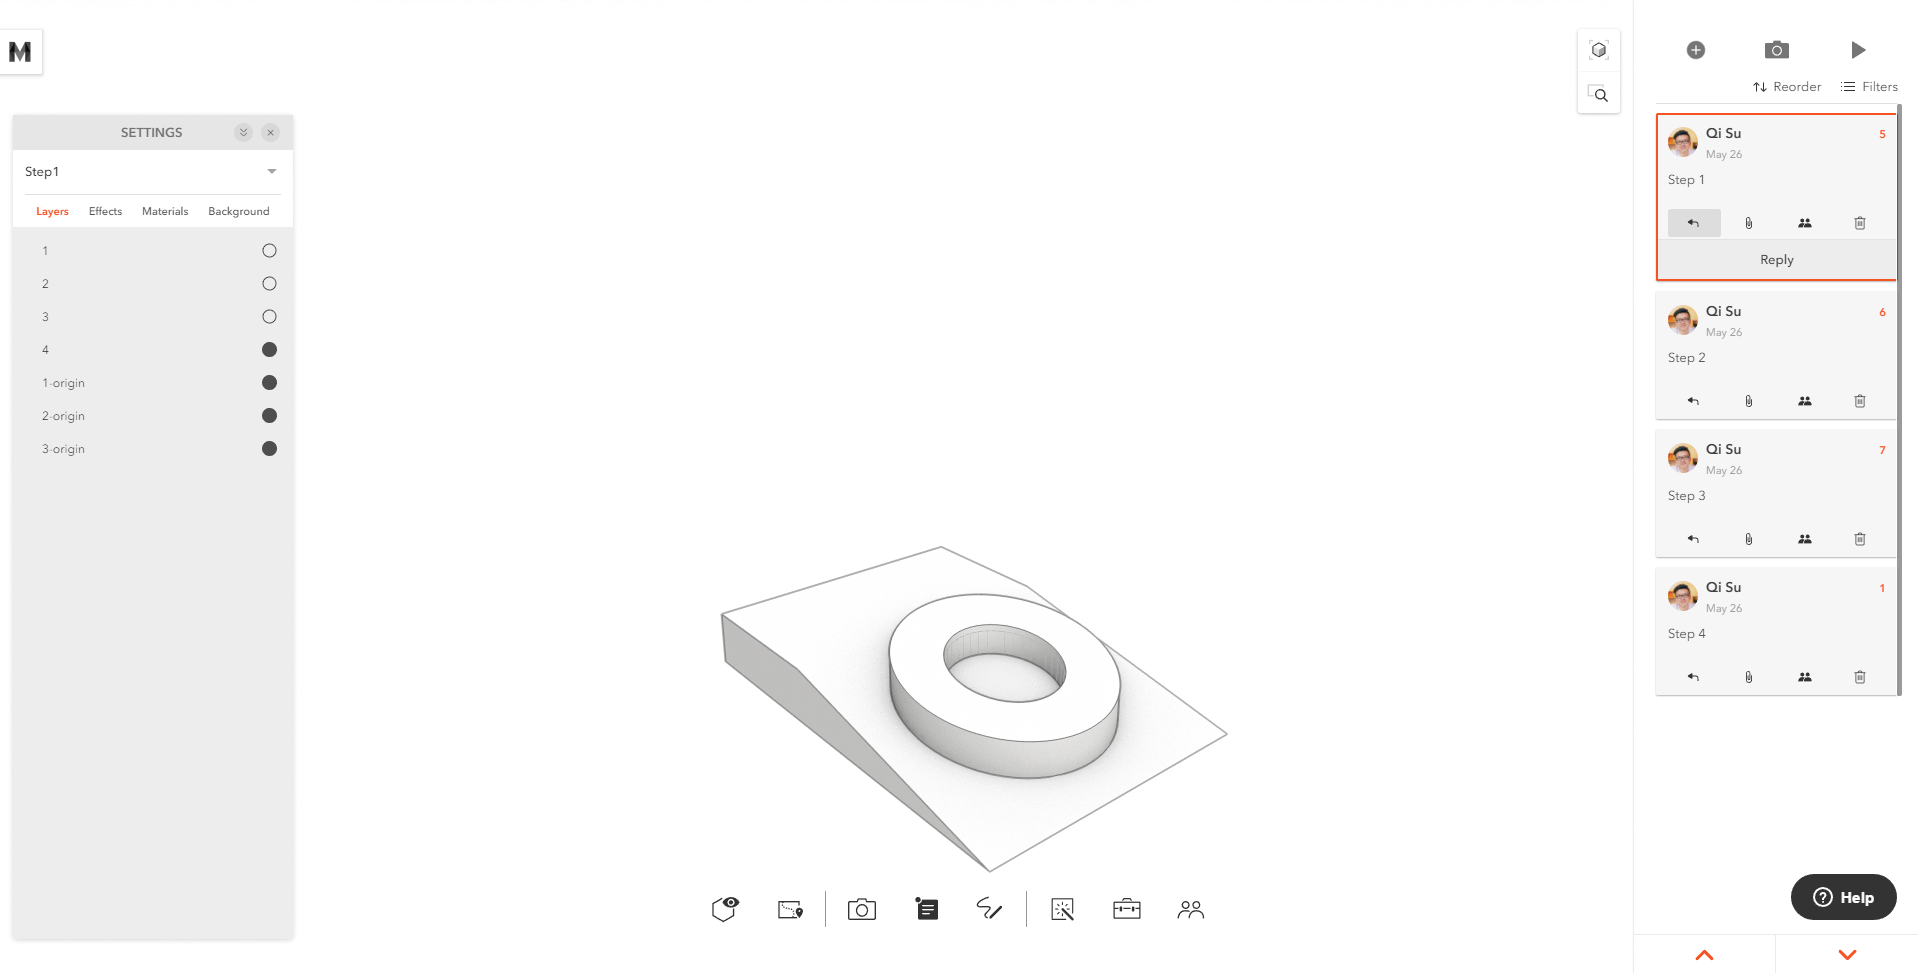
Here at Modelo, we seek to revolutionize the way you are collaborating with team members and presenting to clients throughout your design process. One of the most powerful and effective ways to do that is by using Modelo’s comment cards. This is our most asked about feature because this is a new term to the industry and everyone is looking to keep up.

Most of our clients are finding tremendous success by using comment cards to not only present different views of your models, but also to attach renderings, jump into VR, collaborate during design reviews and much more. As we move towards the middle of July, we wanted to take a second to celebrate a milestone of over 50,000 comment cards used on Modelo and highlight all the great ways our clients have been using them.

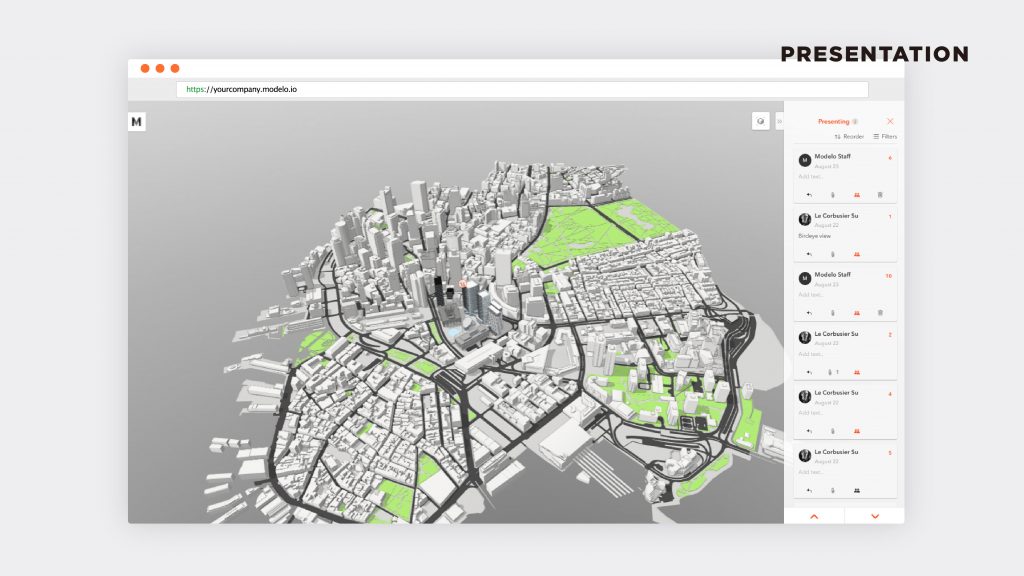
Using Comment Cards to present your design:
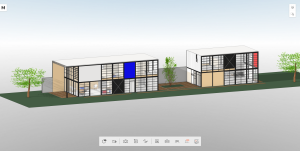
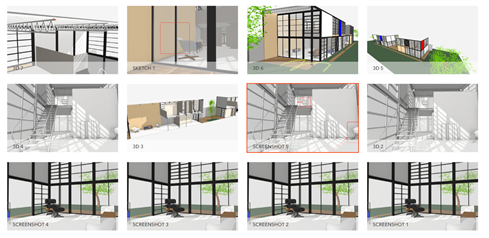
When uploading from any common CAD software, designers are used to creating different views or scenes. With Modelo, when you upload your model, your views will automatically convert into comment cards for a more structured viewing. Think of this as a 3D PowerPoint presentation. From there you can easily pan through your different cards and make it very easy to communicate your vision to your clients.

You can also create additional comment cards in Modelo to ensure you have all your viewpoints set and ready to present to your clients or team members. If you are in the later stages of your design, comment cards are also a tool to attach your renderings and share them. This gives the ability to showcase your 3D as well as your renderings all in one place. Once you have attached your renderings, click the present button and use your keyboard arrows keys to scroll through your comment cards and improve your presentation capabilities.

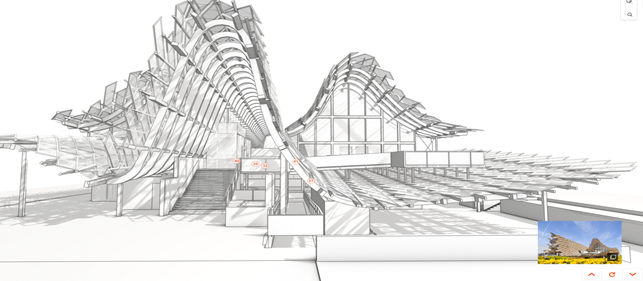
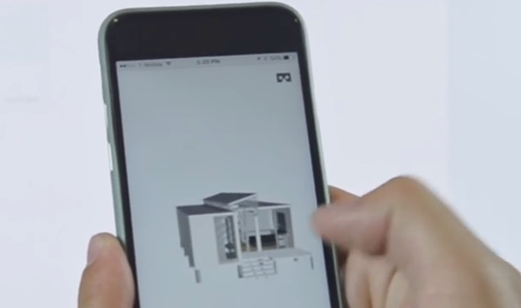
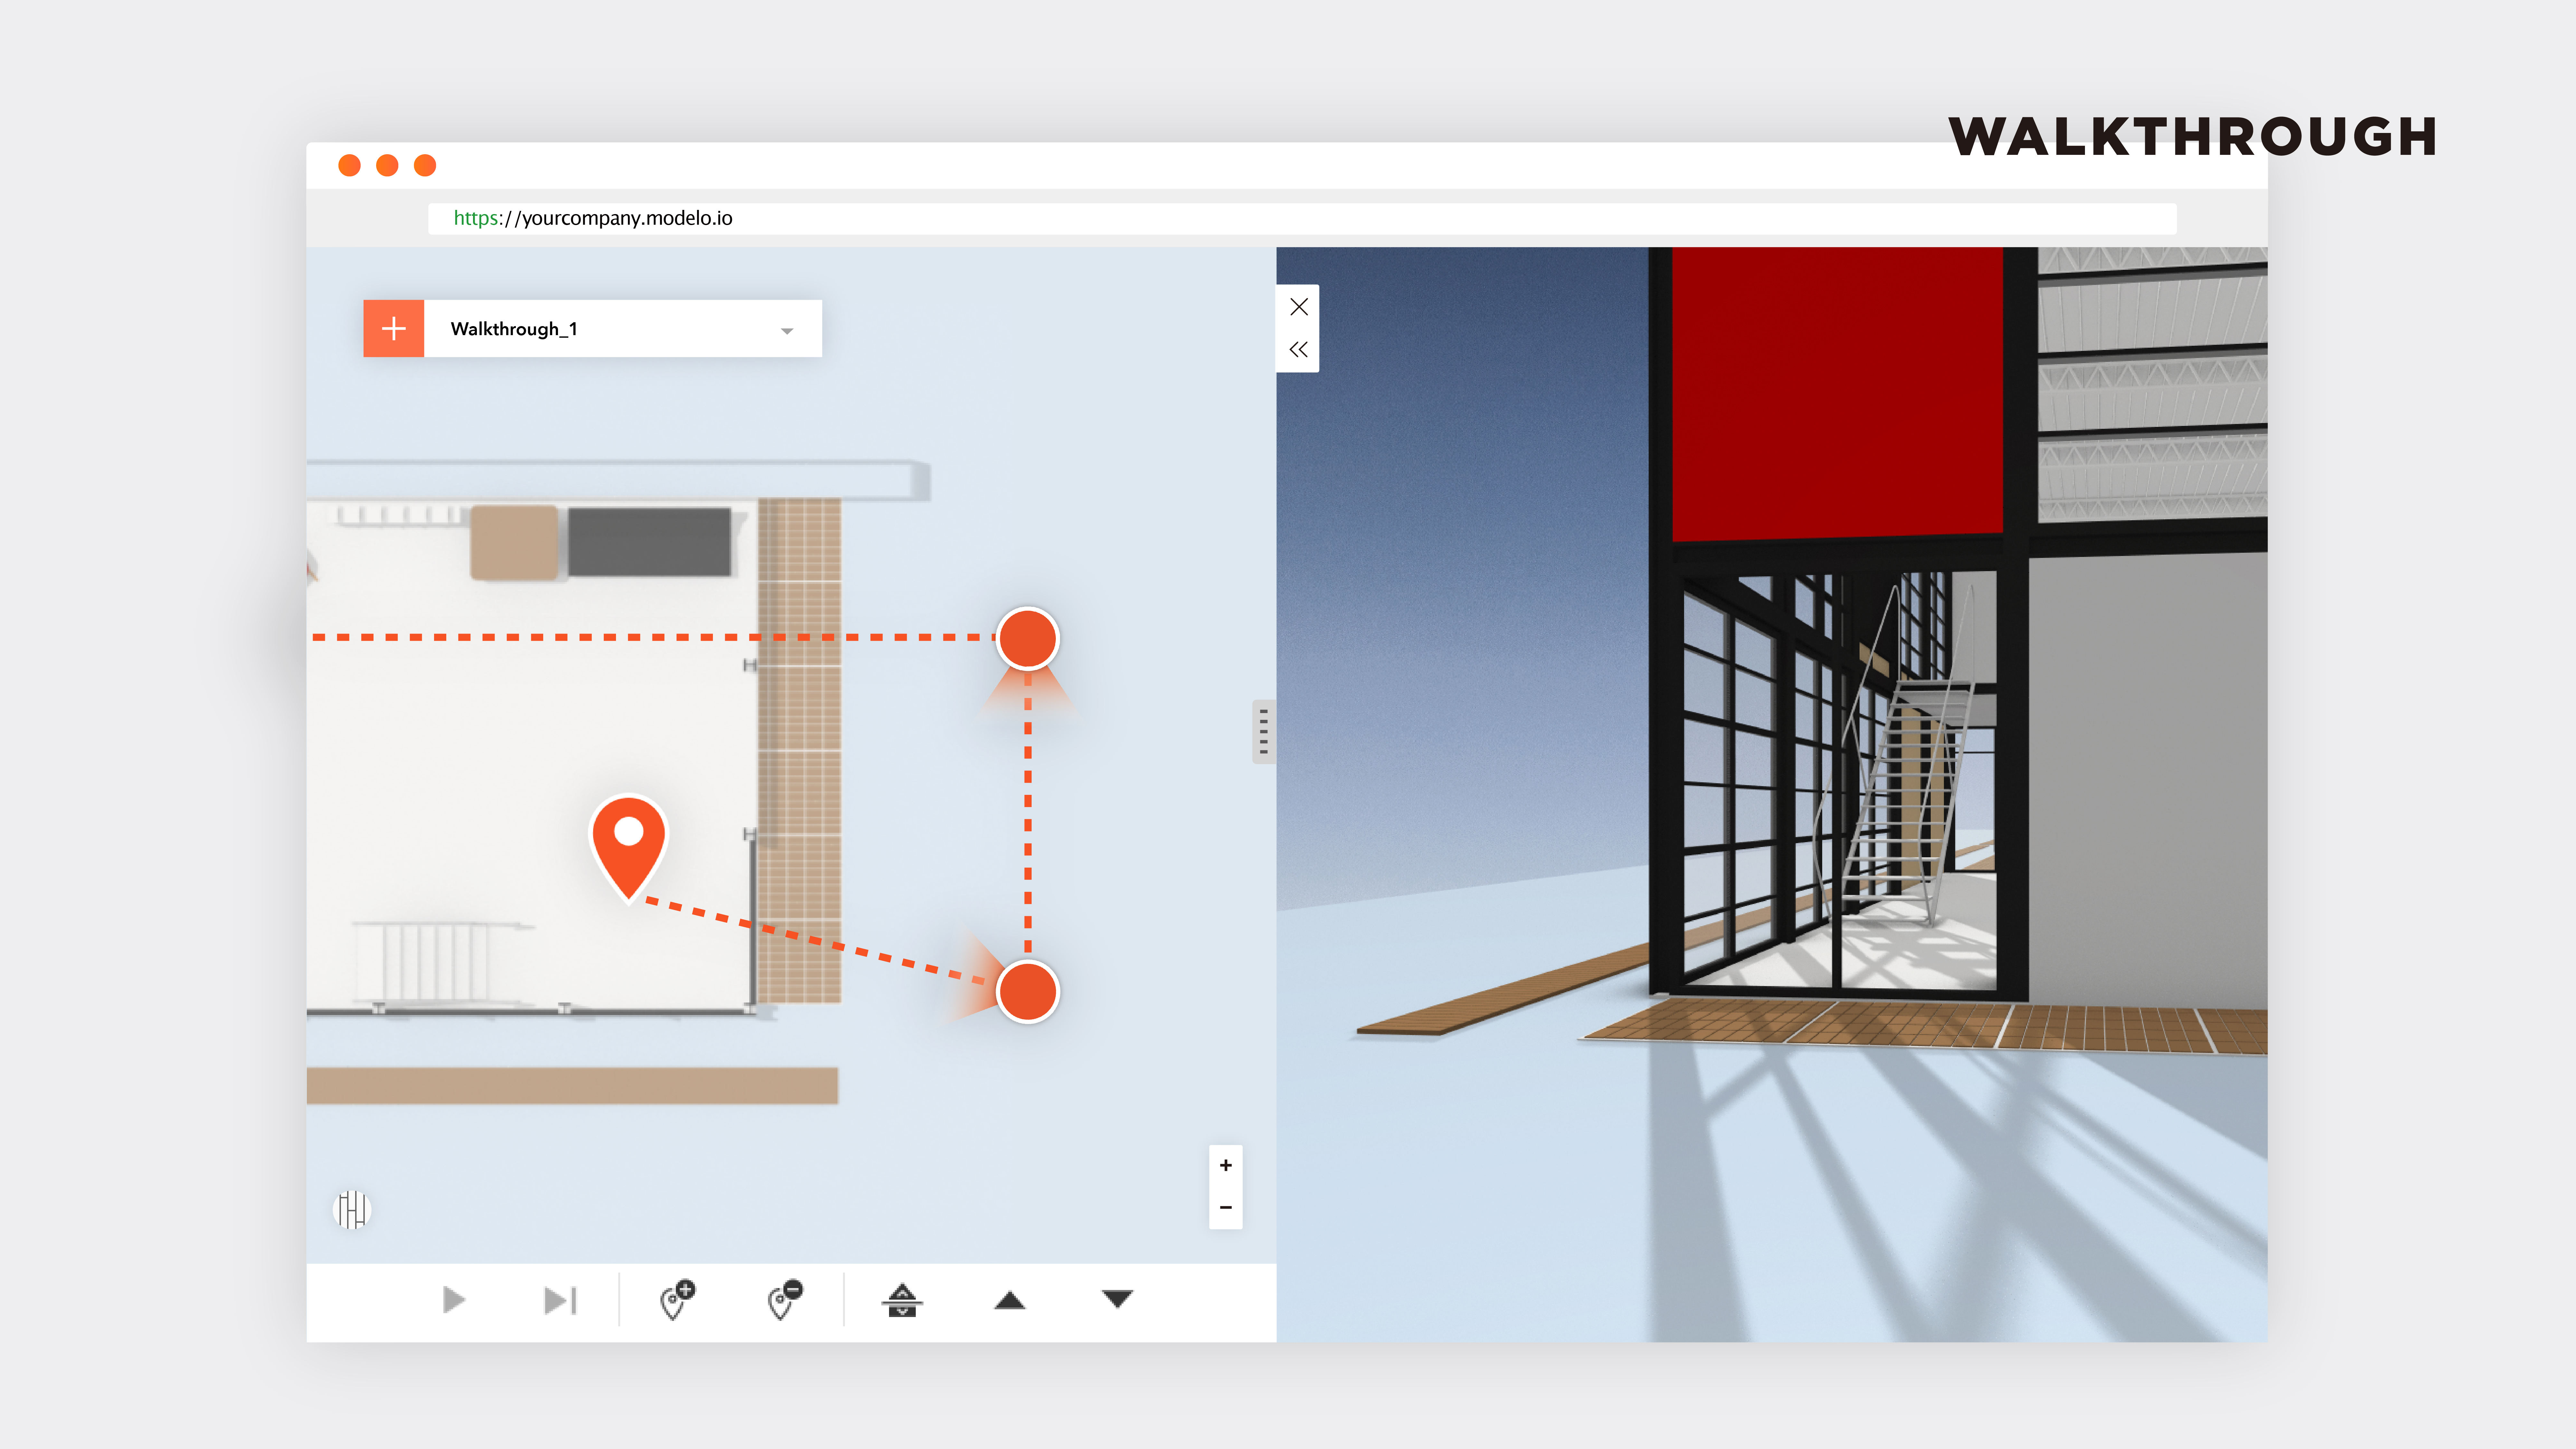
Walkthrough your designs in VR with comment cards
When you create comment cards to collaborate or present, these cards also double as the scenes in your VR walkthrough. Simply open Modelo on your phone, grab a Google Cardboard and explore your design in Virtual Reality in only seconds.

Increase efficiency in your design review process
As we see more and more Modelo customers using comment cards, we have noticed a huge increase in them being used for collaborating with team members during design review stages. Now there’s no need to attach images and type out paragraphs to explain what you are looking to get feedback on. Simply jump into Modelo, create your comment cards and in real-time, from any device allow your team members to mark-up and collaborate in real-time.

Using comment cards is the most productive and efficient way to allow team members to markup and review your designs. This allows you to keep all communication in one place and truly speed up your design review process.

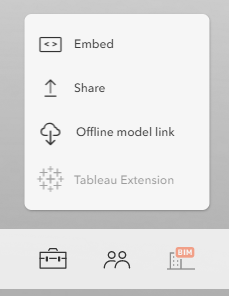
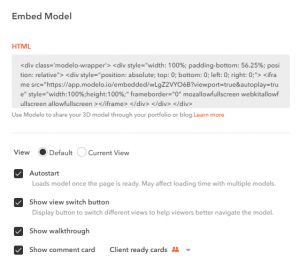
As we wait to see how the next 50,000 Comment cards will be used, we encourage you to get creative and see how comment cards can work for you and your team. Try sending comment cards to team members for feedback or assign tasks right from there as well. Make your Comment cards ‘client ready’ and share your design with a simple URL. Or enhance your presentation skills and really wow your clients by attaching renderings and 360 panorama images to a comment card and with one click of a button communicate your vision. Getting started is just a click away.

Real-time Architectural Plug-in for Revit | Modelo

In this post, we will explain the value of the real-time architectural plug-in for Revit in Modelo. The Modelo Revit exporter plug-in enables the user working in Revit to upload any 3D model they have open directly into a specified project and folder in Modelo within seconds. All of your materials associated with the 3D model such as project assets, views, scenes, layers and textures automatically upload into Modelo faster than anything else in the market, in a very seamless way.

At its core, Revit is designed for modeling, which is an individual behavior. The software is not meant for communication, collaboration, storage, management, or anything else besides 3D modeling. This type of behavior does not apply to the full start-to-finish collaborative process that makes up the design process.

Which brings us to ask the question, how do you like viewing 3D models in Revit? Do you ever feel the pain of waiting several minutes for your Revit model to load? Do you feel the pain of waiting as you spin your large model? What are the possibilities if you, as a designer, could spend less time waiting for a model to load and more time focusing on design? Why spend valuable time waiting when you can easily use Modelo to view your 3D model?

Modelo consolidates your file to the point where it is easily loaded and runs faster than any other software in the market. With the time it takes to load and view your 3D model in Revit, you and your team could have made 10 comments, dropped a few waypoints to create an animated walkthrough, marked-up the design, and emailed a URL link of one of your views with your client. All of this work and feedback is shared automatically in real-time to your team.

Modelo can be used at all stages of the design process. Say you are working on a 50-story building and you have the first story done in Revit. The typical process is to print that out, pin the views on the wall, call the team over and mark it up. Now you can export that first floor file with all the views to your team to then be commented on from anywhere, whether it be at their desk, from their phone or on an iPad. Feedback is delivered in a much faster way through the communication aspect of Modelo.

By using the Modelo Revit plug-in you automatically improve efficiency, improve your workflow, save time, and gain business innovation. From a Principal’s standpoint, what would this mean for your ROI? From a Designer’s standpoint, what would having more time to design and collaborate mean for the quality of your work? With Modelo you have unlimited possibilities. Upload your model from Revit to Modelo today and create a FREE forever account!

Collaborate on 3D Files and Store Files in One Secure Location with Modelo

In Part I of the cloud collaboration mini-series, we discussed how to review and markup BIM and CAD files collaboratively, and in Part II we discussed how to keep all design review feedback organized. Now, in Part III we will finish off the series by discussing how professionals can collaborate on 3D files and store files in one secure location with Modelo.

File storage is a crucial component of any professional’s daily workflow. It’s no wonder that architects, designers, real estate agents and builders all use different types of documents, renderings, photographs and model files to communicate their vision. This means that different collaborators will use different platforms to collaborate on 3D files and store files, making room for misunderstandings throughout several stages of the design process.

File storage should be secure, convenient and accessible on all devices. Most importantly, if you’re looking for something it should be easy to find it, right? Instead of searching for files, have the confidence to know exactly where they are with Modelo.

What if there was an easier way to not only collaborate on 3D files online, but also to store 2D files along side 3D designs, such as panorama images, floor plans or renderings in one location? Enter Modelo’s Assets Folder. The Assets Folder is your new design sidekick because it’s extremely intuitive and convenient. Modelo is compatible with all file types, including .OBJ, .GIF, .PDF, or .PNG to name a few. You can even sketch on 2D assets right from your browser.

Collaboration in the cloud makes it easy for project stakeholders to access all valuable information in an all-encompassing platform that replaces the need for Dropbox or WeTransfer. Modelo gives you the confidence to store important documents, 3D models and all other project assets in one reliable location. Put simply, stay organized and be productive. Try it out for yourself and sign up for a FREE account today!

File Optimization Tips For Uploading small size file to Modelo

One of the most hilarious moments in my work as a designer was when I was in a BIM coordination meeting via video conference with my structural engineer and project manager. We were on a discussion to verify the clearance above a ramp and the PM said “let me zoom into the Revit model and find out.” We watched him via screen share, taking each step of tedious mouse movement so painfully inside a gigantic Revit file: spin – zoom in – rotate – zoom in – pan – zoom out.

In the meantime, I did a quick calculation in my head and we used this estimate to continue the conversation. After maybe 10 or 15 minutes, when we were already on a different topic, I heard the PM on the other end yell “Got it! It’s 4.3 meters!” It was a very delayed response and it made everyone on the call burst into laughter. In short, Revit has become such a powerful tool in every stage of design and construction with the all powerful features added to the program, however speed is sacrificed.

At Modelo, our engineers have come up with an ultra-powerful convertor while retaining a stunning graphic quality. Our converter can convert a 300mb Rhino file down to 30mb without losing any geometric data or texture quality. This sophisticated process of optimization lets our users spin models in 3D faster and smoothly in a web-browser, without the need to even install anything. Large files that can barely move in Rhino or Revit can be smoothly manipulated in Modelo. It means no more waiting around for a large file to move, and rather to let your meetings be efficient and focused.

What’s more, Modelo converts your file in the background so you don’t need to prep your file differently before the upload. I want to share some tips with you to allow you to get your file to the smallest size possible.

  1. If your model is in Rhino or SketchUp, keep the original file format, Modelo has native support for Rhino and SketchUp files. Files can be optimized better than if you export them to .obj or other formats.
  2. Mesh your Rhino model. Use comment “Mesh” to convert all geometries to Rhino meshes. Delete everything else that is not mesh.
  3. Reduce the number of layers. (the fewer the better)
  4. No redundant texture maps. For example, duplicated materials or materials with different names but share same bitmap. Use as few textures as possible.
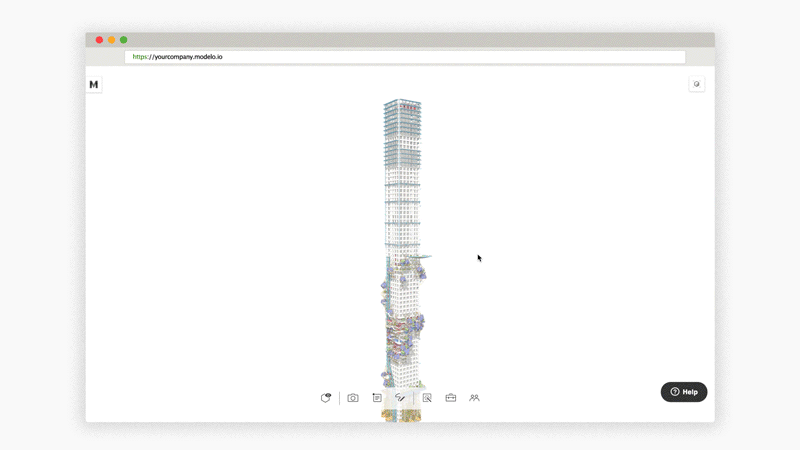
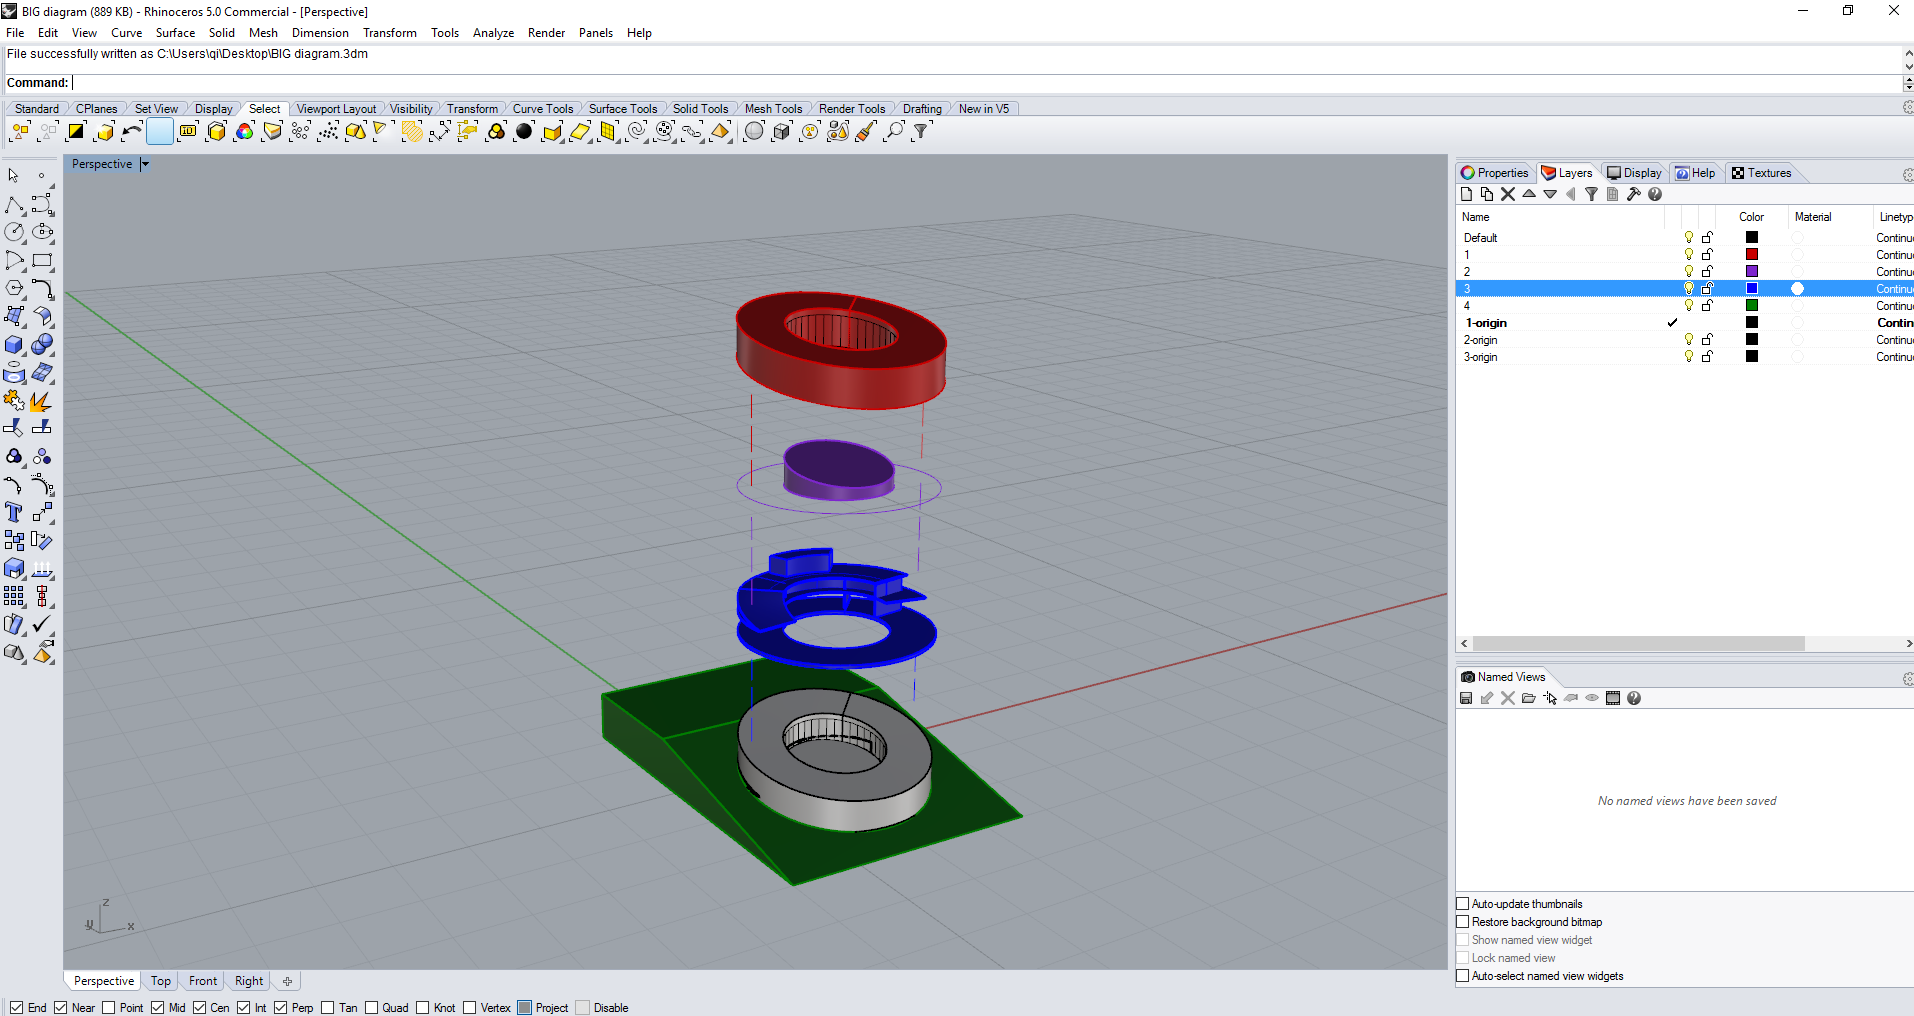
Ultimately, we can to reduce a 700mb Rhino file down to 100mb, and it loads quicker and smoother in Modelo. I hope these tips help get you started on your journey in Modelo!

Present 3D Models Confidently with Offline Mode at Modelo

Present 3D Models Confidently with Offline Mode

Creating beautiful and engaging presentations on 3D CAD models is one of our specialties here at Modelo, so naturally we have spoken to many firms throughout the AEC industry about their presentation processes. From the conversations we have had, there is a clear theme that executing successful presentations, especially in 3D environments, is one of the most challenging aspects of design.

At Modelo, we created and are constantly evolving our presentation features based on an understanding of the common challenges associated with presenting 3D CAD designs (Top 5 things architects can do to improve client presentations). One issue that thwarted many of our clients presentations before joining Modelo was simply unreliable Internet connection.

The design community would agree that there is nothing more frustrating than spending hours compiling a 3D presentation only to be embarrassed by the inability to connect. It can also be debilitating for designers to not be able to present their 3D models on the fly from any device at any time. We created our unique Offline Mode with these specific challenges in mind.

Offline Mode allows users to give full presentations on 3D models offline. Presentations no longer have to be scary events that take days of preparation, are susceptible to technical error, and ultimately fail to communicate the vision of the designers. With our Offline Mode, your 3D models will be ready to view at a rendering speed 45 times than that of your CAD software with the ability to incorporate walkthroughs, views, and attachments. This can all happen from any device at any time, regardless of an Internet connection.

Modelo’s Offline Mode is a perfect way to ensure that your presentation will roll out as planned. It is also ideal for collaboration and presentation between designers and clients who are regularly on the move and need a versatile way collaborate on designs. Welcome to the future of presenting 3D models. This is a paid feature for Business Plan customers. To learn more, contact us at hi@modelo.io. 

How Modelo Can Help Your Organization Make More Money

An ongoing problem that has forever pained the AEC industry centers around the question, how can AEC organizations land more projects? The follow-up questions tend to pivot around how to strengthen client communication and client engagement earlier in order to build client relationships, reduce the margin of error in illustrating a client’s vision, and ultimately improve the overall first presentation. This all in the hopes of rising to the top and standing out among your competition to be awarded the all elusive design contract and receive that letter of intent.

As architects, there is nothing more important than early dialogue and active engagement with your client during the bidding process. AEC organizations must understand their client aspirations, their needs, and design a place that fits into those needs. With Modelo, client project communication throughout the entire design is centered in a web-based platform with clients and team members alike, accessible through any mobile device.

Modelo allows the client to very easily be immersed in a design and truly feel what that space is. It allows for the client to explore parts of the design at their own pace and at their own leisure. Client feedback is easily given in real-time and viewed by the entire project design team, allowing clients to engage from the beginning, rapport to be built stronger than ever before, and for interactive 3D architectural presentations to be delivered smoothly and directly in line with client expectations.

3D interactive presentations in the browser with Modelo

In presentation preparation, architects have to anticipate what the client is most interested in and spend a lot of time delineating the issues the architect thinks is important which usually leads to a prescribed fly through, the animation is run by the architect but can’t really deviate from that because CAD programs like Rhino, Revit, and SketchUp are very tedious to navigate and too time-consuming to change on the fly. If the client asks to see a view that isn’t prepared then you will be out of luck and the presentation will suffer.

By using Modelo, in seconds you will be able to create that special view the client requests during the meeting keeping he presentation flowing forward. In comparison, Modelo is very user-friendly which allows new 3D walkthroughs, views, and screenshots to be made in seconds, giving your clients presentations the most flexibility of any program currently on the market.

Simply put, Modelo improves your chances to win new clients and new projects by promoting enhanced client communication in the early stages which in turn builds rapport, as well as delivering beautiful initial design presentations. Having a leg up on your competition in the way you communicate and engage your client leads to a closer client relationship, a design in closer alignment with the client’s vision, and a clearer presentation which meets and surpasses expectations.

When put to use with Modelo, this simple formula will lead to an improved chance to win projects in a given year; Modelo = more projects = more money. Modelo’s originally unique and effective way to communicate and engage with clients is entirely new to the AEC industry and changing the standards for how companies engage their clients. The only way to truly understand is to sign up to Modelo for yourself, upload a model, and dive in to the software to familiarize yourself with the product.

Instantly Transfer 3D Files With Ease Using Modelo

Still using WeTransfer or Hightail? Try Modelo’s model sharing tool with quick preview.

Did you ever have to share a model for someone else to open it? Uploading and downloading may seem easy enough with WeTransfer, Hightail, Dropbox or Google drive, but do you ever wonder what your file looked like while waiting for it to be downloaded?

Sharing is even quicker and more intuitive to use in Modelo. When you have the model in Modelo, all you need to do is to click the share button and enter your recipient’s email.

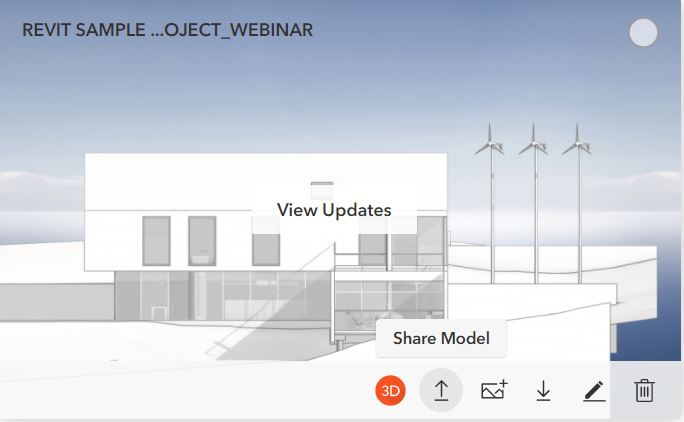
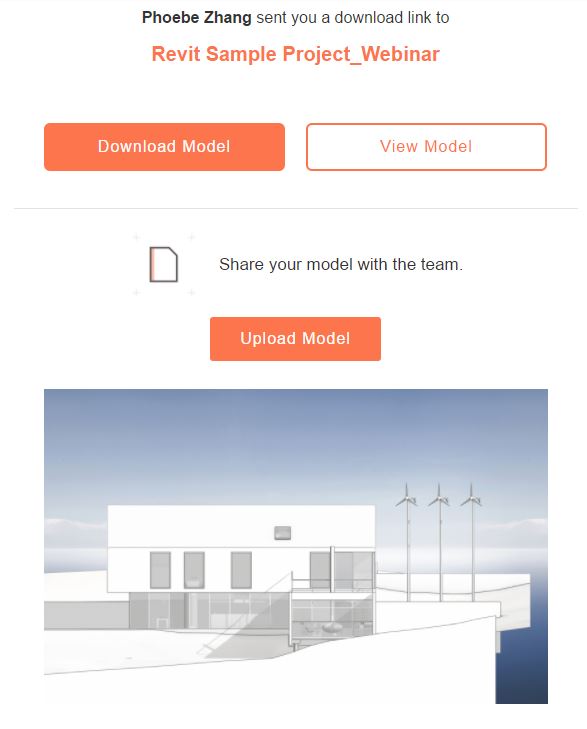
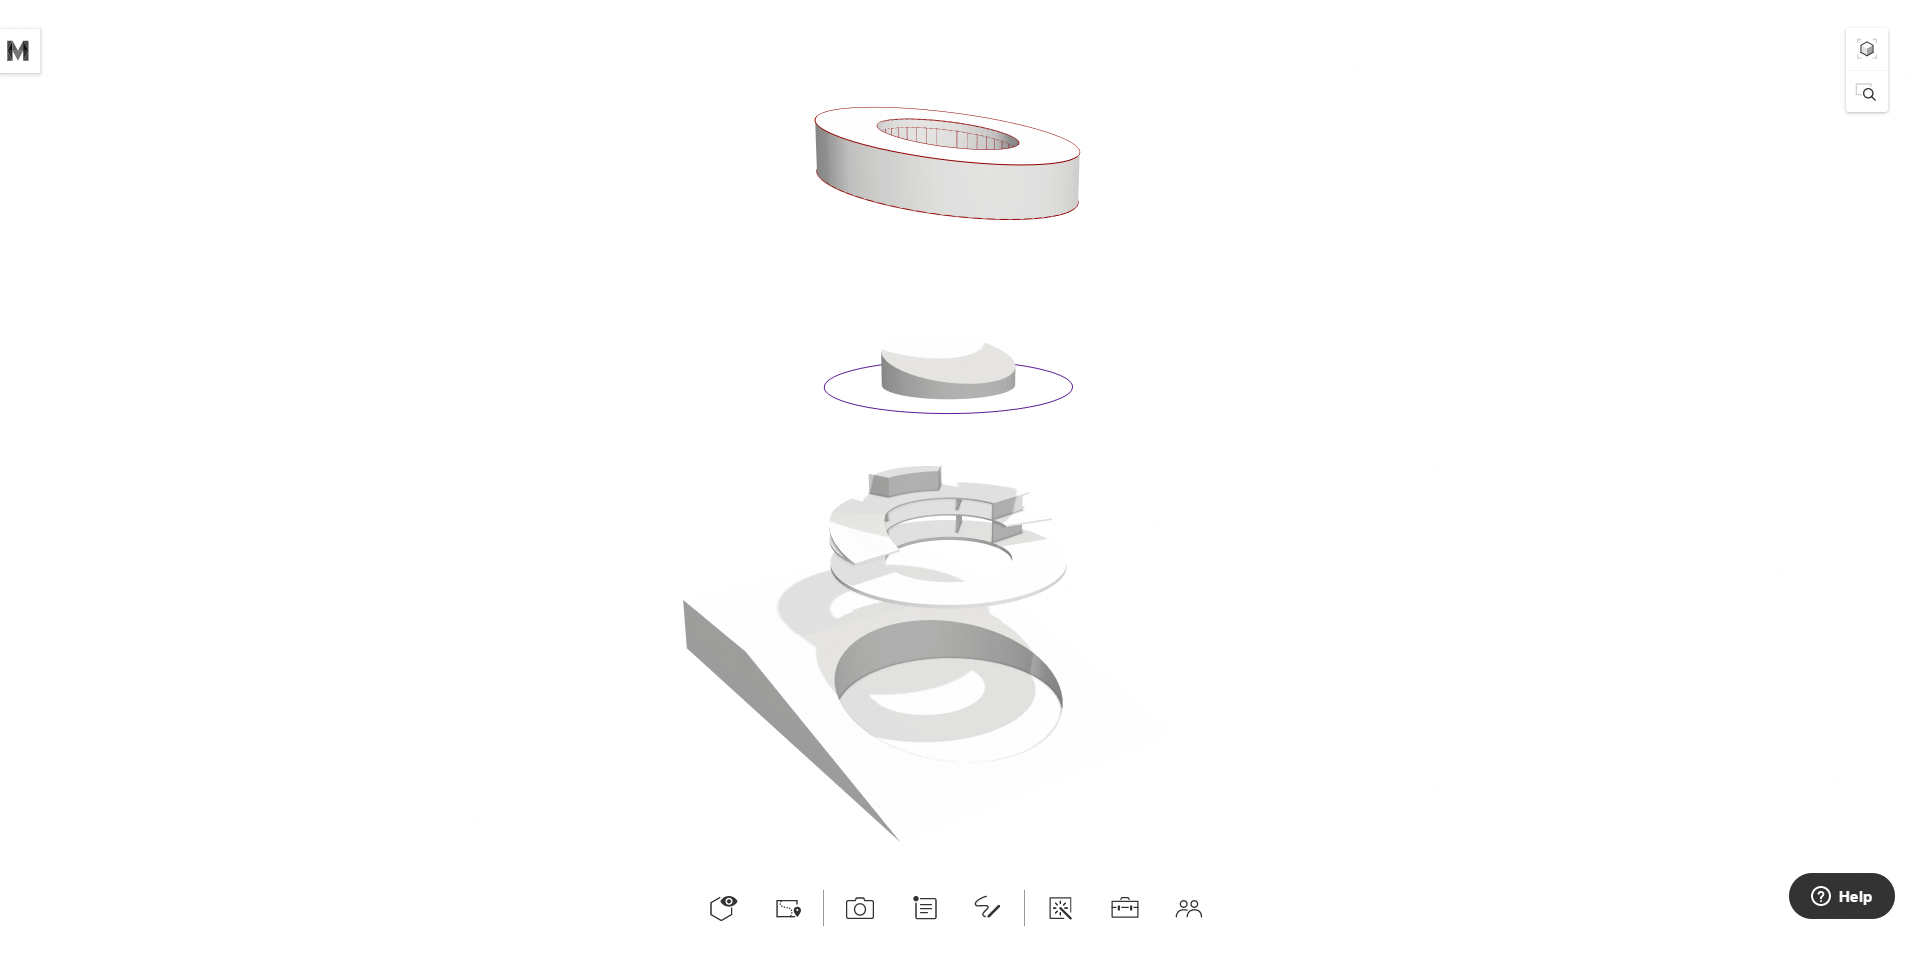
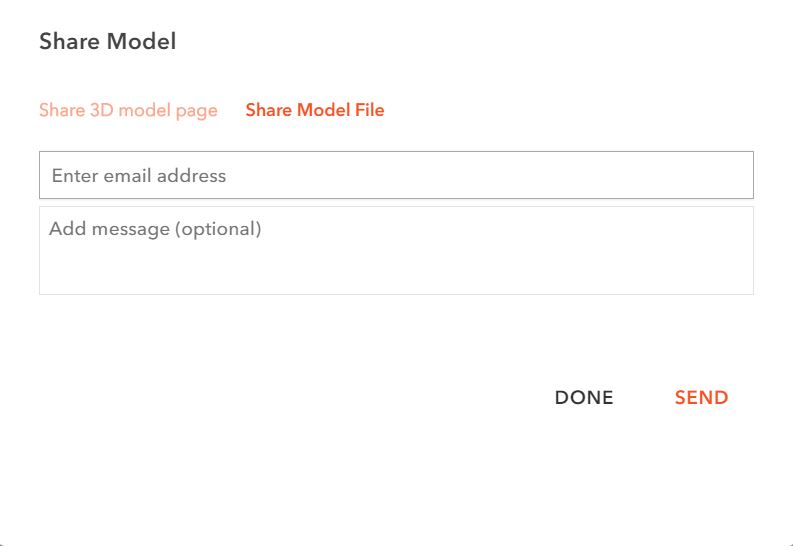
Your recipient will instantly get an email to download. In the email, there is a button to download and a button to view. You can preview the model in 3D while waiting for it be downloaded.

The “View Model” button will lead you into a webpage where you can spin around in the model without opening any modeling applications, and without the need to install anything. A thumbnail image will also be included in the email for quick impression. No more waiting around and you can also view in your phone as well!

After you downloaded the model and made necessary edits in the file, you can uploaded the new model back into the folder by clicking “Upload Model” in the original emails. Now all the revisions and versions of the same model are securely organized in one place. You and your collaborators can access the same files at any time and on any device.

How to Keep All Design Review Feedback Organized | Modelo

In part one of “what does collaboration in the cloud mean,” we discussed how to review BIM files collaboratively. In part two, we’ll dive into how to keep all of your design review feedback organized by utilizing comment cards and even assigning tasks to colleagues in real-time.

Design review feedback is one of the most valuable pieces of a project’s direction and goals. Getting clear design review feedback is good, but being able to then store all of that design review feedback in one organized location is even better. Introducing Modelo’s comment cards.

With 3D comment cards, users are able to comment on any area of their 3D model (once uploaded to Modelo), and then add their feedback directly on the comment card. What’s more, project collaborators can then @mention each other in real-time to make sure their message is being delivered to the correct person.

No longer will feedback be a drawn out, confusing process, but rather a straightforward and positive experience with Modelo. Project collaborators can even take screenshots and create sketches to then save and share with other stakeholders to ensure the correct message is being passed along to the appropriate contact.

Make cloud collaboration a priority and effortlessly keep design review feedback organized. Watch more in the video below and impress your colleagues by signing up to Modelo and collaborating on 3D files in-the-cloud today.

How to Create BIG(Bjarke Ingels Group) Style Diagrams by Using Modelo

create a Bjarke Ingels Group style diagram in 3D in Modelo

As a former architectural designer myself, it’s common to always get attracted to these “we-don’t-know-what-to-call-them” style diagrams. One of the firms that produces such drawings is BIG (Bjarke Ingels Group). Below is an example of how you can create BIG style drawings in Modelo:

Example of a complex BIG drawing

How to create a BIG style diagram in Modelo in 3D
Here is the diagram animated in Modelo

Part of the reason my Co-founder and I founded Modelo is that we wanted to save the time involved to generate these time-consuming renderings, drawings, and diagrams. I remember I used to spend hours back and forth between Rhino+Vray and Illustrator to achieve such visual effects. Thus, we started to rethink about what we can do to establish a standard visual style that’s appealing enough to be used in presentations and design reviews and easy enough so that we can focus on design, not overlay Make2D lines on top of a white Vray renderings in Illustrator. Introducing ArchitectEffect. (We’ve put together a Pinterest board for such drawings, if you are interested in contributing to this board, please contact us).

In this post, I will show you how to easily create BIG inspired diagrams in Modelo. 

First, because I don’t have the model of this diagram, I created a simplified version of it. Below is how it looks in Rhino. I separated the four different components (site-4, building body-3, inner courtyard-2 and building envelope-1) and put each of them into a unique layer so that we can easily turn them on and off in Modelo. 

Creating a BIG style diagram in Rhino for Modelo

Now if we upload this BIG inspired model to Modelo, it looks like this:

Simplified version of BIG style Diagram created in Modelo

From here, you want to open up the setting panel, turn on the ArchitectEffect, adjust the Pen Detail which controls the amount of outline that gets rendered in the scene. Adjust the Ink Contrast so that all curves have a unified color. Then turn off the shadow (since there is no shadow in the example diagram, but you can keep them on depending upon your needs) and adjust the lighting direction. After all the adjustments, click Update to save this setting as the default.

Create BIG style diagrams in Modelo and adjust settings

Now if we take a look at this model, it gets the outlines and some ambient occlusion, but not as apparent as that in the example diagram.

Update model in Modelo to make sure scale is correct

The issue is I made this model based on my assumption of the scale of a museum, as you can see from above, the sites’s width is around 90 meters. However, because the model is oversimplified, it doesn’t have the same level of geometrical complexity as BIG’s model does. And since our ambient occlusion is calculated based on real units, this model is basically too big for the AO to show up nicely. So I scaled the model down by 90%. Here is the result:

Simplified version of BIG style diagram in Modelo

You can tell the areas around the intersection of geometries are darker, and it’s pretty close to what the BIG diagram looks like. Note, the AO will look even nicer with a more detailed model. Here is a side by side comparison with BIG’s diagram, not bad, huh?

Comparison of BIG style diagram created in Modelo and BIG diagram

Now you know how to use Modelo’s ArchitectEffect to generate a BIG inspired diagram drawing. In addition, since everything in Modelo is interactive, we can explore further options. I went back to Rhino and created several more layers, like this:

Adding layers to BIG style diagram in Rhino to upload to Modelo

These new layers have the identical geometries from layer 1, 2 and 3. But are located where the building components are supposed to be. Now with this setup, after I upload the model to Modelo, I will have more layer configuration options. So I did a quick four-step setup in Modelo:

Then I selected a right camera view of my model and under each setting, I added a new 3D view:

With all these set up, I can then simply use the present option to achieve an animated diagram by circling through these four comment cards.

Below is how it looks in Modelo, try spinning the model around or zooming in.

BIG diagram By Qi Su Modelo »

After seeing how simple it is to create a BIG inspired diagram in Modelo, give it a try. Get started by creating an account today.

Embedding 3D models into your website with Modelo. Learn how to embed today!

Embedding 3D models into your website with Modelo. Learn how to embed today!

Eames house By Modelo Modelo »

So you want to show off your 3D modeling skills… Well, we want to help you! Embedding your 3D Revit, Rhino, SketchUp, 3DS Max or Vectorworks model into your blog or portfolio website using a small piece of code we provide through Modelo. This small snippet of code creates what is called an “iframe” (an inline frame of html, embedded within a website). If the blogging tool you use supports iframes, then you should be in luck. Now onto the embedding!

1. View your Model in the 3D viewer


Once you upload your model, navigate to the 3D view page, which looks like the screenshot above.

2. Click the Share icon and select “Embed”

From here it’s easy. Click the share icon at the far right of the toolbar and select the “Embed” option. This will open an Embed Options popup, which provides you with your html code for the iframe.

3. Choose your Embed options

Let’s look at each of the elements in the image above individually:
    • Embed code: This is the text you will copy and paste into your blog or website’s HTML. Click the text once to select it, copy it, then paste it into your site. (We’ve included some helpful links to iframe how-to for some of the most popular blogging sites below)
    • Size: This sets the size of the embedded model. The default is 640 x 360 – experiment with this to find the best fit for your purposes and the format of your website’s content. Pro-tip: you can adjust the width to 100% in order to have an adaptive window.
    • View: Default / Current View allows you to set the angle or perspective of the model when it loads on your site. Selecting Default will display the model in your embedded viewer as you see it when you first open it in Modelo. If you have a particular angle you want the model to be displayed at when it loads, cancel the Embed, rotate the model to your preferred position, and then select Embed and toggle to “Current View”
    • Autostart: Automatically loads the model on your site so that a user can immediately begin it. Keeping Autostart turned off will display a preview of your model with a Play button superimposed on top. If you are planning to embed a number of models on a single page, you should consider keeping Autostart turned off, otherwise, the load times could slow down significantly.
    • Autospin: The embedded model rotates slowly around the center when the model starts to display. If you drag to view the model, the autospin will pause a few seconds. Then it will continue when the users stop operating.
    • Show view switch button: In the top right corner, a small cube is displayed. Hovering over this cube pops out three different perspective views that allow your visitors to quickly change angles of view between: Top/Bottom, Front/Back, Left/Right and Default.
    • Hide Tools: When clicked this option, the toolbox will not show in the embedded models. Pro tips: if you don’t want customers to see the dimensions and the model inside. You prefer to check this box.
    • Show comment card: 3D comment card is another powerful feature of Modelo, you could use them to organize and showcase different design options, layer configurations, camera angles, as well as annotating in 3D. Check this tutorial out for more information:
    • Show walkthrough: You could easily create a walkthrough in Modelo interface, so when your website’s visitors see the model, they could simply click the play button to experience your 3D space like they are in it. The walkthrough option will only show when the ” Show comment card ” is clicked. Check this tutorial out for more information:

  • Show comment card: 3D comment card is another powerful feature of Modelo, you could use them to organize and showcase different design options, layer configurations, camera angles, as well as annotating in 3D. Check this tutorial out for more information:


4. Copy and Paste your Embed iframe html

With your Embed settings selected from Step 3 copy the iframe text (which will change slightly based on your preferred settings). Switch to the page in your blog or website in which you want to embed, select the embed option and paste!

Here’s what it would like in Squarespace (for example):

Embedding_3D_models_into_your_website_with_Modelo_—_Modelo_Blog.png

First add a block and select the “Embed” option outlined here in red, then paste your copied iframe html code into the box.

Keep in mind: You will probably need to play around with the settings a bit and explore the embed support options within your own publishing platform.

Here are some links to helpful support pages for a few different publication platforms:

Next tip: learn how to customize your settings in Modelo before you share with clients or colleagues here.