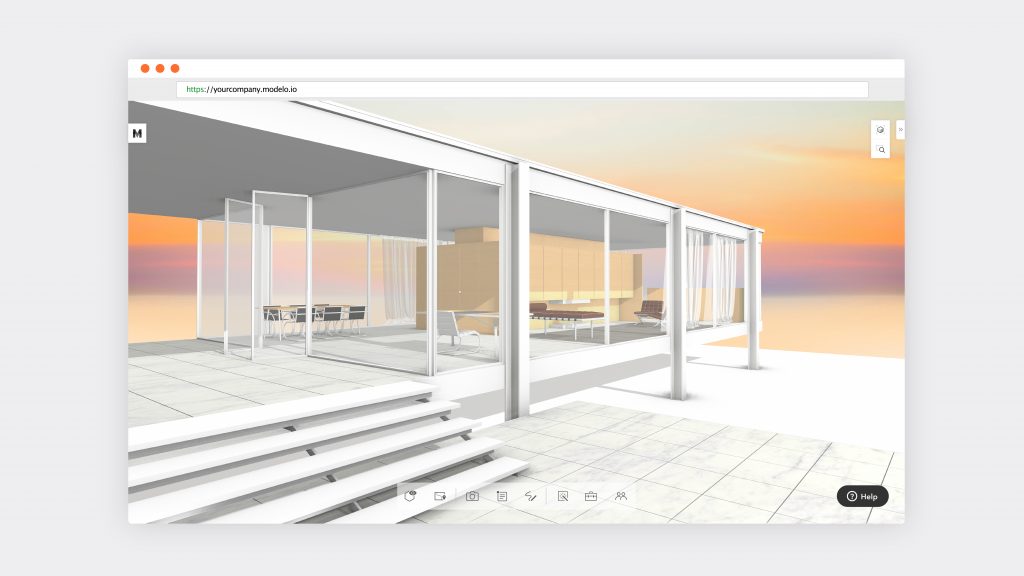
Using Layers in Modelo to Prepare Alternate Design Options

Every design project begins with the foundation of an idea, and slowly builds up to a final product. That build up process requires the creativity, dedication, and unique skill set of each design member. At Modelo, we dedicate our time to perfecting our backend technology, so that you get to enjoy the beautiful and intuitive results on the front end. With our background being rooted in design, and our customer success team being focused on obtaining feedback and improving the product, we’ve been able to create an incredible (and ever-adapting) product that makes working in design fun and elegant.

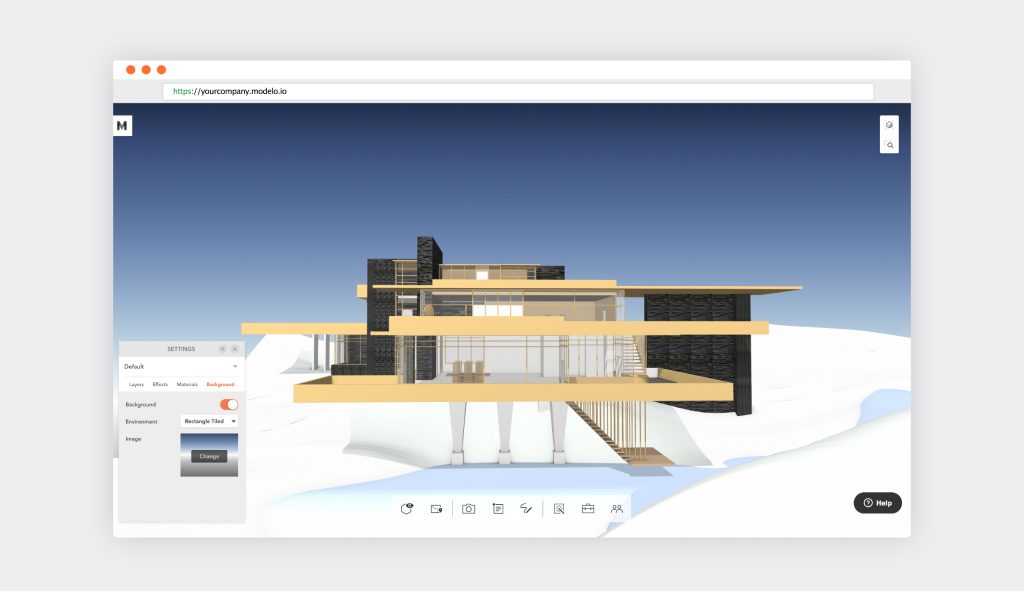
One of the key features we’ve integrated into Modelo is the ‘Layers’ feature. This allows you to easily turn layers on and off within your model, to make sure you’re seeing exactly and only what you need to. This is how easy it is to toggle layers in Modelo on and off and how to use that view to move your design discussion forward in the right direction.

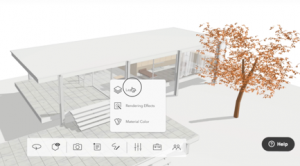
  1. Open your model in Modelo, then scroll over the ‘Settings’ icon in your menu bar. Click on the ‘Layers’ option.
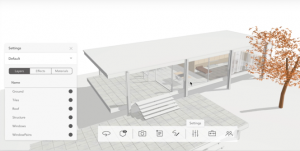
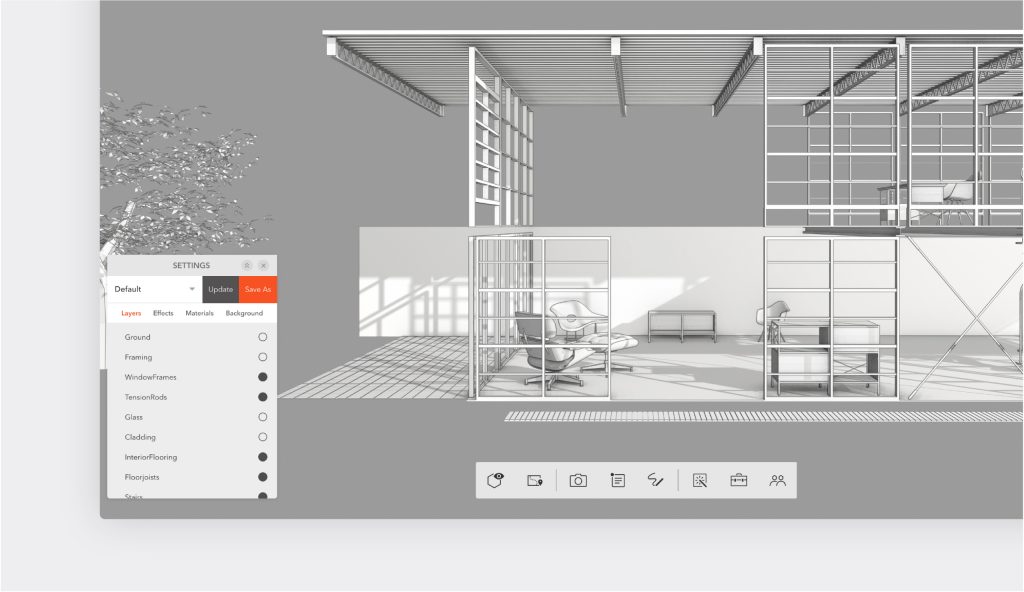
  2. Here, you’ll find all of your model’s layers, which automatically integrate with Modelo when you upload. (Pro tip:  in your CAD software, organize your layers the way you want them to appear in Modelo. How you set them in your software, is how they’ll appear in Modelo)
    How to turn layers on and off in Modelo
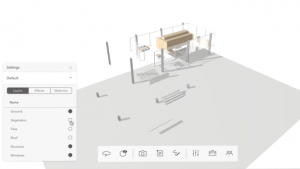
  3. Turn the layers off and on, to tailor your model to its specific needs. Do this by clicking the circles ‘on’ or ‘off’.Select different layers to create various design options
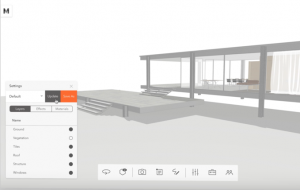
  4. After you’ve made your desired changes, you have two options. Click ‘Update’ to make your new settings the default, or click ‘Save As’ to make it a new design option. This allows you to switch between the original design option, and the new one, by clicking the dropdown (next to ‘Update’ and ‘Save As’) and selecting your desired option.
    Save toggled layers in Modelo

Modelo aims to provide the best possible design asset management tool for designers, and the ‘layers’ function is just one of many powerful features that we offer for you and your team. To learn about these other features, check out our other product related blog posts.

The Ultimate Guide for Creating Interactive 360º Tours with Modelo

360º tours are the most immersive way to present your unbuilt designs in the correct context. By involving clients, contractors, or other stakeholders in the design review process earlier, all parties can be more involved, making it easier for you as a refined designer to make tweaks sooner rather than later.

We’ve outlined the ultimate guide for creating 360º tours that will take you through step-by-step on how to use Modelo’s new 360º tour feature for both presentation and design review purposes.

Step 1: Creating your Project and Upload your Panorama images
To begin, create a new project in Modelo. For the purpose of creating a 360º tour, we will be focusing on the “Create 360 Tour” tab highlighted below.

For imagery requirements, panorama images can be taken using a dedicated 360º camera, like the Ricoh Theta, or by using rendering support such as Lumion or V-Ray. Then uploading them to Modelo and getting started is a breeze.

When uploading the images, you first want to create a new folder (or multiple folders) to store all your images. You can sort however you see fit- by project, by phase, or by date. Modelo is compatible with the following file formats: PNG or JPG, and we also support cube map and spherical images.

Step 2: Creating your First Hotspot
Once your images are all ready to go, you can begin creating hotspots. These hotspots will act as the tour guides throughout the 360º tour. Simply click on the “view” button and you will be taken into that panorama. You will also notice all of your other images in that folder on the bottom bar, which will help you create a consecutive path by linking to each image. Note: the current view is highlighted on the bottom bar, this is also your starting view.

To create your first hotspot, click “Add Hotspot” in the top right-hand corner. An orange dot will emerge, allowing you to place it on any point of the panorama. You can rotate the image in order to call out certain areas of the scenery, like an entrance to a building. After you place your first hotspot, you must choose the second panorama image from the bottom bar that you would like to link to.

This second image’s direction should be consistent with the first, and bring you to the next consecutive point on the tour. It’s all about the end destination and creating a guided tour that demonstrates the consistency. Keep in mind that if you’d like to go back and forth between points during your 360º tour, it’s necessary to link back to the previous image. Then repeat these steps for the next hotspots and you’re on your way to completing your first 360º tour with Modelo!

Pro tip: Make sure to save and test throughout your tour creation process.

Step 3: Playing and Sharing your 360º Tour On Any Device
Congratulations! You’ve successfully created your first 360º tour with Modelo. Now it’s time to play and share with other colleagues or clients. To play your 360º tour, simply choose your starting view by selecting the image you’d like to begin your tour with, and then click on the “Play” button.

Everything in Modelo has the ability to be shared, that’s what makes collaboration so effortless. To share your 360º tour, simply click on the “Share” button and a unique URL will be generated for you.

We get it, sometimes you need to tweak things as your designs go through different iterations. That’s why you can always edit your 360º tours and preview the shareable link before you send along to other stakeholders, so you can see what they’ll see.

Once you’re ready to go, copy and paste the URL and send it to anyone on your project via email, text, or through the medium of your choice. They can then open it up on the device of their choice- phone, tablet, or computer- and view with confidence and ease. Plus, you can embed 360º tours on your website to impress visitors and potential clients with your designs.

Step 4: Virtual Reality and Hosting your 360º Tours on Websites
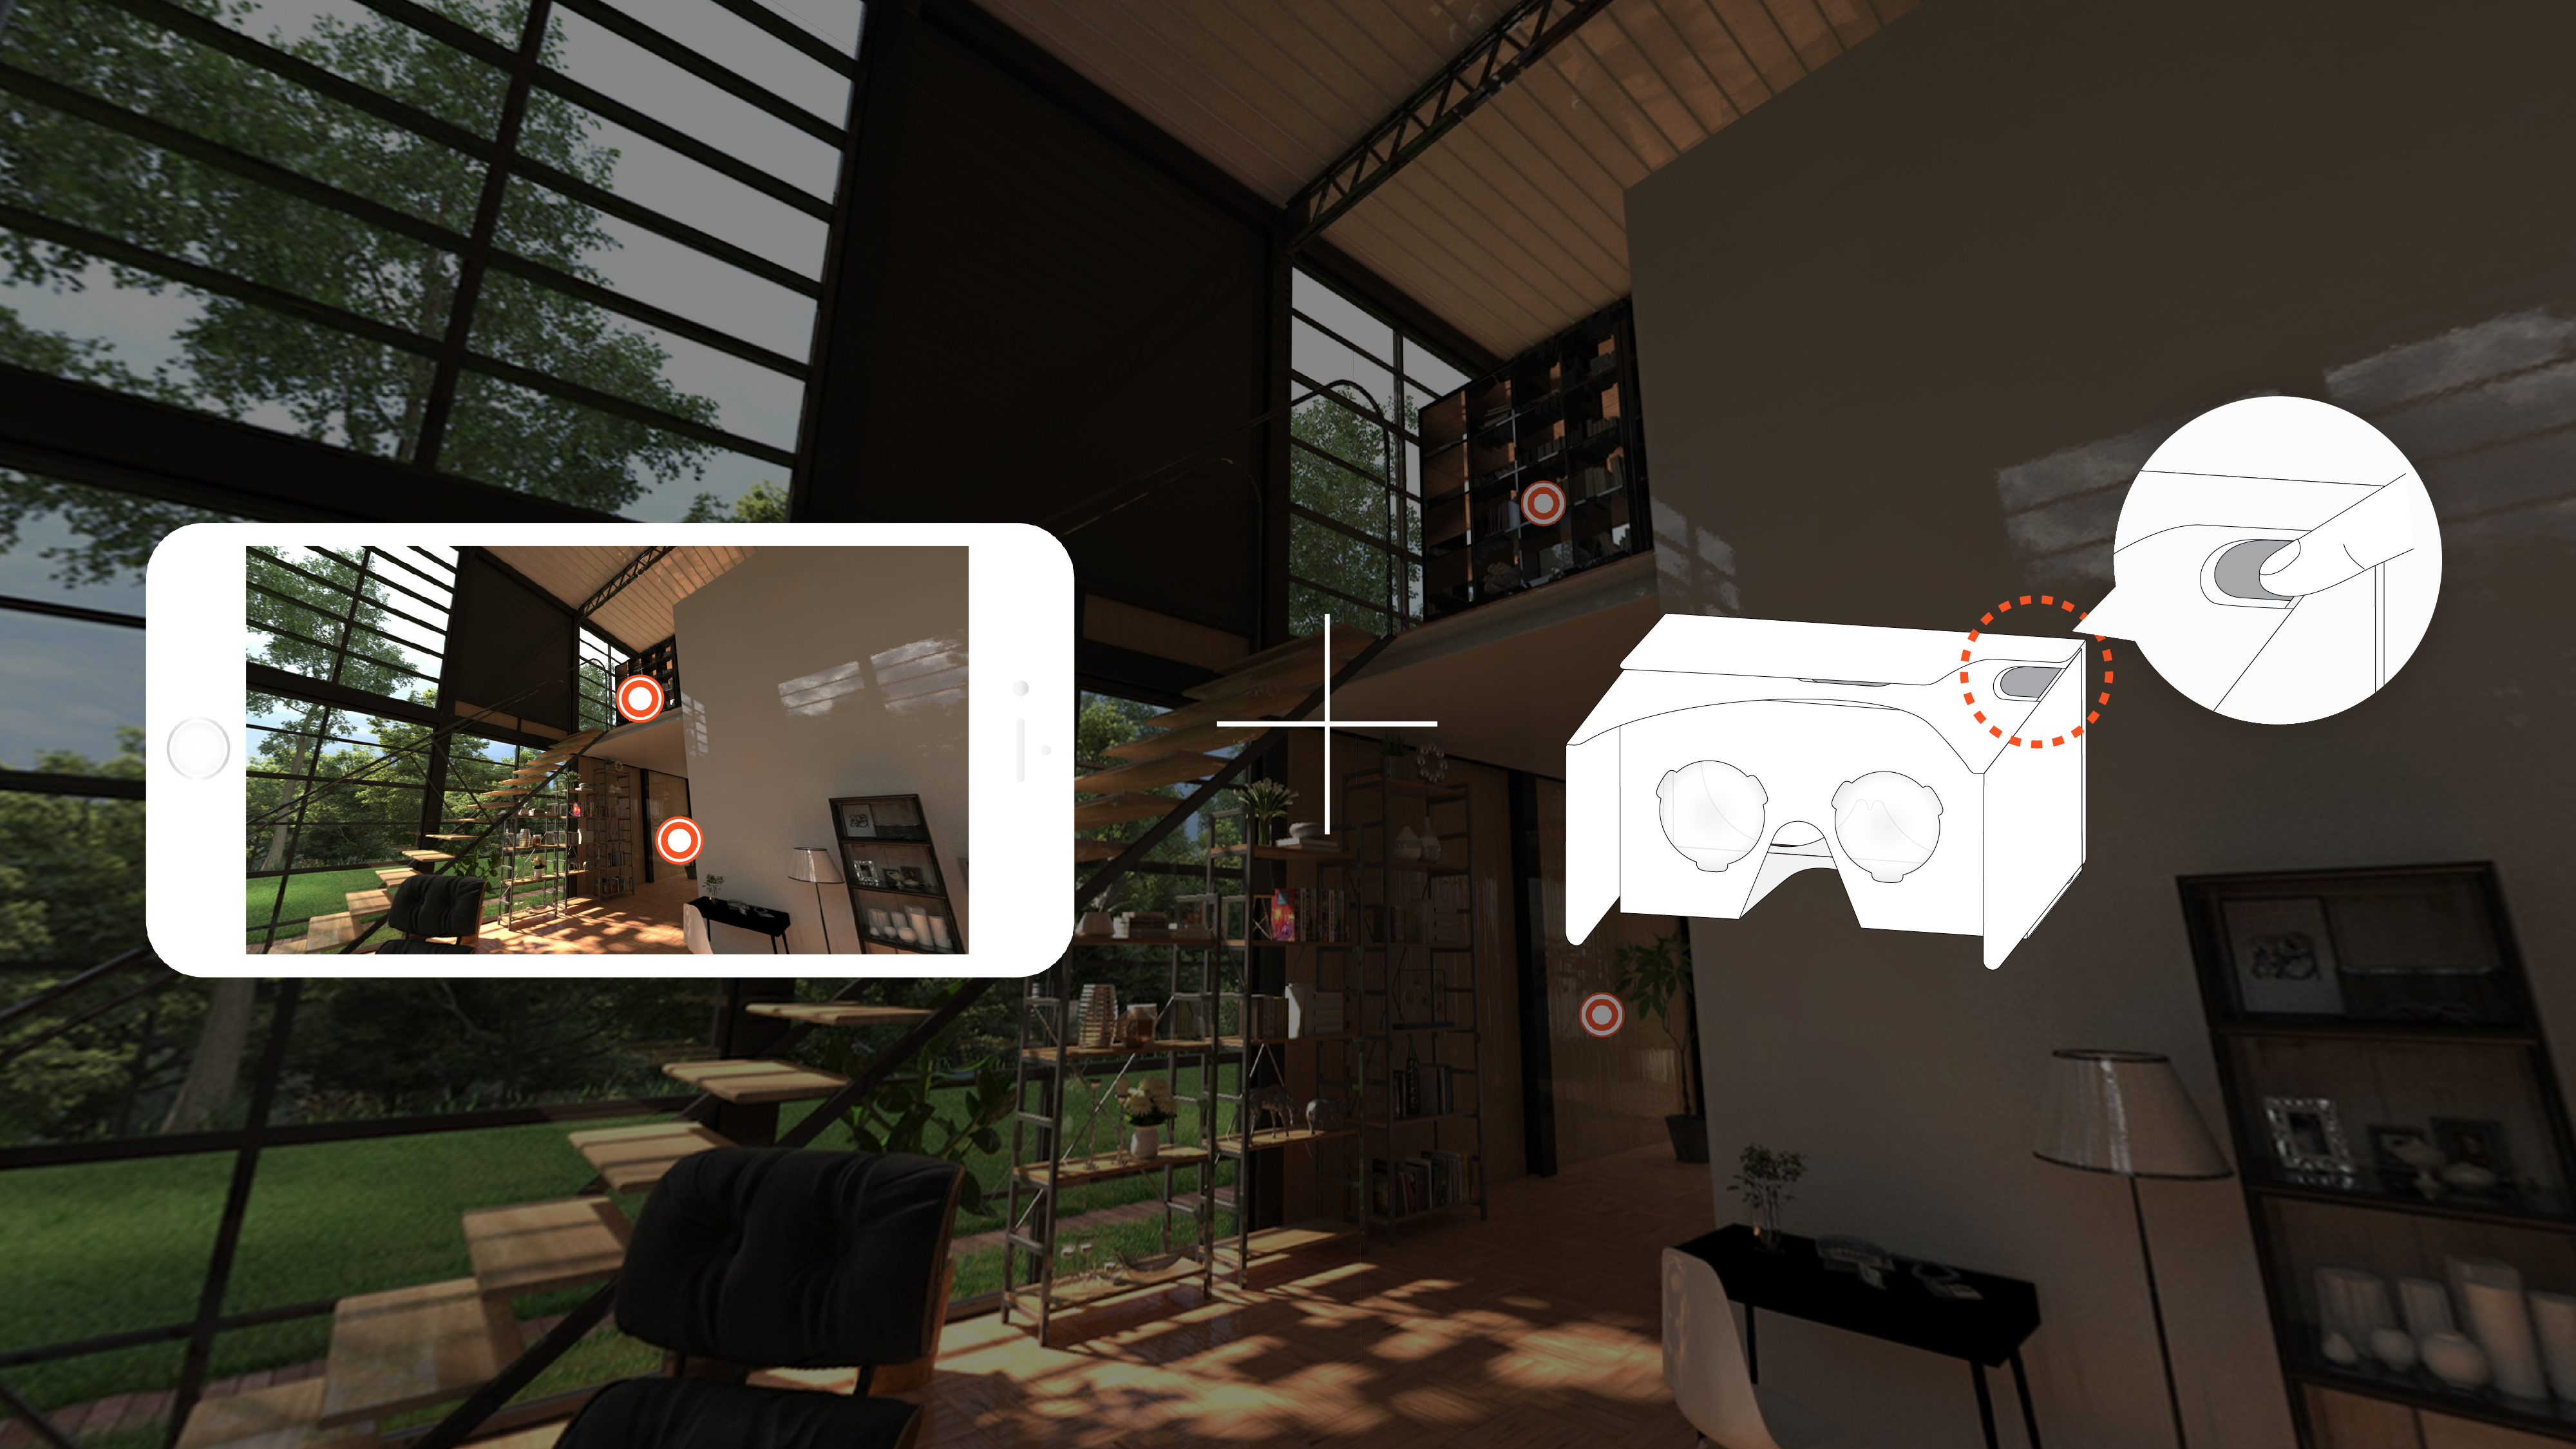
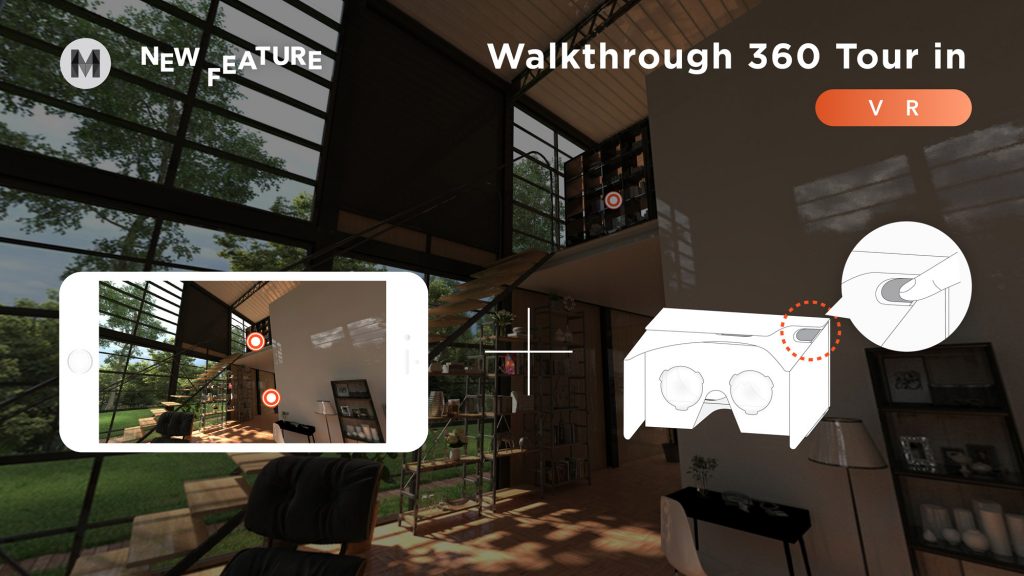
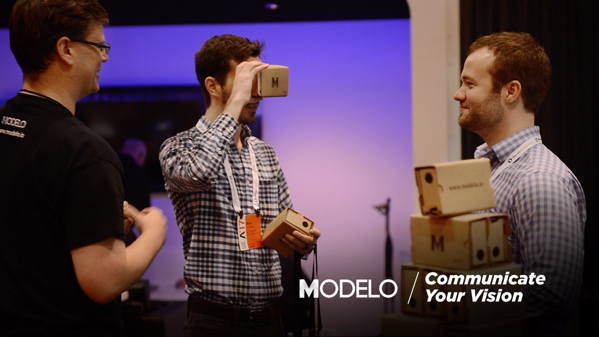
The best part about sharing designs with clients using a unique URL link is that they can slide their phone into a Google Cardboard and view the 360º tour in Virtual Reality with the click of a button. Google Cardboards are a great option for architects to implement into their design review workflows because they are inexpensive and less clunky than other VR options.

Modelo and Google Cardboard are bridging the gap and making VR accessible to non-CAD users, as well as experienced CAD users. Clients need to see 360º tours in VR because it brings a space to life, allows them to visualize and tour their building before it’s built in the right context, and makes design reviews more productive. 

To view the whole tutorial video, click here. Modelo makes it easy for you to immerse your clients, contractors, or other stakeholders in an interactive 360º Tour during design reviews and presentations. Get started on yours today!

4 Hidden Gems in Boston Changing the Future of Urban Farming

Cities are constantly bustling with visitors, residents, cars, trains and movement. Cities never sleep, but they do breathe. And cities crave green spaces to provide an oasis for healthy, urban living. Companies around the world have started implementing urban farming initiatives in densely populated areas and even on top of buildings to provide just that.

One company in particular, Green City Growers, located in Somerville, MA and has worked on urban farms and green roofs throughout the Greater Boston area. As an award-winning B Corporation, GCG’s mission is to transform unused space into thriving urban farms, providing clients with immediate access to nutritious food, while revitalizing city landscapes and inspiring self-sufficiency.

Green City Growers (GCG) has worked with both commercial and residential clients in the Greater Boston area, inspiring change and authentic living through urban agriculture. In this post, we’ll highlight some of their diverse work with Modelo’s 360º Tour tool to capture these unique landscapes and urban farms.

Fenway Farms
Success is achieved when you pair the old with the new. That’s exactly what Fenway Farms accomplishes in the heart of Boston, MA. Green City Growers worked with one of the most iconic and oldest working baseball parks in the nation, Fenway Park. GCG CEO and Founder, Jessie Banhazl, adds, “Fenway Farms is an incredible asset to not only the Red Sox, but the City of Boston. Having an innovative, productive rooftop farm on top a city historical icon validates the idea that urban farming is an important part of the fabric of our city”

It’s unarguably an iconic example of successful green spaces and as GCG Urban Farmer and Educator, Lee, comments this project is a “home run for sustainable agriculture.” Fenway Farms represents the dedication of the Boston Red Sox to promote healthy lifestyles and the importance of eating fresh food. This project features a 5,000 square foot milk crate growing system with a smart irrigation system on top of the rooftop. Fenway Farms was accomplished in partnership with Recover Green Roofs and structural engineers designed a one-of-a-kind system that can both hold the weight of the farm, as well as resist environmental pressures such as wind uplift.

Fenway Farms shared by Meghan Barrett Modelo »

Rotate image to find the orange dots, then click to continue on the tour.

Crops are chosen by the park’s chefs at the EMC Club Restaurant and Fenway Farms has been providing organically grown vegetables and fruit to the restaurant since 2015, with a collaboration between the Boston Red Sox and Fenway Park. There are two harvesting seasons in Spring and Summer, and approximately 6,000 pounds of produce is harvested each season. Crops vary depending upon the season and the chefs’ desires, but some staples in the Spring include broccoli, arugula, kale, cilantro, carrots, greens mix, spinach, lettuce mix, mint, rosemary, thyme, oregano, parsley, radish, scallions, snap peas, and strawberries. And summer harvesting usually includes beans, chard, chives, cucumbers, eggplant, hot peppers, kale, basil, mint, oregano, parsley, rosemary, thyme, scallions, strawberries, sweet peppers, sweet potatoes, tomatoes, zucchini, and flowers.

The Strega Deck, opened in 2016, provides an exclusive look at the garden and was created as a result of Fenway Farms. It is an event venue for special occasions and directly located next to the rooftop garden. Green City Growers also maintains garden beds at Strega Deck and donates all food to the community via a food rescue partner, Lovin’ Spoonfuls.

Fenway Farms shared by Meghan Barrett Modelo »

Rotate image to find the orange dots, then click to continue on the tour.

Kendall Center
Public educational gardens bring new life to urban areas that were once empty. A prime example of this is at Kendall Center in Cambridge, MA, where the area is bustling with greenery, vegetables, and flowers. Green City Growers partnered with Kendall Center to bring garden beds to the roof-deck level. This area is known for being a hub for technology leaders and innovation and is home to companies such as Google, Akamai Technologies, MIT, Novartis, The Broad Institute, Biogen, and Microsoft. Overall, this urban garden space provides a gathering area for activity, and creates a sense of community that provides inspiration through innovation.

The garden beds at Kendall are maintained by Green City Growers and open to the public, so visitors from around the world and tenants of the building can grab a book and enjoy the scenery while catching some rays on their lunch break. What’s more, they can learn about the benefits and process of urban farming from one of Green City Growers’ farmers during weekly educational sessions (on Wednesdays at 12p.m.). 

Green City Growers Urban Farmer and Educator, Anna, discusses the educational sessions a bit further by adding, “the program adapts to each group of participants, and this season the group has focused on propagation techniques, pollination, seed saving and the importance of creating and maintaining a bio diverse garden. Weekly participants tend to this garden oasis and go home with bags full of beautiful, nutritious produce grown a small rooftop plot in Kendall Square!” Plus, a portion of the produce from this program is donated to Green City Growers’ food rescue partner, Lovin’ Spoonfuls. Follow @kendallcntr on Instagram for an exclusive glimpse at the garden area.

Kendall shared by Meghan Barrett Modelo »

Rotate image to find the orange dots, then click to continue on the tour.

3rd & Binney
Collaboration is the name of the game when it comes to urban farming. At 3rd & Binney in Cambridge, MA, corporate and municipal stakeholders came together to benefit a local school. Located in a busy urban area in Cambridge (not far from Kendall Center), students from the Community Charter School of Cambridge are able to learn the basics of organic farming, planting and tending plants, soil health, harvesting, and using fresh produce in a variety of recipes, with guidance from a Green City Growers urban farmer. 3rd & Binney is a site that highlights the connection between utilizing space to connect education, farming, and community in an urban context that was not possible before. 

One of these urban famers, Anna from GCG, expands on this idea even further by elaborating on the collaboration aspect, “the 3rd & Binney garden is a true representation of community. The project is made possible through the hearts and minds of  Boston Properties, Cambridge Redevelopment Authority, CCSC and GCG, where we have collaboratively developed installation, maintenance and an education program in the midst of a bustling Cambridge street. The students of CCSC, through their Urban Agriculture Club, plan and tend the garden communities; taking care of the rich soil, learning about insects and animals in the garden, harvesting the diverse array of produce all while deepening relationships with each other.”

3rd & Binney shared by Meghan Barrett Modelo »

Rotate image to look around the space.

Independence Wharf
When the harbor, a great view, and urban farming combine, you get a completely unique space in the heart of the Seaport District in Boston, MA. Located right next to the Harborwalk is 470 Atlantic Avenue, or Independence Wharf. The Harborwalk is a huge attraction in Boston, as it is a publicly accessible wharf and walkway that provides easy access to Boston Harbor and other popular Boston attractions for miles.

Green City Growers Urban Farmer and Educator, Anna, portrays a great visual of the location, stating “it’s a unique site in that it shares great views, the garden does really well, and you have the perspective to see other green spaces and rooftops within [the] Seaport while you are up there. You’re participating in green spaces while observing other green spaces in Boston.”

On both the fourteenth floor Observation Deck and ground floor of Independence Wharf, Green City Growers maintains raised bed gardens. The observation deck is open to the public during weekday hours, which allows visitors to come and appreciate the greenery while taking in the breathtaking view of the harbor and cityscape from the fourteenth floor. Green City Growers provides hands-on education with weekly sessions (on Fridays at 12p.m.), where excited participants learn how to grow their own food in a city environment. Lastly, a portion of the produce from this program is donated to Green City Growers’ food rescue partner, Lovin’ Spoonfuls.

Independence Wharf shared by Meghan Barrett Modelo »

Rotate image to find the orange dots, then click to continue on the tour.

Conclusion
The power of urban farming lies in its accessibility and ease of implementation and learning. With educational training and environmental awareness initiatives, Green City Growers helps both businesses and individuals grow their own food and be a little bit greener. On a local, national and even global level, we can all learn something from Green City Growers: green spaces revive us and help keep our urban spaces clean, so it’s crucial to keep the momentum going to transform underutilized and unconventional spaces into flourishing oases.

Curious how we created these 360º tours?
With Modelo’s Design Asset Management (DAM) solution, users have the power to collaborate and present 3D models online, host models on their websites, sketch on and markup 2D and 3D assets, create 360º tours of panorama images, plus so much more.

When you upload a 360º image to Modelo, you have the ability to create an interactive 360º Tour using hotspots that guide viewers along the path you set for them. Then once your tour is ready to go, you can share with anyone by generating a unique URL or by generating a line of HTML code from within Modelo, and embedding these 360º Tours on your website, just like we did above.

If you want to learn more about embedding panorama tours on your website, read this blog post, or create your own 360º Tour by signing up for a free account here.

New Features from Modelo to Improve Your Workflow: October

New Modelo Features to Improve Your Workflow

Modelo’s latest release empowers your design workflow with improvements that save you time and create efficiencies for you and your clients. These intuitive improvements include easy model re-uploading, PDF present mode, embeddable panorama images, and a metric-focused project overview page.

As a reminder, these updates will be deployed at 9:00pm (EST/UTC/GMT -5) on Thursday, November 2nd, 2017. At this time, Modelo will be unavailable for up to 30 minutes.

Introducing Modelo Light!
Modelo Studio now has a new name… Modelo Light! It will remain a streamlined presentation tool for CAD users. As a reminder, with this plan, users can creative interactive 3D presentations, share them with a simple URL link, and even hide information that’s not ready to share with stakeholders.

Embed 360º Tours and View in VR
When you customize your 3D model page to include your company logo, the branding will then carry into your embedded panorama images. This allows you to host and showcase custom tours on your website or brand your projects for presentations.

What’s more, you can not only view panorama images in VR, but now you can now virtually walk through 360º tours in VR by clicking on the orange hotspots and creating immersive tours for clients, colleagues, or contractors. Learn more by creating your first 360º tour today!

Plus, even embed or share your 360 tours or 3D models on your website with your custom branding.

Re-uploading Models
Undoubtedly, models and projects go through many different phases throughout the design process. Once you’ve shared your model with a client or colleague, there is still a chance that another version is on its way. We’ve saved you the hassle of re-uploading and recreating settings or comments.

Now you can re-upload your model to include the same comments or settings, without changing the URL link that you previously sent. Meaning, your client or colleagues can still use the same URL even when there are changes being made. If that’s not efficiency at it’s finest, we don’t know what is.

Walkthrough Settings
If you made changes on your 3D model, you can now create walkthroughs that mirror either the default settings or other settings you’ve made. With the click of a button, you can change walkthrough settings, allowing you to save even more time to spend on designing.

Project Overview Page
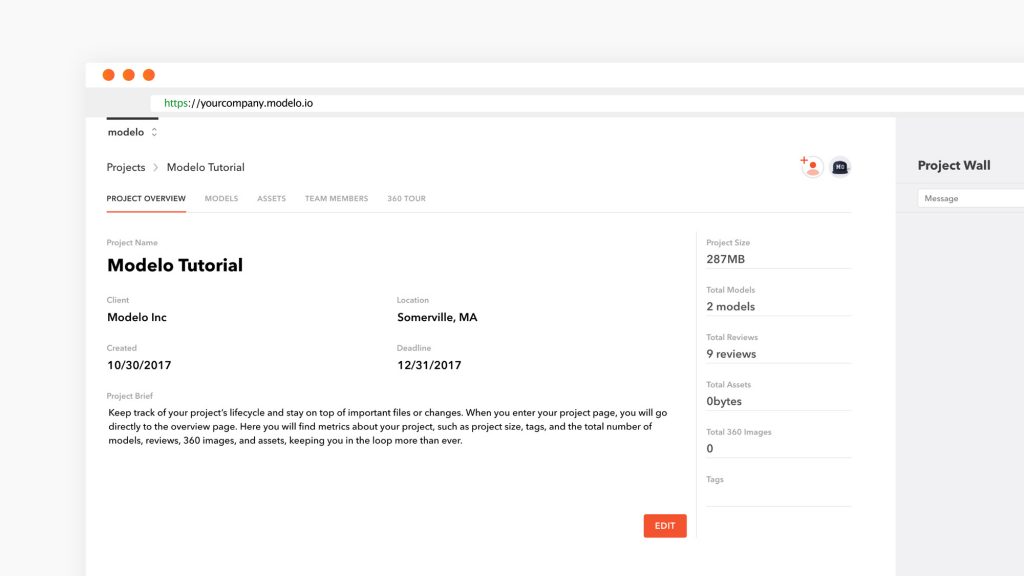
Keep track of your project’s lifecycle and stay on top of important files or changes. When you enter your project page, you will go directly to the overview page. Here you will find metrics about your project, such as project size, tags, and the total number of models, reviews, 360 images, and assets, keeping you in the loop more than ever.

PDF Present Mode
Marking up PDF files in the browser has been possible with Modelo for some time now. But what if you want to present a PDF with red lines to stakeholders during design reviews? Now Modelo’s PDF Present Mode offers a smooth interface that enables you to go full screen to focus solely on the PDF, and not be distracted by other tabs in the browser or the toolbar.

List and Grid View
View projects, models, assets and panoramas in a list or grid view, so it’s effortless to find the project that you’re looking for in the style you prefer.

Lastly, we wanted to let all of our users know that as of November 2, 2017, Modelo’s mobile apps will be retired. We apologize if this causes any inconvenience, however we’ve decided to dedicate our time and resources to focusing on successfully operating our web app for all Modelo users to enjoy.

Make Design Decisions Faster by Using VR

Virtual reality visualizations allow AEC professionals to make informed design decisions on complex 3D designs quicker, allowing you and your firm to close more deals.

When you create VR tours of your 3D models, you essentially bring your design to life. No longer are you staring at a 2D drawing or even a 3D model on a computer screen. But you and your client are virtually walking through the front door, deciding which new kitchen counters to install, examining the specs of the bathroom, and truly immersing yourself in a realistic representation of the brand new charming house your client has dreamt of all her life. Plus, add a 360º image as the background of your 3D model and surround the house with the mountain flowers of Aspen, Colorado to give the full effect. After all, seeing is believing.

It’s not a mystery that designs go through many phases, and with those phases come lots of decisions. VR allows you and your client to come to design decisions quicker and it prevents misunderstandings or costly rework down the road. By using VR as a collaboration tool throughout the design review process, everyone can be on the same page, looking at the same model in VR. Modelo encourages thoughtful and beautiful design, but above all we encourage collaborative design.

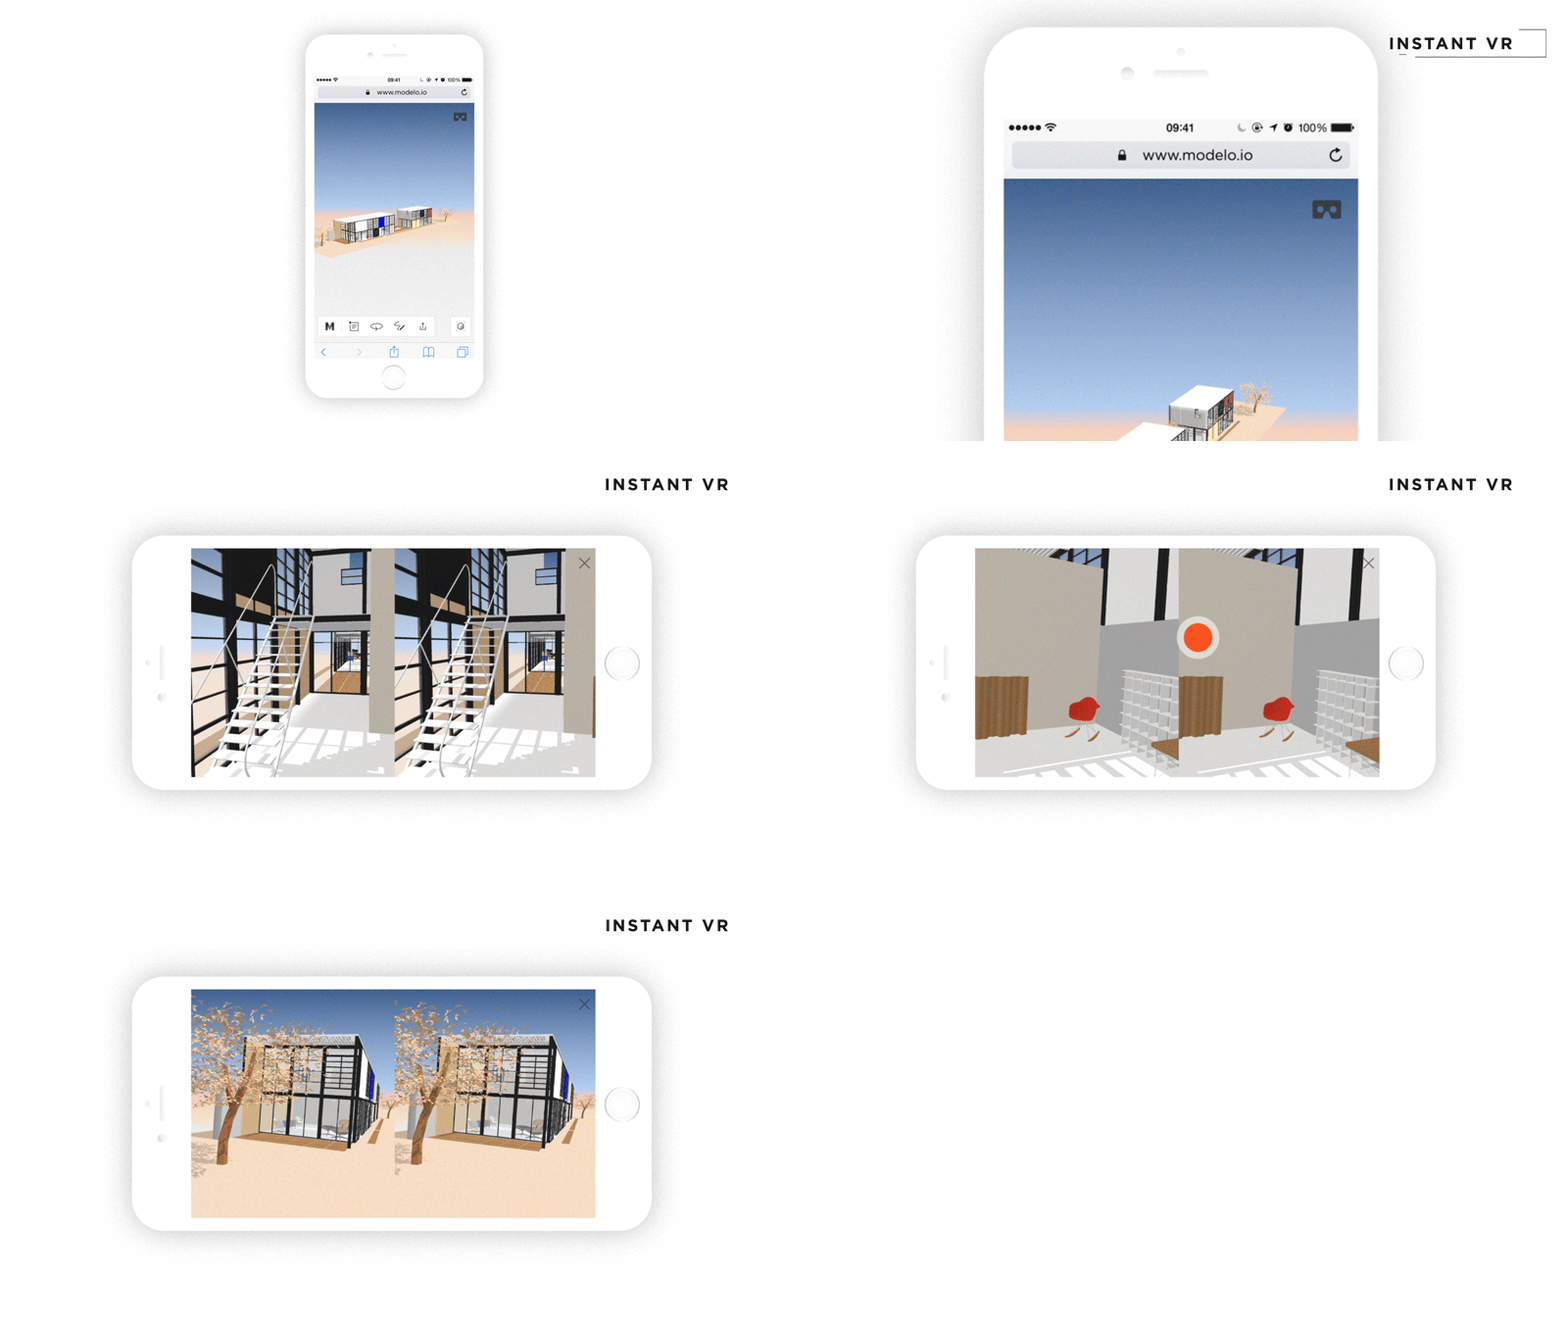
When firms use Modelo’s VR tool, they upgrade their design capabilities and decision making to the next level. Learn how Modelo works perfectly with Google Cardboard, a less expensive but equally effective VR headset that’s easy to set-up. Further, pairing Modelo + Google Cardboard is especially easy for clients to use because there are no downloads required and it’s extremely intuitive for non-designers. When clients are immersed in the project along the way, they are more involved in the decision making, meaning that it’s easier to come to necessary conclusions. A client-centered approach means closing more deals and making your organization more money.

Use Modelo to view complex 3D designs in VR.

Besides client communication, VR is especially beneficial for internal collaboration. VR helps architects and designers understand their own designs better, thus allowing them to make design decisions quicker, be more productive and win more deals.

View complex 3D designs and make informed design decisions easier by using VR and Modelo throughout the design process. Sign up today for a free forever account.

11 Ways to Be More Productive with Modelo

At times, the sheer number of software applications promising improved productivity can be overwhelming. Oftentimes, you may feel as though you spend more time evaluating software applications to improve productivity, rather than actually using them to be more productive. To avoid Modelo from falling into that trap, the team behind Modelo reached out to hundreds of Modelo users and asked them to help compile this guide. The final result is presented below for you to review and includes the top 11 ways that Modelo has been proven to deliver increased productivity.

To download this guide as a PDF eBook, click here.
Learn Modelo's toolbar with functions like comment, share and walkthrough.

Learn the Toolbar

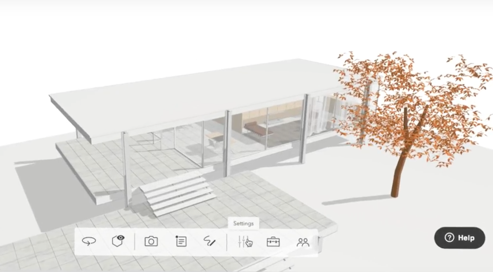
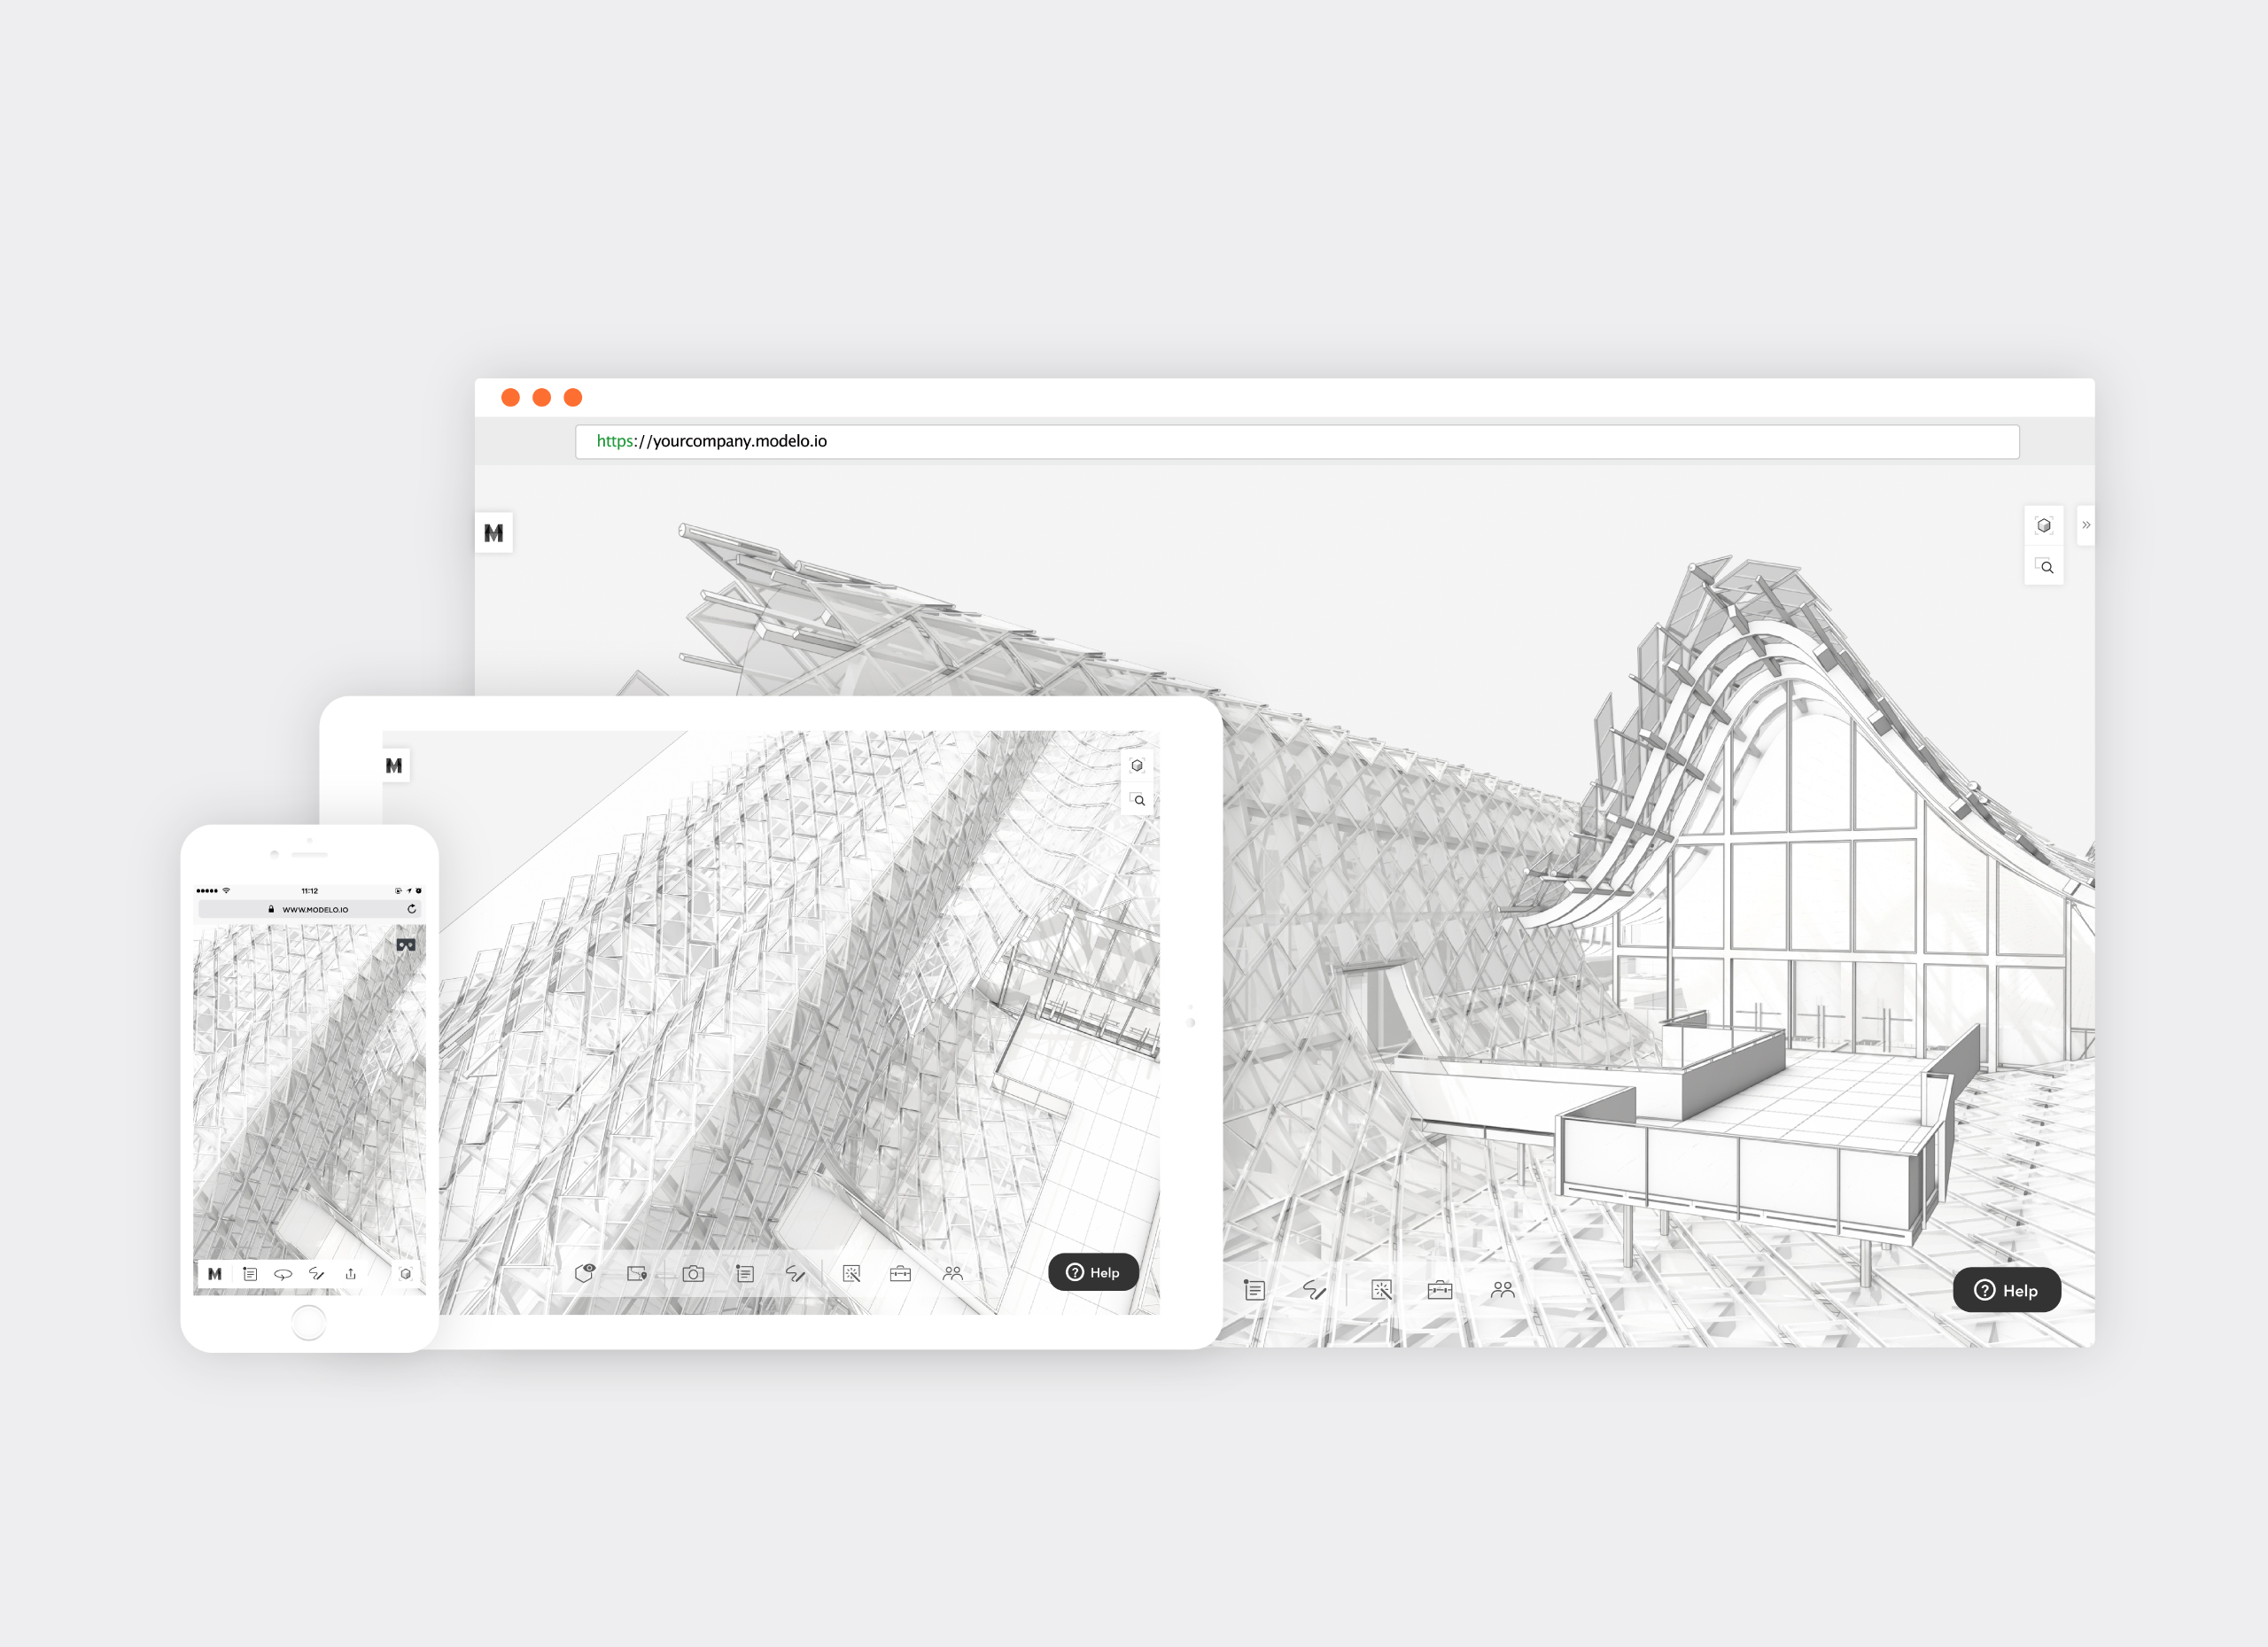
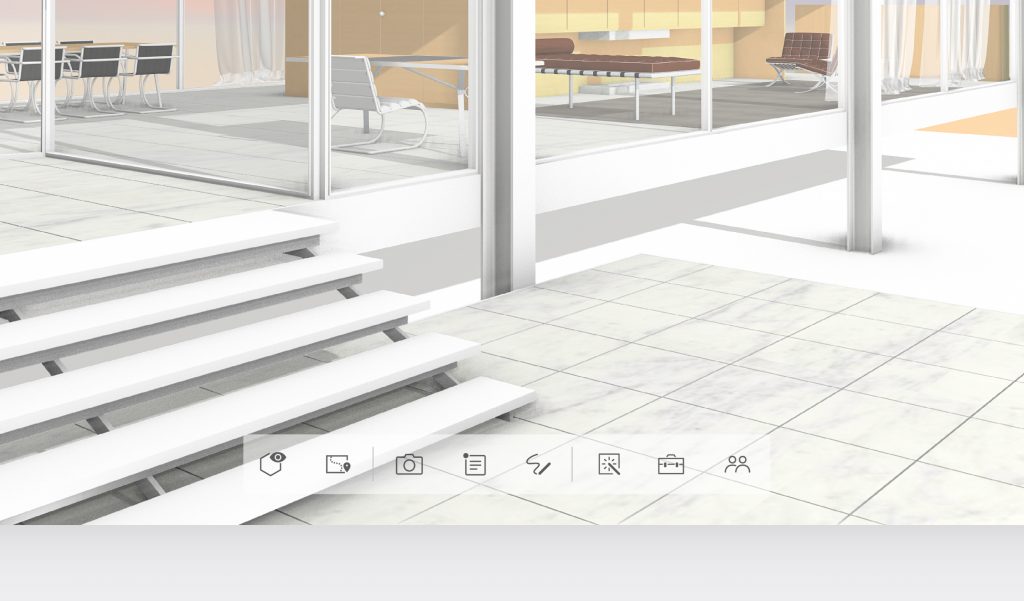
The toolbar in Modelo is the nerve center of your productivity. To make the most of Modelo, you are going to want to become familiar with, and ultimately master, the functionality it offers. As a brief summary, the icons from left to right are:

    1. Orbit View / First Person View: Toggle between viewing your designs in first person or orbital view.
    1. Walkthrough: Create a walkthrough, or flythrough, of your design by dropping waypoints along your desired path. For a comprehensive explanation on how to create a walkthrough in Modelo, click here.
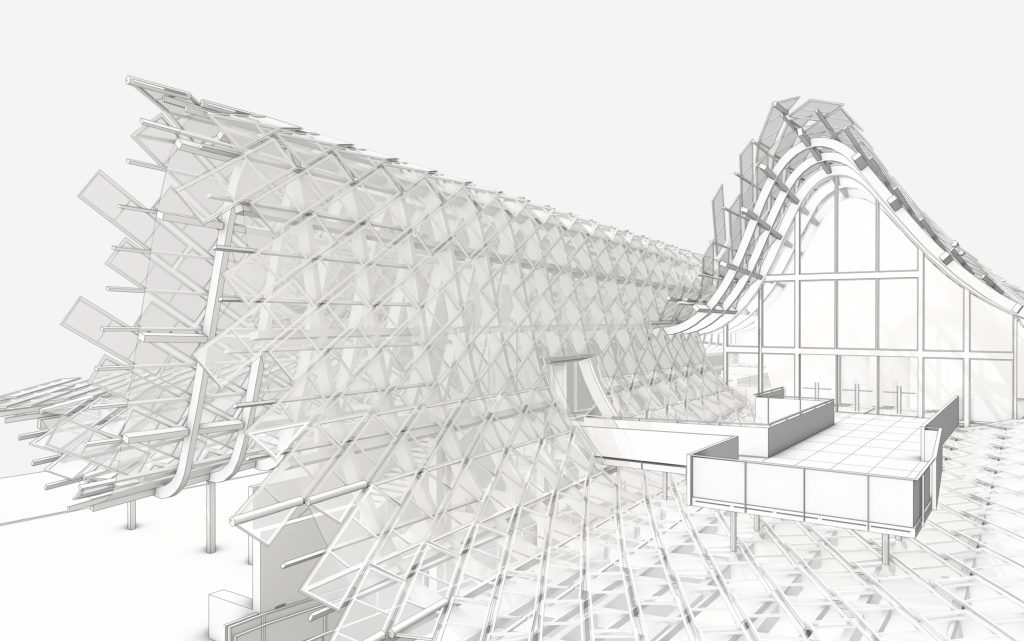
    1. Screenshot: Capture the current view of your screen in high or low resolution. Send it to a colleague or client or download it for later reference.
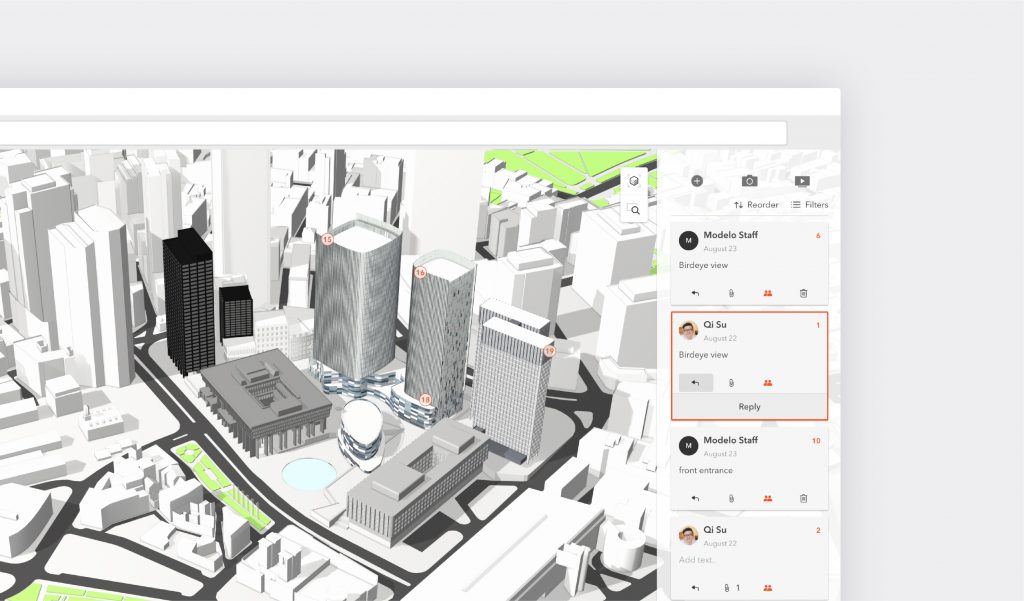
    1. Comment: Provide pinpoint feedback on your models by making a comment anywhere on your designs. Attach files to comment cards and use them to guide presentations. For a complete overview of how to best use comment cards in Modelo, read this guide.
    1. Sketch: Markup your designs in a variety of ways using Modelo’s sketch tools. A variety of colors, borders, line markings, pen weights, and other formatting tools are available to you.
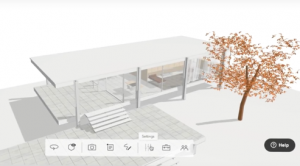
    1. Settings: Adjust the settings that apply to your design. Select between a multitude of options under the Layers, Effects, Materials, and Background headings.
    1. Tools: Use Modelo to create section cuts, take measurements, zoom and pan, and see your design in full screen.
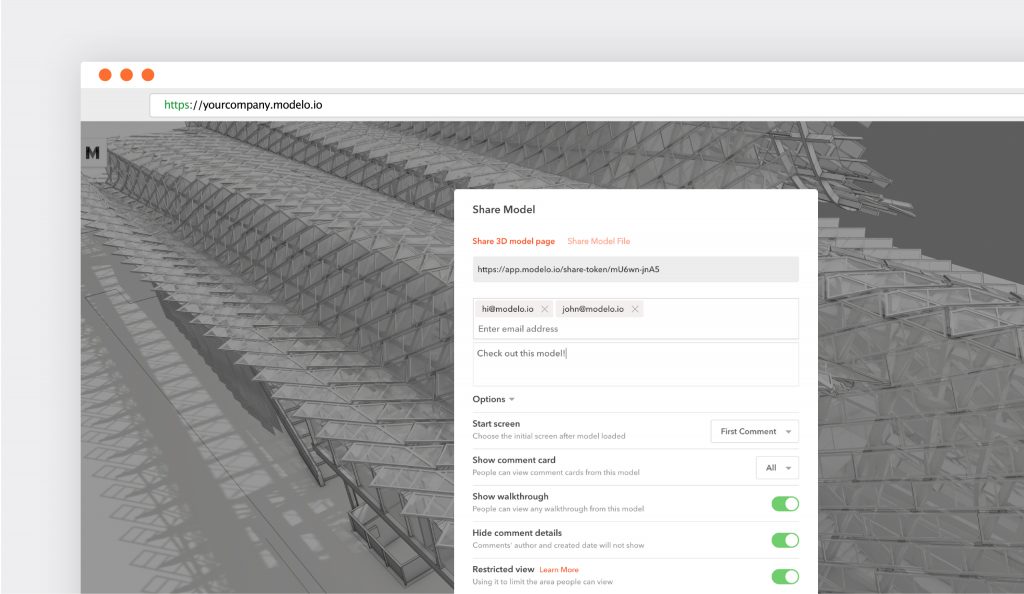
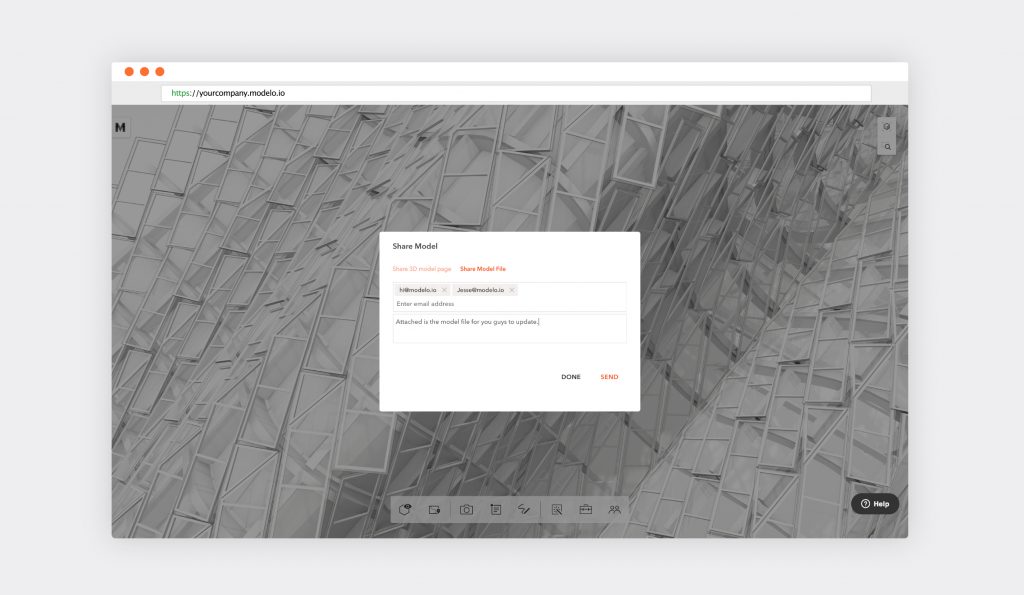
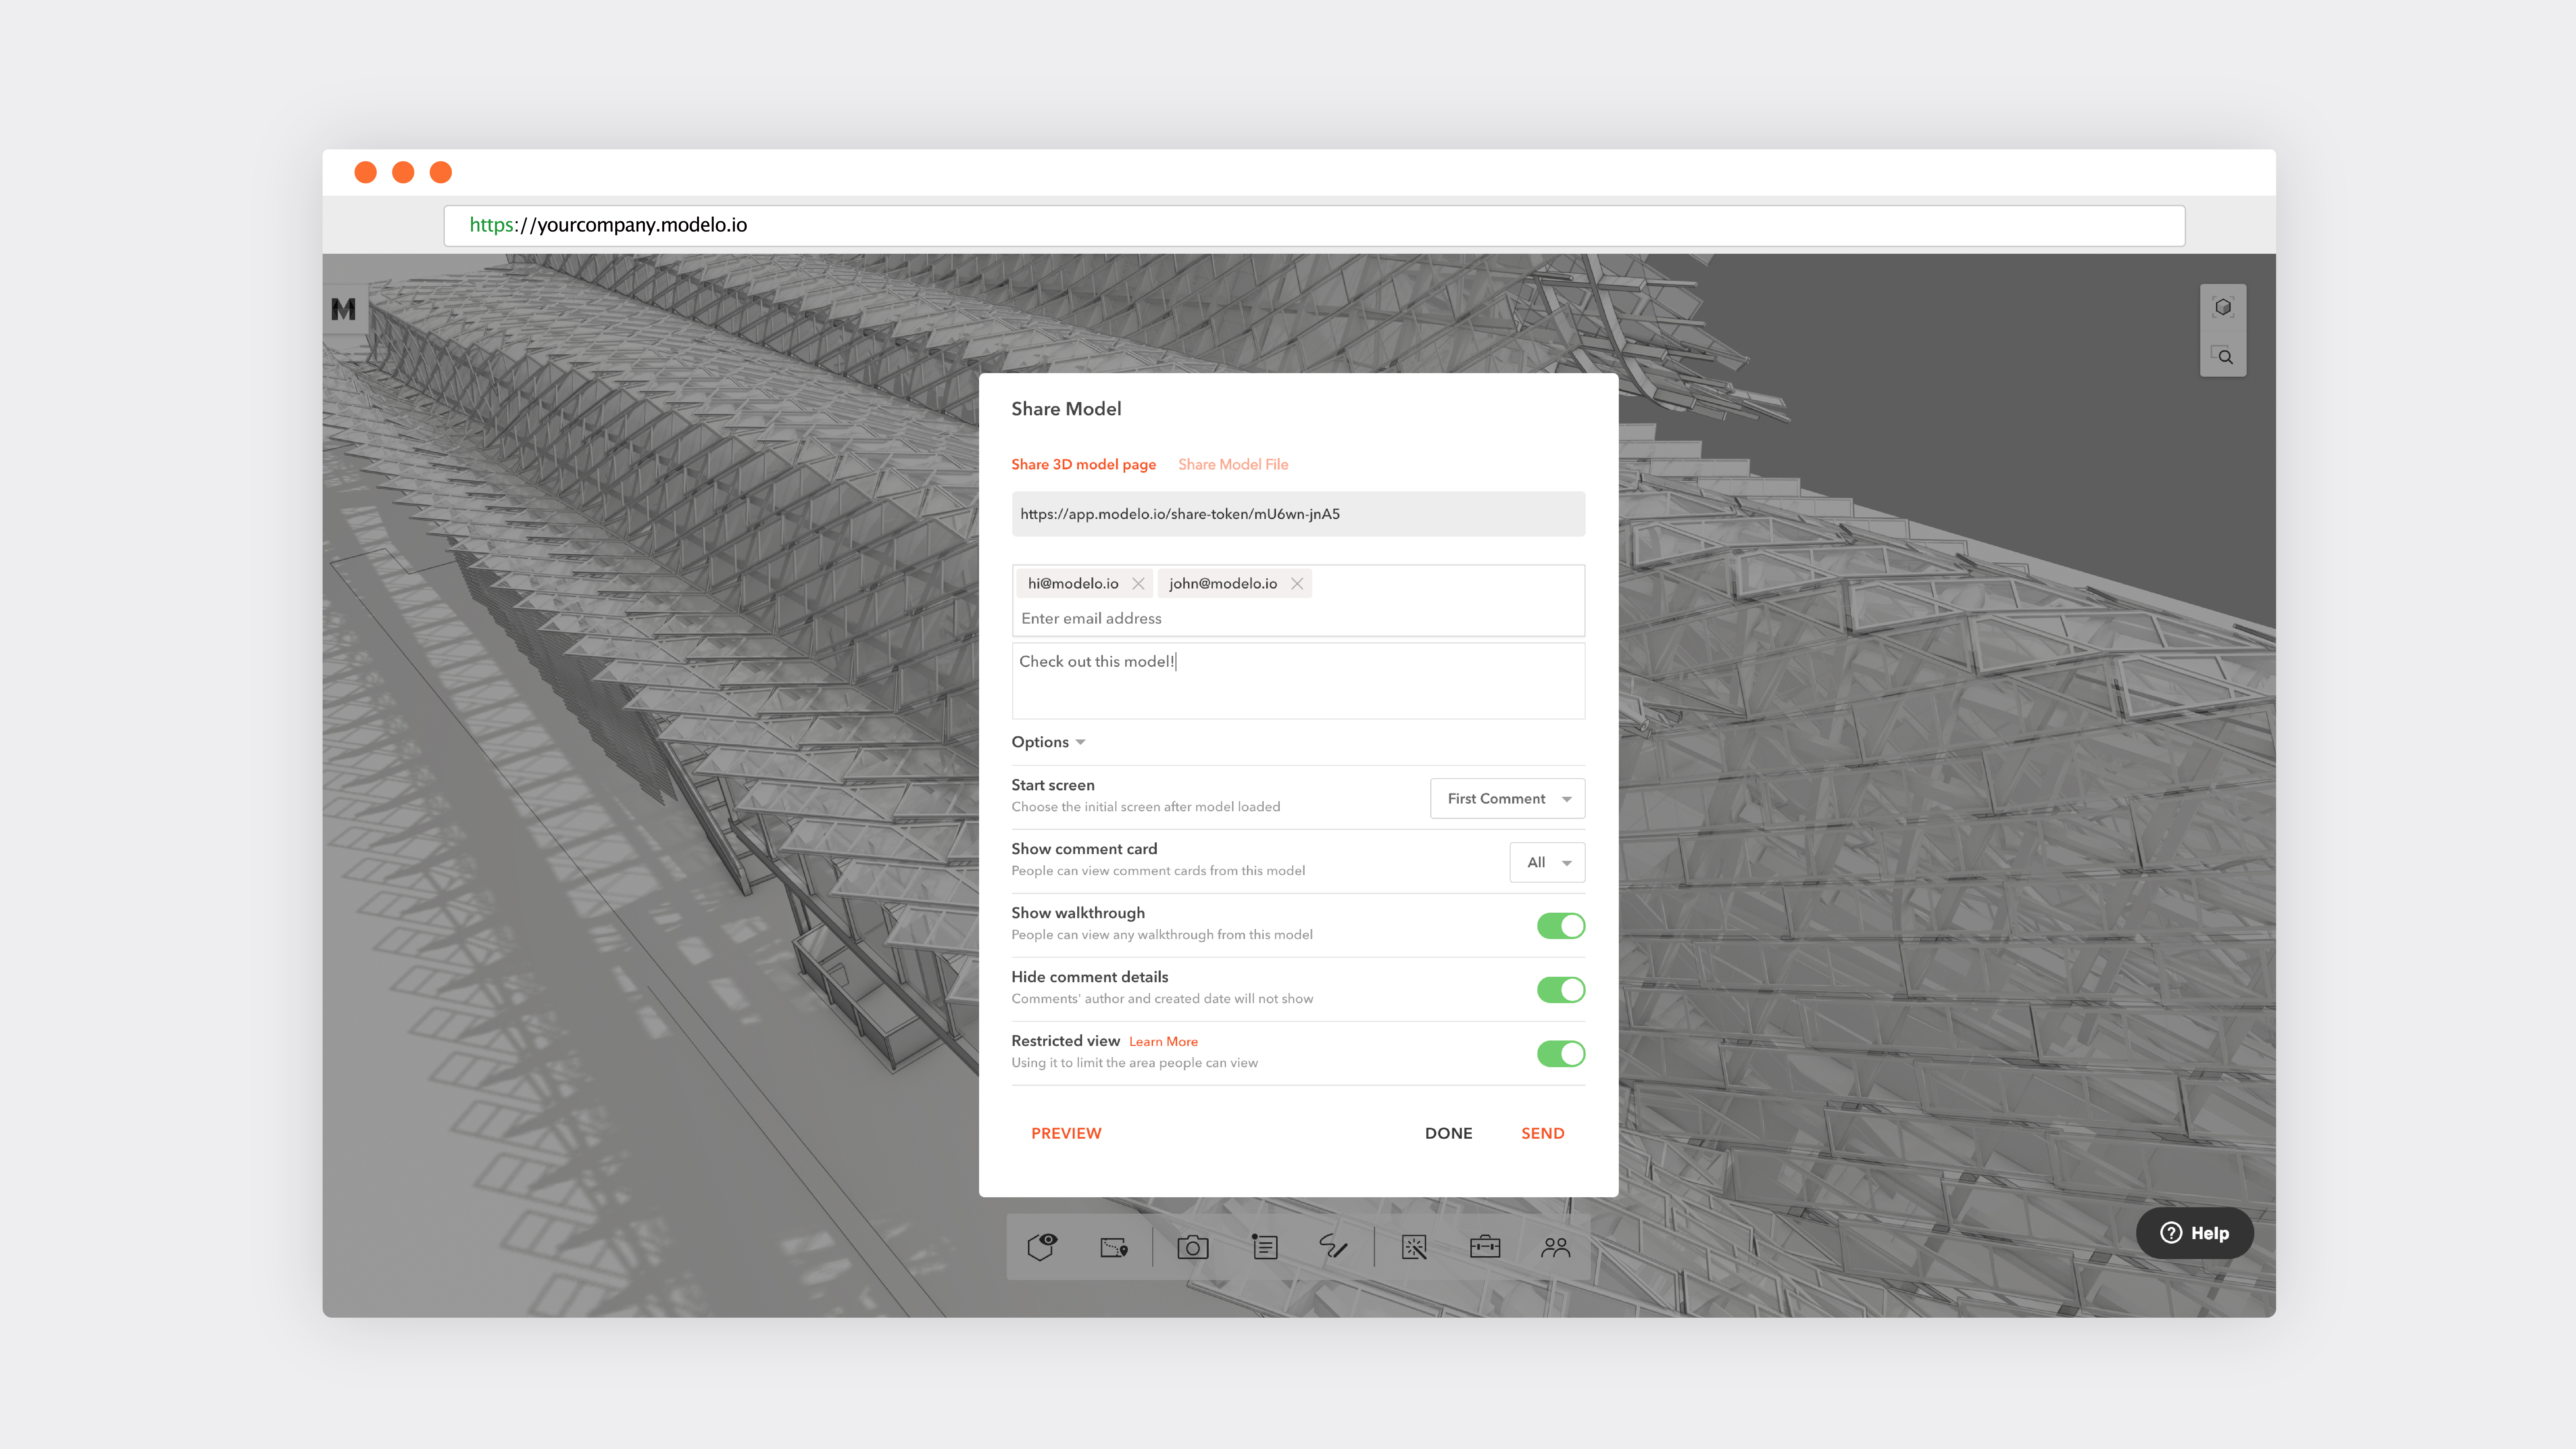
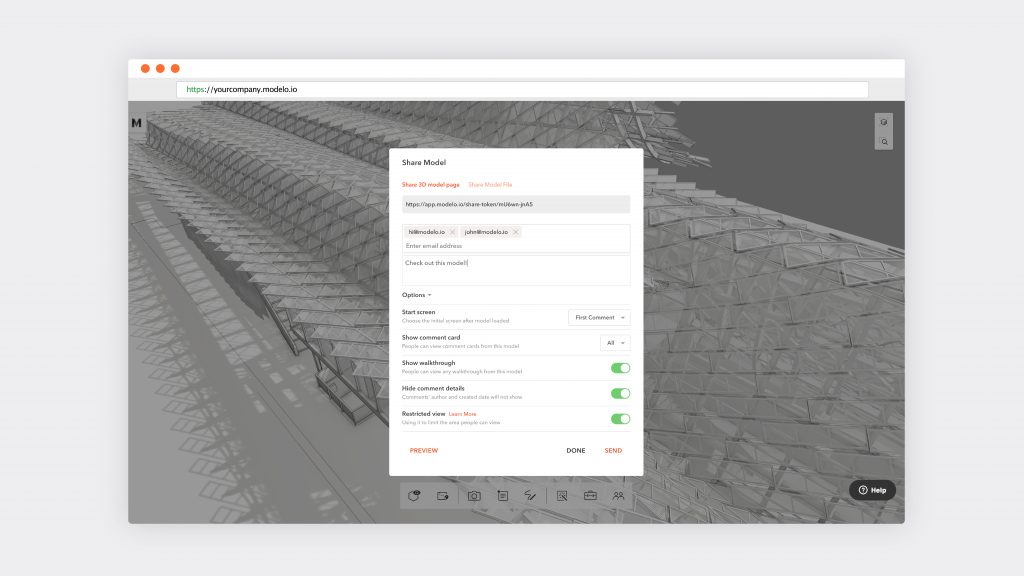
  1. Share: Sharing your design with clients and colleagues is one of Modelo’s most powerful features. You can generate HTML code to embed your design in a website, create a unique URL to share your designs, or save your design to view in an offline environment.

Create 3D views and scenes of any view of your design with Modelo.

Create scenes

Creating scenes of your designs isn’t a task that is exclusively reserved for your very expensive CAD software. Once your model is uploaded, you can create views and scenes of any view of your design. For instance, you can present different design options to your clients and have them provide feedback directly in Modelo. Of course, if you do create scenes in your CAD software, you can upload these to Modelo as well.

When you present your scenes in Modelo, you can elect to see these in virtual reality (VR), as a looping presentation that cycle automatically through your scenes, or create walkthroughs to really experience your design.

Download your designs and present them while you are offline with Modelo.

Save offline

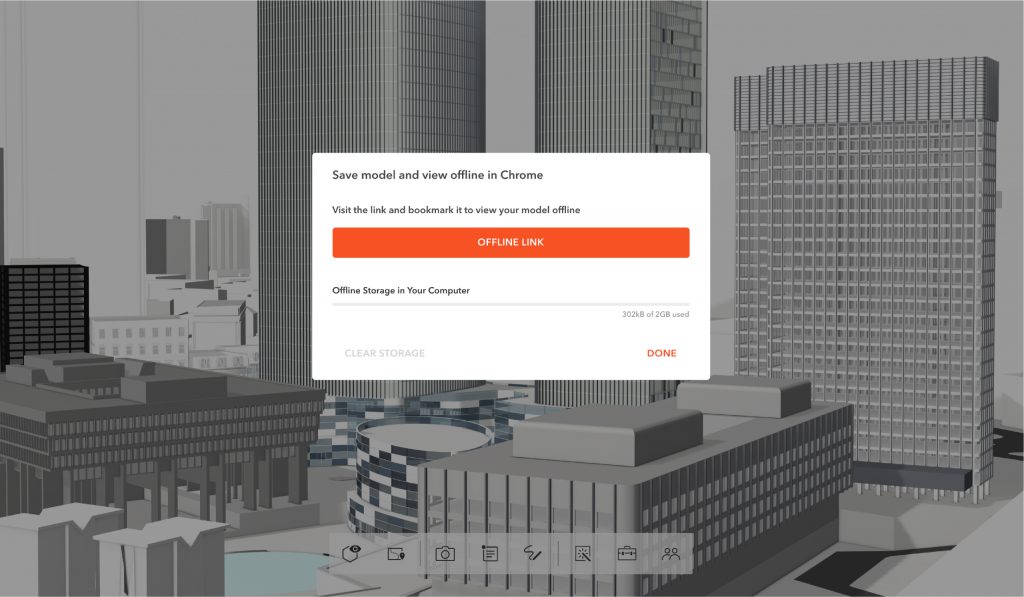
If you’re going to an area where the Internet is slow, mobile data is expensive or unreliable, or you can’t get online for any other reason, you can download your designs and present them while you are offline. All of the walkthroughs, comments, and markups you have created on your design will be saved so you don’t lose any presentation capabilities. You will still be able to present powerfully to your clients, explore your designs in detail, and communicate your vision with a highly rendered design even if you don’t have internet access.  

Customers who love this feature find it especially helpful when presenting in foreign countries or in an office where the Wi-Fi network cannot be accessed (such as many government institutions).

To save your designs for offline access, you are required to have a Modelo business account. Here is a step-by-step guide to saving your designs for offline access.

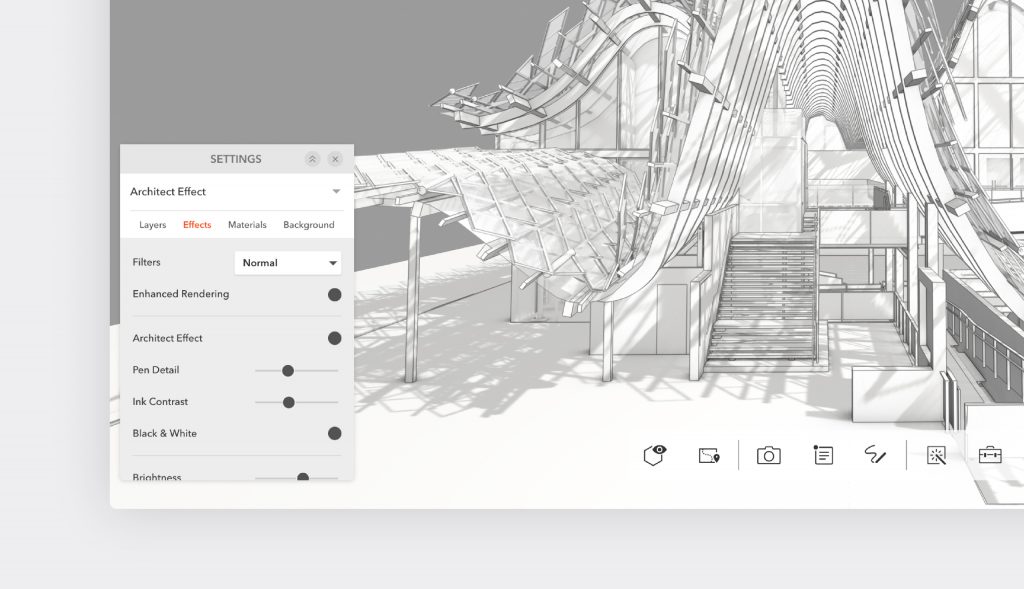
Modelo's Architect Effect lets you and your colleagues efficiently explore the design when you sit down for a design review.

Architect Effect (and other design tools)

Clients love highly rendered, detail-rich designs to review. However, that doesn’t always make it easy to actually review your designs. To help with that, Modelo introduced an Architect Effect. This effect strips away all of the design elements to leave you a simple design of just your model that you and your colleagues can efficiently explore the design when you sit down for a design review.

To best suit your preferences, the Architect Effect can be displayed in a black and white, full color, or hand drawn effect.

Modelo's Architect Effect lets you and your colleagues efficiently explore the design when you sit down for a design review.

There are a host of other effects that you can apply to help further customize your design, depending on the client that you are working with, including:

    1. Filters: Apply different filters, such as blueprint, vintage paper, and dark sky over your design to create different looks.
    1. Enhanced Rendering: Add that little bit of extra polish to your design to create that ‘finished look’ before your client presentation by turning Enhanced Rendering on
  1. Brightness, light direction, and shadow: Adjust the brightness, latitude and longitude of your light direction, and your shadows to create a ‘time of day’ look to your presentations.

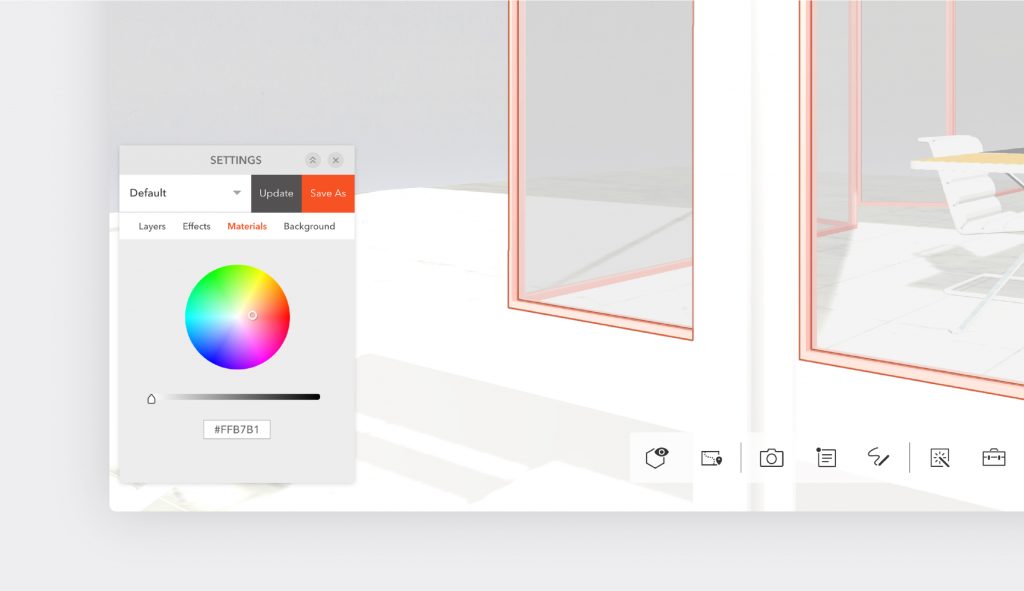
Use Modelo's Materials setting to call out a part of your design with a specific color.

Materials effect

Sometimes when you present to clients or colleagues you want to direct their attention to specific parts of the design. Use the Materials setting to call out a part of your design with a specific color.

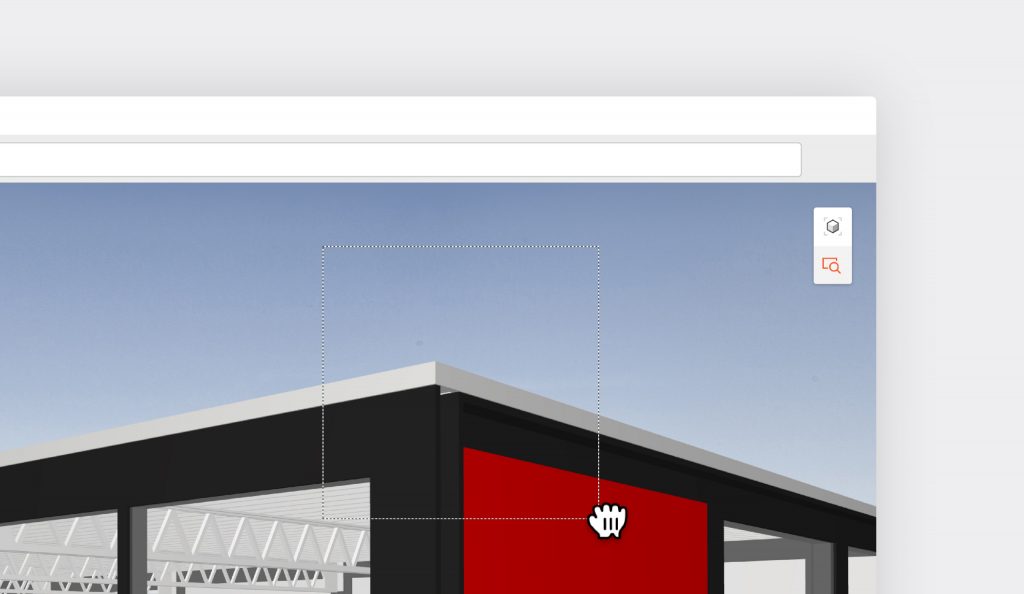
To quickly zoom into a part of your model you can click the magnifying glass icon and select the area you want to examine with Modelo.

Magnifying glass

To quickly zoom into a part of your model you can click the magnifying glass icon and select the area you want to examine. Conversely, if you want to zoom out of your model completely to see a particular perspective, click the directional cube directly above the magnifying glass icon and select either the top, front, or right perspective.

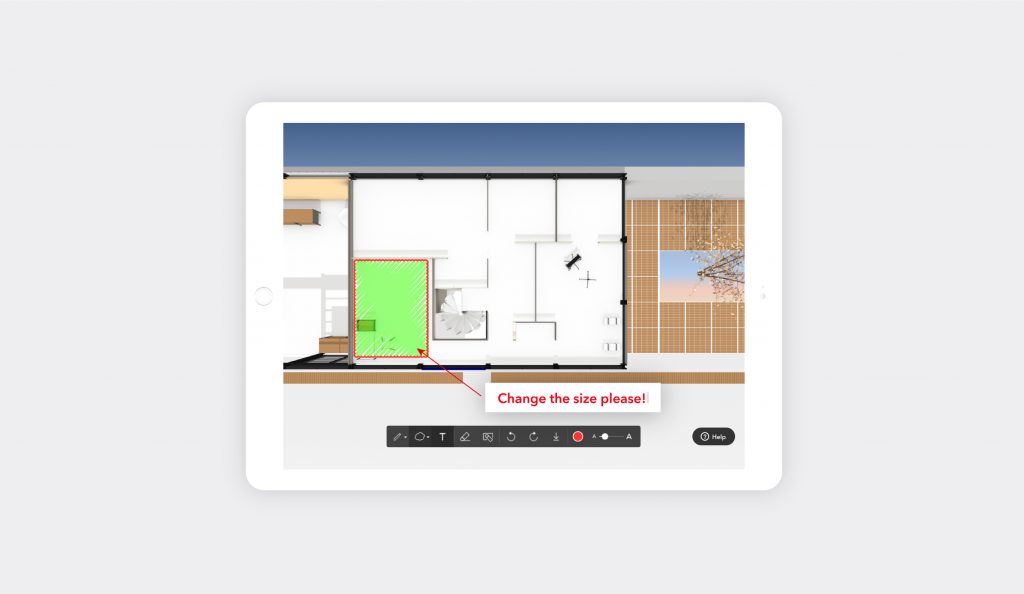
Modelo can satisfy all of your markup needs, and you can even choose your favorite hue.

Markup

Architects are all familiar with ‘Redlines,’ the ubiquitous way of marking-up corrections on a design. The good news is that Modelo can satisfy all of your markup needs, and you can even choose your favorite hue – you are not limited to just red!

After you navigate to the Sketch icon on your toolbar, you will notice that you have a multitude of markup options. They are all very self-explanatory, but the idea is that you can customize your feedback and make it appropriate for your audience. You can not only markup anywhere on your design, but you can also provide feedback on any files that you have uploaded to Modelo. Once you have completed providing your feedback, you can add any notes and share it with your colleagues.

Extend your branding efforts or make your design really stand out with a customized background in Modelo.

Backgrounds

Extend your branding efforts or make your design really stand out with a customized background in Modelo. You can upload any image and then select how you would like it to be displayed (either as a rectangle, sphere, or tiled rectangle).

Use Modelo to explore your model in design reviews and present it to clients by toggling your layers on and off.

Toggle layers on and off

As you build your model in your preferred CAD software, you build it in layers. As you use Modelo to explore your model in design reviews and present it to clients, you can toggle your layers on and off.

Share the scenes of your design that you want clients to see with a unique URL.

Share designs

Almost everything you do in Modelo can be shared. Or, if you prefer, not shared. If some parts of your design aren’t ready for the client, don’t share those parts; only share the scenes of your design that you want them to see. Similarly, if you want them provide feedback on your design directly in Modelo, turn that functionality on. Walkthroughs can also be shared.

Your clients do not need a Modelo license to see what you share. All they need is a web-connected device (mobile phone, computer, tablet, etc). From there, all they have to do is click the unique URL that you generate and send to them directly from Modelo. There is no need to send them USBs or ask them to download anything from an FTP server or other file transfer service.

Share the scenes of your design that you want clients to see with a unique URL.

Clients told us that one major productivity gain they achieve by using the share link is by sharing their designs with clients ahead of their meeting and asking them to review it. Then, when they are in the meeting, they are using that time to dive into the client’s feedback to then translate that understanding into improving their design when they are back in the office.

Learn more about sharing designs using Modelo here.  

Create animated walkthroughs in minutes with Modelo.

Walkthrough

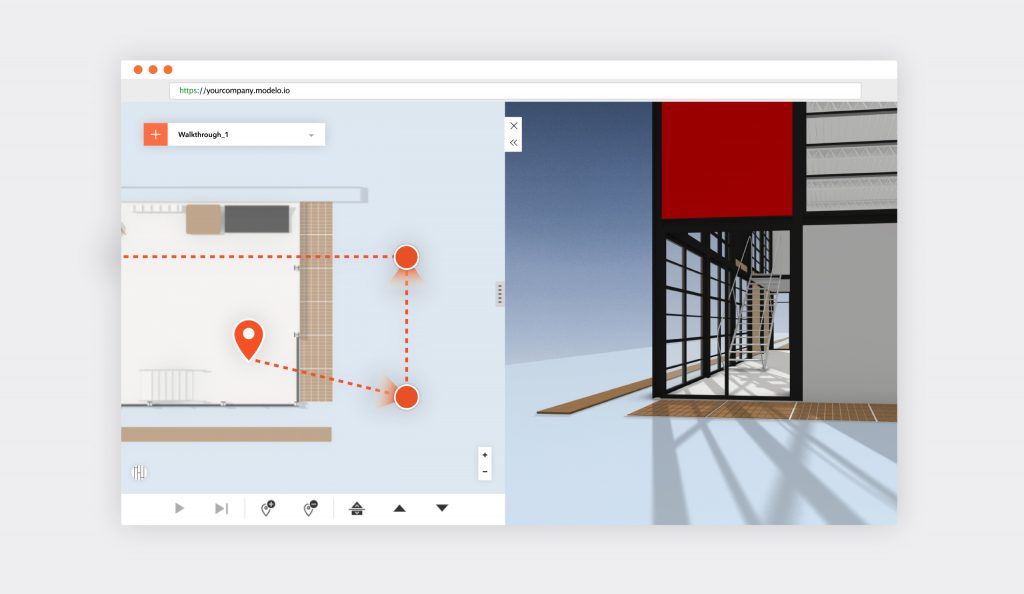
Creating animated walkthroughs of your designs can take hours. In fact, before architects started using Modelo, almost two-thirds of them spent at least one day creating each walkthrough. Now, they create animated flythroughs within minutes. Once they have uploaded their design, they simply select the walkthrough tool from the Modelo toolbar, drop their waypoints, and select the camera direction. What previously took hours, now only takes minutes. What’s more, you can share your walkthroughs with clients and colleagues alike.

Read a comprehensive summary of creating walkthroughs in Modelo.

Summary

The 11 tips listed above have been proven to increase productivity for architects and industrial designers alike, particularly when they are working with their colleagues and presenting to clients. It is not an exhaustive list and there is certainly a lot more value still to be explored with Modelo, like embedding your design on your website, exploring your design in virtual reality, or uploading panorama images.

If you are not already a Modelo user, set up a FREE forever account today in 90 seconds. Then, upload your own model and see how much more productive Modelo can make you.

Use Architect Effect to views designs in black and white and impress clients with Modelo.

About Modelo

Modelo is a cloud-based software application used extensively throughout the architecture and industrial design, retail space planning, construction, and real estate industries. Created by a Harvard-educated architect and Rhode Island School of Design industrial designer, every aspect of Modelo has been designed to help professionals in these industries better communicate their vision. There are obvious applications for Modelo when presenting to clients, but internal communication with colleagues and partners can also be expertly facilitated through Modelo.

4 Awesome Panorama Images of Boston Courtyards

For this post, we sent our intern, Ian, on a quest to take 360º panorama images of the nicest courtyards in the immediate Boston area. Here’s what he found!

The Boston Public Library
Built in 1848, the Boston Public Library is a gorgeous building with a beautiful courtyard. With pillars, a fountain and a statue of an angel, the courtyard is extravagant but also it is still tasteful. A wonderful place to enjoy a book and cup of coffee!

Isabella Gardner Museum
This indoor courtyard is different than the rest. With colorful flowers and multiple statues this courtyard is heavily decorated. Additionally, as you ascend up and around the museum, you can always look down on the beautiful courtyard from new heights. Relaxing, tranquil, a must visit!

The Prudential
The courtyard outside the Prudential is great for anyone looking to take a shopping break. It is an open and more urban courtyard. With a beautiful fountain and grassy area, you almost forget where you are. A great place to read a book, enjoy lunch or just get some sun.
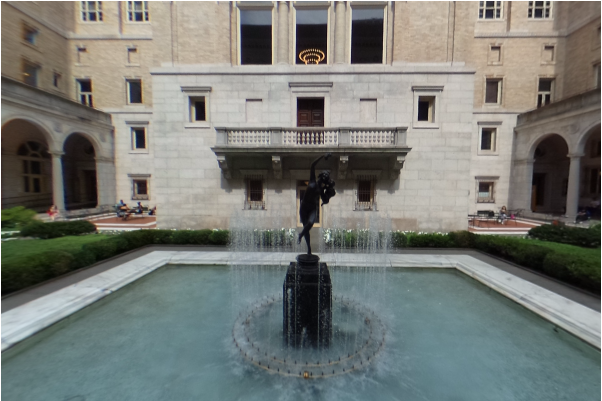
Museum of Fine Arts
At the Museum of fine arts is a lovely courtyard. With chairs and tables it is a great place to relax after a long day of walking around the museum. Plenty of shade to relax! Pro Tip: go after 4 PM and you get into the museum for FREE!

Learn how you can start embedding panorama images just like these on your own website with Modelo. Sign up today for FREE!

Convert Vectorworks Files to VR with Modelo

Convert Vectorworks files to VR with Modelo in seconds. Below we’ve outlined the steps you need to follow for both MAC and PC systems:

For Mac users:
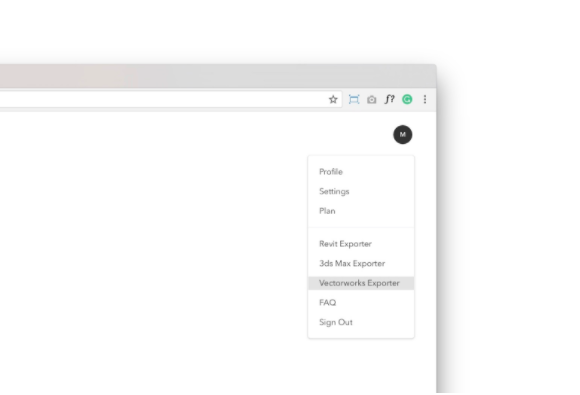
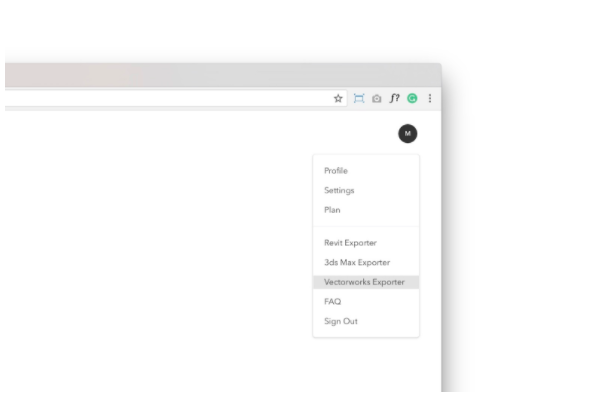
First, download the required installation zip folders from either the Vectorworks Partner Products Page, or from within your Modelo user interface by clicking on your avatar.

Unzip it and open the folder called “Export to Modelo.” Within this folder you will see:

    • “Export to Modelo.vsm”
    • “ExportVGX.vwlibrary”
  • “requests” folder

Step 1:
With Vectorworks closed, find the folder where you installed your Vectorworks application, in our case, it’s a folder named Vectorworks 2016. Open it and then open the folder Plug-ins. Then move the “Export to Modelo.vsm” and “ExportVGX.vwlibrary” files into this folder.

Step 2:
Now go back to applications, open the Vectorworks installation folder (the first folder you opened in step 1) again, and right click on the actual executable Vectorworks app (the icon which you click to open the application), and select “Show package contents.” Then follow this path: Frameworks/Python.framework/Versions/3.3/lib/python3.3/. You want to copy & paste the entire requests folder here.
Step 3:
Now, open up your Vectorworks application. Go to the Tools menu and select Workspaces. Select Edit Current Workspace.

On the right side, expand File and then scroll down and expand Export.

From the Commands List expand All Menus scroll down to the Export section of the list and then drag and drop Export to Modelo over to the Menus list on the right and drop it in Export, which you expanded a couple moments ago. Hit OK.

Now you’re officially done with all the installation steps.

Go back and open a model you want to export from Vectorworks to Modelo. Click File, Export and then you can select Export to Modelo from the list.

When you choose to export, you will be prompted to paste in a token to set the destination of your exported file in Modelo. At this point we’re assuming you’ve already signed up for Modelo.

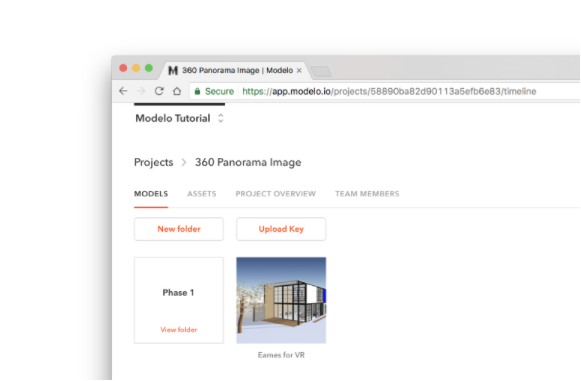
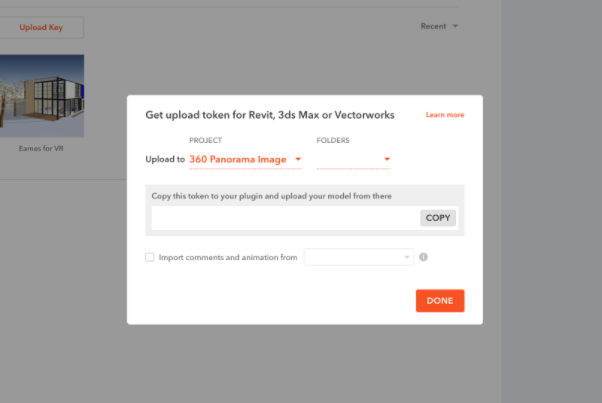
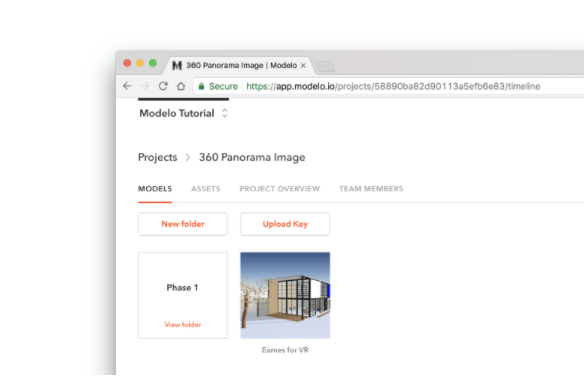
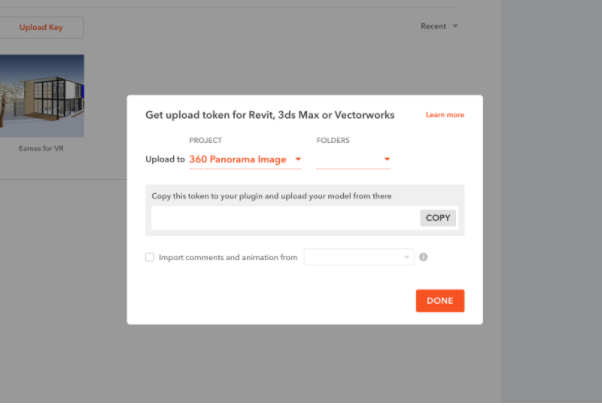
Log into your Modelo account in the browser, go to the project where you want to upload your model to, click the upload key. This is going to prompt us to select our Project and folder that we want to import our Vectorworks file to.

With those selected, Modelo generates a token. Paste the token into Vectorworks and click OK. In only a few moments you will see a model begin uploading in the folder you selected!

And there you have it, your Vectorworks file imported to Modelo for Mac.

For PC users:
First, again download the required installation zip folders from either the Vectorworks Partner Products Page, or from within your Modelo user interface by clicking on your avatar.

Open the zip you just downloaded, look for the folder named “Vectorworks_Plug-in_PC”, and open that folder, then you will find two other zips are included:

    • “Export to Modelo.zip”
  • “Requests.zip”

You’re going to want to unzip both of these folders and place files within into specific Vectorworks application folders.

Step 1:
With Vectorworks closed, find the folder where you installed your Vectorworks application, in our case, it’s a folder named Vectorworks 2016. Open it and then open the folder Plug-ins.

Now open the Export to Modelo folder you just downloaded and unzipped and copy the three files within:

    • “Export to Modelo.vsm”
    • “ExportVGX.vlb”
  • “ExportVGX.vwr”

Paste these three files into the Plug-ins folder.

Step 2:
Now return to the Vectorworks 2016 folder and from there open the Python33 folder. Then from within Python33, open the Lib folder (not to be confused with the libs folder).

Within Lib, open the site-packages folder. This is where you’re going to paste the requests folder you downloaded.

Step 3:
Open up your Vectorworks application. Go to the Tools menu and select Workspaces. Select Edit Current Workspace.

On the right side, expand File and then scroll down and expand Export.

From the Commands List expand All Menus scroll down to the Export section of the list and then drag and drop Export to Modelo over to the Menus list on the right and drop it in Export, which you expanded a couple moments ago. Hit OK.

Now you’re officially done with all the installation steps for PC.

Go back and open a model you want to export from Vectorworks to Modelo. Click File, Export and then you can select Export to Modelo from the list.

When you choose to export you will be prompted to paste in a token to set the destination of your exported file in Modelo. At this point we’re assuming you’ve already signed up for Modelo.

Log into your Modelo account in the browser, go to the project where you want to upload your model to, click the upload key. This is going to prompt us to select our Project and folder that we want to import our Vectorworks file to. With those selected, Modelo generates a token. Paste the token into Vectorworks and click ok and in a few moments you will see a model begin uploading in the folder you selected!

And there you have it, your Vectorworks file imported to Modelo for PC.

Once you’ve converted your Vectorworks file to Modelo, it’s time to view in VR. Follow this easy step-by-step guide to learn how to create VR tours of your 3D models to then view in Google Cardboard. Plus check out the VR requirements for Modelo.

Start converting your Vectorworks files to VR with Modelo today!

5 ways Modelo Can Help You To Improve Client Communication

Modelo is a multifunctional platform used to collaborate on 3D models and 2D assets with your clients by inviting them into your project, or by sharing any part of your model with a simple and unique URL. No downloads required! Below, we’ll outline the 5 ways that Modelo can improve client communication.

  1. Invite clients into your project
    By sharing a quick and unique URL link, you can automatically invite clients to load any part your 3D model on their mobile device, tablet or laptop. Modelo eliminates any downloading or logging in from the client-side. It only includes a simple click of a link and clients are immediately immersed in your 3D design, free to view whichever scenes or attachments you specify.
  2. Quick Screen Captures 
    Eliminate the long loading times and system lag that’s commonly experienced in CAD software with our screen capture tool. Capture a view from anywhere in your model in seconds. Like anything else in Modelo it can be saved, downloaded and shared with clients.
  3. Client Engagement
    Your client has the ability to comment on your specific scenes to voice which areas they like or which areas may need adjustments. Hearing this feedback directly and early on in the design process eliminates rework later on. Clients can now visualize the 3D design in an easy way on any mobile device.
  4. Share Design Assets
    A client no longer needs to download anything or login to view assets including, drawings, floor plans, site layouts, model photos, quick renderings or essentially any document you need to communicate to the client. Modelo uploads all of your assets into one single folder associated with a project and also generates a unique URL for each to be shared to the client or attached to a view, perfect for presentations.
  5. Walkthrough Feature
    Modelo is the fastest and easiest way to create a walkthrough animation in the industry. Simply by dropping a few waypoints on your floor plan, setting the camera angle and hitting play you can create a smooth walkthrough that recognizes the average height of a human from the ground. You can even climb stairs! This walkthrough can be shared with a unique URL to your client again, in order to gain immediate feedback in a quick and easy way for the client to understand the space in the earlier design stages.

Start improving your client communication today for FREE with Modelo. Plus, learn how Modelo can make your organization more money.

Delivering on Photorealistic Renderings to Avoid Time-wasting and Rework with Modelo

Turning a design plan into a photorealistic rendering is a labor and resource-intensive process that can take weeks to produce. The process is usually slowed down by coordination and communication difficulties, such as the necessity to gather and compile all final plan information, send out images and await feedback, and attempt to interpret the feedback provided through long-winded emails. All of this happens among project teams before the render can truly be initialized.

Eventually, after all this work is done, a beautiful rendering is produced. Game over, right? Well, not so fast. The rendering now has to be presented and meet the expectations and vision of the client. And what happens if it doesn’t? Then, as many design teams we have talked to have gone through, an even longer rework process is underway that is going to drain time, resources, and money, ultimately inhibiting project delivery and the ability to move on to acquire new projects.

With Modelo, the time it takes to produce a rendering will be cut down significantly, and you will be able to deliver on client expectations once that final rendering is completed, avoiding all that rework that firms are experiencing on a regular basis.

By providing a centralized platform for collaboration and communication around 3D models and 2D assets, all the information that needs to be gathered and accessed to produce a final rendering is all in one place that can be accessed by all project members and stakeholders. All the marking-up and feedback that needs to occur in order to produce a final rendering can be done right within Modelo in real-time from any device, any where, on a platform that everyone on the team has access to. No need to print and scan images, draft emails and access files from different locations. Furthermore, that final rendering can be stored and shared right within Modelo.

Even more importantly, the unprecedented tools and abilities Modelo provides for communication and collaboration with clients will eliminate the need to a long rework process. With Modelo, models, design options, walkthroughs, flythroughs, views and assets can be easily shared with clients through URL links, allowing the client to be involved with the design from the early stages to the end, allowing for more efficiency and less surprises when it is time for that final rendering.

Save time and effort by collaborating in 3D in Modelo. Try it out for yourself by signing up for free today.